Saltar al contenido principal

Sony AZ1VR LCD Side Display Replacement

Qué necesitas

  1. Sony AZ1VR LCD Side Display Replacement, LCD Side Display: paso 1, imagen 1 de 3 Sony AZ1VR LCD Side Display Replacement, LCD Side Display: paso 1, imagen 2 de 3 Sony AZ1VR LCD Side Display Replacement, LCD Side Display: paso 1, imagen 3 de 3
    • Remove the two screws on the bottom of the camera.

    • Remove the screw inside the battery door.

    • Once these are removed, slide the door out, and the small piece of plastic with the door.

  2. Sony AZ1VR LCD Side Display Replacement: paso 2, imagen 1 de 3 Sony AZ1VR LCD Side Display Replacement: paso 2, imagen 2 de 3 Sony AZ1VR LCD Side Display Replacement: paso 2, imagen 3 de 3
    • Grab the lens and pull the body out of the plastic, this will reveal the insides of the device.

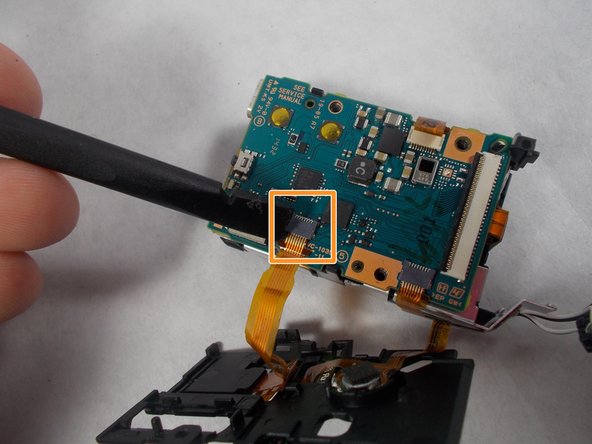
    • You'll see a screw on the top of the device, towards the front, remove this screw.

    • Pull the tabs on the bottom and top of the lens, and pull outward, this will remove the lens housing from the body.

  3. Sony AZ1VR LCD Side Display Replacement: paso 3, imagen 1 de 3 Sony AZ1VR LCD Side Display Replacement: paso 3, imagen 2 de 3 Sony AZ1VR LCD Side Display Replacement: paso 3, imagen 3 de 3
    • Remove the screws connected to the silver metal plate.

    • Remove the plate by pulling the back up and pushing it towards the front.

    • Remove the screw directly above the LCD display.

    • Pull the plastic up gently, it will be connected by cables on the bottom.

    • Disconnect the cable going to the LCD display.

Conclusión

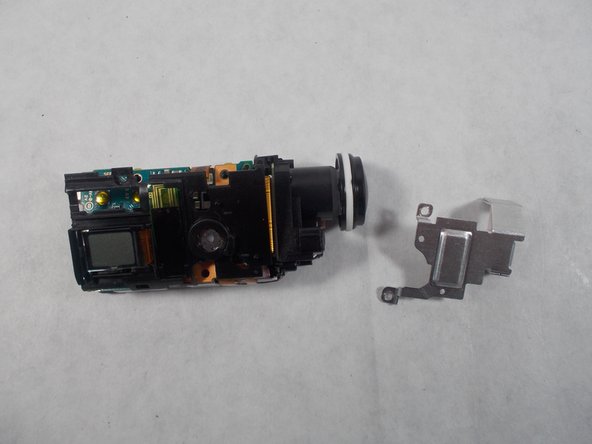
To reassemble your device, follow these instructions in reverse order.

Michael Martin

Miembro Desde 03/08/17

401 Reputación

4 Guías creadas

Equipo

0 comentarios

Agregar Comentario

Ver Estadísticas:

Ultimas 24 horas: 0

Ultimos 7 días: 1

Ultimos 30 días: 5

Todo El Tiempo: 158