Introducción
This guide will tell you how to replace the flash assembly of the a6000 camera if it breaks or gets damaged.
Qué necesitas
-
-
-
Position the camera with the flash assembly facing upwards.
-
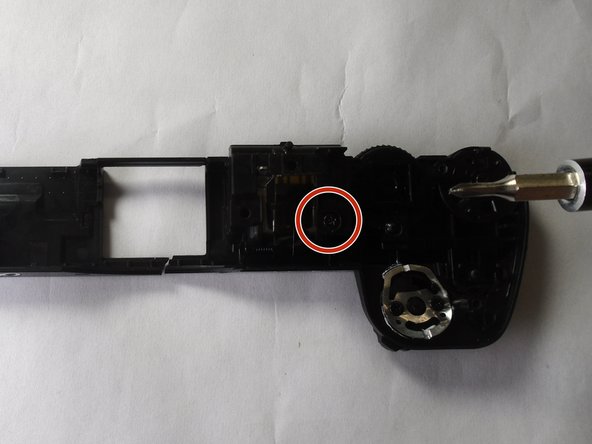
Locate the flash assembly.
-


To reassemble your device, follow these instructions in reverse order.
To reassemble your device, follow these instructions in reverse order.
Cancelar: No complete esta guía.
4 personas más completaron esta guía.
Equipo

The Citadel Military College of South Carolina, Team S2-G3, Eggleston Fall 2019 Miembro de The Citadel Military College of South Carolina, Team S2-G3, Eggleston Fall 2019
CMCSC-EGGLESTON-F19S2G3
3 Miembros
5 Guías creadas
4 comentarios
Anyone know where to get the flash? My daughter’s has the “won’t stay closed” problem so common to the a-series and I need to replace it.
Thanks, good guide but please update it according to Jürgens comments or there is a big risk people will break their top panel.
David: I got the flash unit from AliExpress, but you can find it on Ebay as well.
Thanks for the guide! I had to open additional 2 more screws inside the battery compartment. and only had to remove 2 bottom screws on Step 8 (instead of 3). Replaced the flash unit without any issue. Thank you!
Thank you for the Description, for me I had 2 screws below the view finder, and also 2 in the battery compartment that needed to come loose.
I did not have any screws behind the button to adjust for your eye sight.
I did have some issues to get the cable back in properly, and had to tape my metal tweezer not to get zapped over and over again.
What worked best for me was a flat tweezer and gently push it in.
When Placing back the top panel i had some issues with the alignment with the on off button as initially i couldn't turn the camera on/off any more. After trying some positions with the on off button it worked.