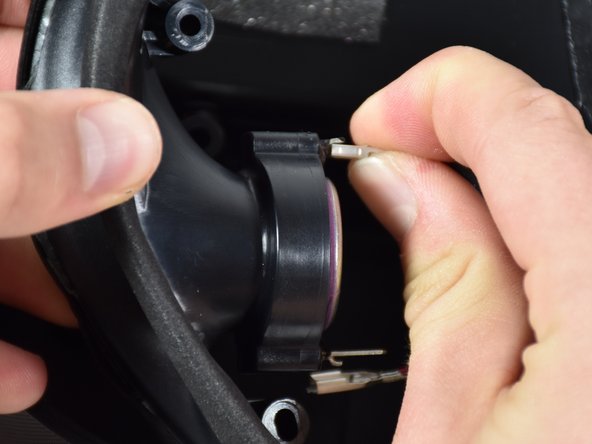
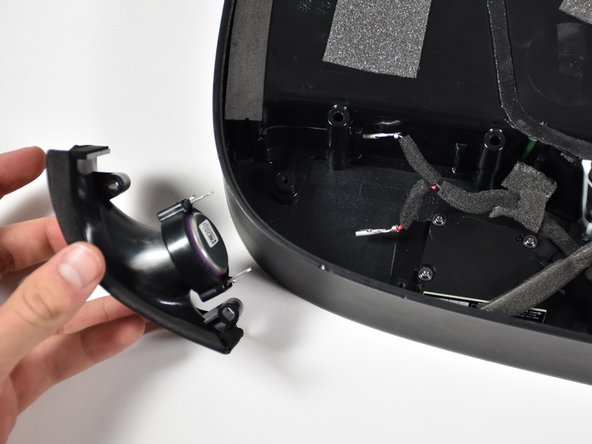
Saltar al contenido principal

Sonos Playbase Side Speaker Replacement

Qué necesitas

  1. Sonos Playbase Side Speaker Replacement, Bottom Panel: paso 1, imagen 1 de 3 Sonos Playbase Side Speaker Replacement, Bottom Panel: paso 1, imagen 2 de 3 Sonos Playbase Side Speaker Replacement, Bottom Panel: paso 1, imagen 3 de 3
    Herramienta utilizada en este paso:
    Pro Tech Toolkit
    $74.95
    Comprar
    • Turn the Playbase upside down so that the "Sonos Playbase" imprint is face up.

    • Remove the bottom panel with an Opening Tool by inserting underneath and prying upwards.

    • Melt the adhesive with an iOpener for ease of opening

    • Use a Metal Spudger if the plastic spudgers do not work.

    • Take care to avoid damaging the plastic or the device if using a metal spudger.

  2. Sonos Playbase Side Speaker Replacement: paso 2, imagen 1 de 2 Sonos Playbase Side Speaker Replacement: paso 2, imagen 2 de 2
    Herramienta utilizada en este paso:
    Pro Tech Toolkit
    $74.95
    Comprar
    • Remove the fourteen 11mm T-10 screws by turning counter-clockwise.

    • Remove the seven 44mm T-20 screws by turning counter-clockwise.

    • Remove the twenty-two 34mm T-20 screws by turning counter-clockwise.

    • Record where each screw belongs for easier reassembly.

  3. Sonos Playbase Side Speaker Replacement: paso 3, imagen 1 de 2 Sonos Playbase Side Speaker Replacement: paso 3, imagen 2 de 2
    Herramienta utilizada en este paso:
    Pro Tech Toolkit
    $74.95
    Comprar
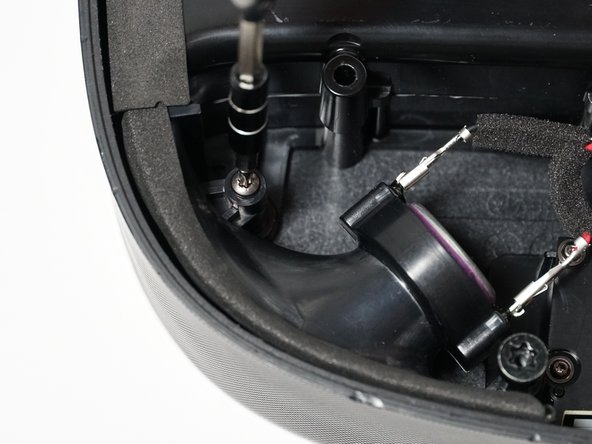
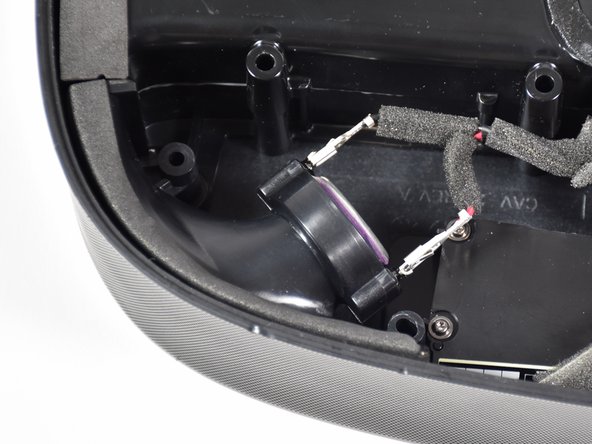
    • Remove the metal plate with a Opening Tool by inserting underneath and prying upwards.

    • Use a metal spudger if plastic openers do not work.

    • Take care to avoid damaging the plastic or the device if using a metal spudger.

  4. Sonos Playbase Side Speaker Replacement, Side Speakers: paso 4, imagen 1 de 3 Sonos Playbase Side Speaker Replacement, Side Speakers: paso 4, imagen 2 de 3 Sonos Playbase Side Speaker Replacement, Side Speakers: paso 4, imagen 3 de 3
    Herramienta utilizada en este paso:
    Pro Tech Toolkit
    $74.95
    Comprar
    • Remove the 24 mm T-10 screw by turning counter clockwise.

    • Remove the 41 mm T-55 screw by turning counter clockwise.

  5. Sonos Playbase Side Speaker Replacement: paso 5, imagen 1 de 3 Sonos Playbase Side Speaker Replacement: paso 5, imagen 2 de 3 Sonos Playbase Side Speaker Replacement: paso 5, imagen 3 de 3
  6. Sonos Playbase Side Speaker Replacement: paso 6, imagen 1 de 2 Sonos Playbase Side Speaker Replacement: paso 6, imagen 2 de 2
    • Remove the speaker.

Conclusión

To reassemble your device, follow these instructions in reverse order.

James Andrews

Miembro Desde 10/08/18

421 Reputación

4 Guías creadas

Equipo

Cal Poly, Team S17-G2, White Fall 2018 Miembro de Cal Poly, Team S17-G2, White Fall 2018

CPSU-WHITE-F18S17G2

4 Miembros

8 Guías creadas

Un comentario

Where can you get a replacement speaker/driver?

Christopher Erickson - Contestar

Agregar Comentario

Ver Estadísticas:

Ultimas 24 horas: 0

Ultimos 7 días: 1

Ultimos 30 días: 5

Todo El Tiempo: 792