Saltar al contenido principal

Esta versión puede contener ediciones incorrectas. Cambiar a la última instantánea verificada.

Qué necesitas

  1. Este paso está sin traducir. Ayuda a traducirlo

    : paso 1, imagen 1 de 3 : paso 1, imagen 2 de 3 : paso 1, imagen 3 de 3
    • Remove the air tank by rotating it counterclockwise.

    • Do not pull the trigger or jostle the gun, there will still be pressurized air inside the gun that could be expelled and cause bodily harm if injected into eyes and/or skin.

    • The pressure gauge will indicate the leftover air in the gun.

  2. Este paso está sin traducir. Ayuda a traducirlo

    : paso 2, imagen 1 de 2 : paso 2, imagen 2 de 2
    • Remove the hopper by pulling it out of the feed tube, located on the top of the body. The hopper should easily come off when pulled straight up.

  3. Este paso está sin traducir. Ayuda a traducirlo

    : paso 3, imagen 1 de 1
    • Turn the gun on by pressing the power button until the red light blinks.

    • Turn vision mode off by pressing the power button again.

    • Red light should be flashing in a double blink sequence.

  4. Este paso está sin traducir. Ayuda a traducirlo

    : paso 4, imagen 1 de 1
    • Pull the trigger to release the air in the gun.

    • Pressurized air can be forceful, causing particles to be ejected from the gun into your eyes and/or skin. When air bubbles enter the bloodstream, they can block blood vessels, causing embolisms. To avoid this, make sure to point the gun in a safe direction when pulling the trigger because air will be released from the gun.

  5. Este paso está sin traducir. Ayuda a traducirlo

    : paso 5, imagen 1 de 1
    • Remove the four 8mm screws on each side of the gun's grip using a Phillips #2 screwdriver.

  6. Este paso está sin traducir. Ayuda a traducirlo

    : paso 6, imagen 1 de 1
    • Remove the grip by sliding it towards the front of the gun.

  7. Este paso está sin traducir. Ayuda a traducirlo

    : paso 7, imagen 1 de 2 : paso 7, imagen 2 de 2
    • Remove the 9V battery by unsnapping it.

  8. Este paso está sin traducir. Ayuda a traducirlo

    : paso 8, imagen 1 de 3 : paso 8, imagen 2 de 3 : paso 8, imagen 3 de 3
    • Remove the front and rear 1" screws on the gun's grip frame using a 3/32" Allen Wrench.

  9. Este paso está sin traducir. Ayuda a traducirlo

    : paso 9, imagen 1 de 2 : paso 9, imagen 2 de 2
    • Remove the 12 mm screw on the top of the grip frame using a 3/32" Allen wrench.

  10. Este paso está sin traducir. Ayuda a traducirlo

    : paso 10, imagen 1 de 1
    • Separate the gun's body from the frame by gently pulling them in opposite directions.

  11. Este paso está sin traducir. Ayuda a traducirlo

    : paso 11, imagen 1 de 1
    • Remove the 1-1/4" screw that's attached to the blue tube above the front grip using a 3/32" Allen Wrench.

  12. Este paso está sin traducir. Ayuda a traducirlo

    : paso 12, imagen 1 de 3 : paso 12, imagen 2 de 3 : paso 12, imagen 3 de 3
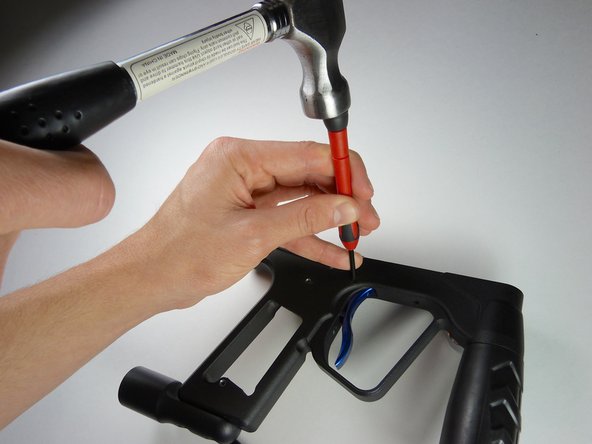
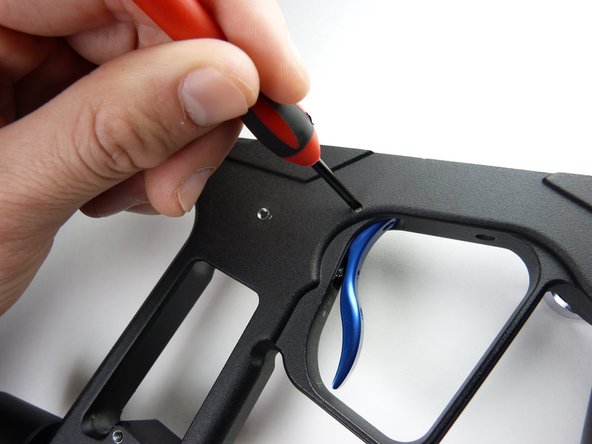
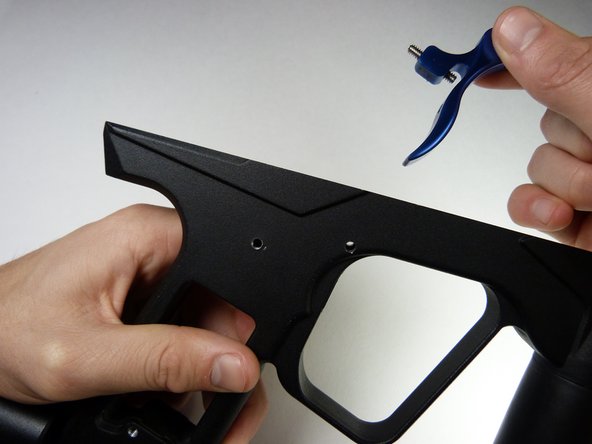
    • Remove the trigger pin by tapping it out of the right side of the gun using a 3mm screwdriver.

    • Any small tool can be used for this step instead of a 3mm screwdriver

  13. Este paso está sin traducir. Ayuda a traducirlo

    : paso 13, imagen 1 de 2 : paso 13, imagen 2 de 2
    • Remove the trigger by pulling it out.

Linea de Meta

Una persona más ha completado esta guía.

Shane Villalpando

Miembro Desde 02/02/15

1,031 Reputación

10 Guías creadas

Equipo

Cal Poly, Team 8-42, Amido Winter 2015 Miembro de Cal Poly, Team 8-42, Amido Winter 2015

CPSU-AMIDO-W15S8G42

4 Miembros

10 Guías creadas

0 comentarios

Agregar Comentario

Ver Estadísticas:

Ultimas 24 horas: 0

Ultimos 7 días: 0

Ultimos 30 días: 29

Todo El Tiempo: 2,020