Saltar al contenido principal

Sky Thunder HD 8500WH Gear Replacement

Qué necesitas

  1. Sky Thunder HD 8500WH Gear Replacement, Rotor Blade: paso 1, imagen 1 de 3 Sky Thunder HD 8500WH Gear Replacement, Rotor Blade: paso 1, imagen 2 de 3 Sky Thunder HD 8500WH Gear Replacement, Rotor Blade: paso 1, imagen 3 de 3
    • Place the drone with the top side facing up.

    • Remove the blade cover.

    • Remove the rotor blade.

  2. Sky Thunder HD 8500WH Gear Replacement, Lockstitch: paso 2, imagen 1 de 2 Sky Thunder HD 8500WH Gear Replacement, Lockstitch: paso 2, imagen 2 de 2
    • Unscrew the 1cm screw holding in the blade lockstitch with the Phillips 0 Screwdriver.

    • Remove the blade lockstitch.

  3. Sky Thunder HD 8500WH Gear Replacement, Lower and Upper Body: paso 3, imagen 1 de 3 Sky Thunder HD 8500WH Gear Replacement, Lower and Upper Body: paso 3, imagen 2 de 3 Sky Thunder HD 8500WH Gear Replacement, Lower and Upper Body: paso 3, imagen 3 de 3
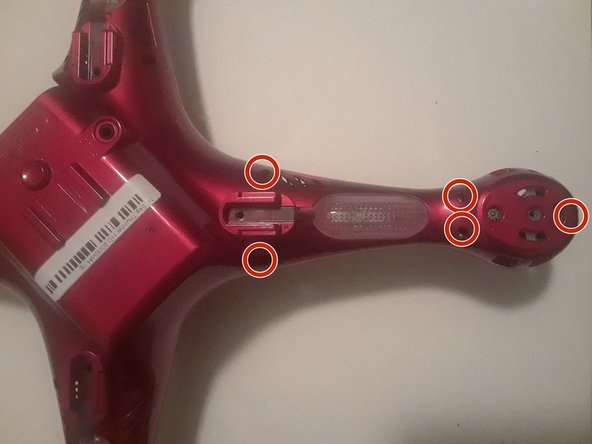
    • Lay down the drone so the battery side is facing up.

    • Unscrew all 5 .8cm screws on each arm of the drone with the Phillips 0 Screwdriver.

    • Repeat previous bullet for each arm (20 screws in total).

  4. Sky Thunder HD 8500WH Gear Replacement: paso 4, imagen 1 de 2 Sky Thunder HD 8500WH Gear Replacement: paso 4, imagen 2 de 2
    • Using a bit of force, gently pull apart the lower and upper bodies.

    • Keep going until both parts are completely separated.

  5. Sky Thunder HD 8500WH Gear Replacement, Gear: paso 5, imagen 1 de 2 Sky Thunder HD 8500WH Gear Replacement, Gear: paso 5, imagen 2 de 2
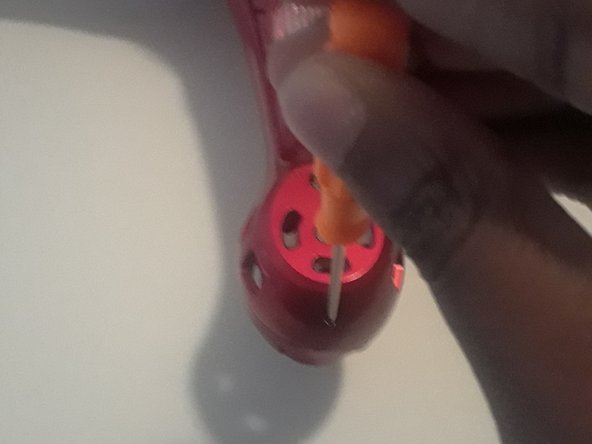
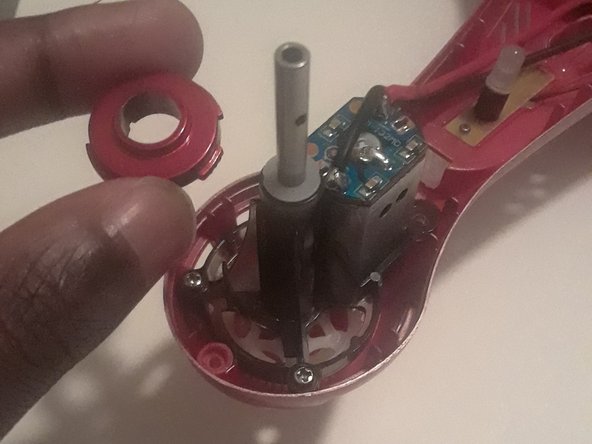
    • Find the gear mechanism at the end of one of the drone arms.

    • Unscrew the two front .8cm screws with the Phillips 0 Screwdriver.

  6. Sky Thunder HD 8500WH Gear Replacement: paso 6, imagen 1 de 2 Sky Thunder HD 8500WH Gear Replacement: paso 6, imagen 2 de 2
    • Remove the white spacer.

    • Remove the red spacer.

  7. Sky Thunder HD 8500WH Gear Replacement: paso 7, imagen 1 de 1
    • Pull the gear out from the bottom of the holding mechanism.

Conclusión

To reassemble your device, follow these instructions in reverse order.

Una persona más ha completado esta guía.

0 comentarios

Agregar Comentario

Ver Estadísticas:

Ultimas 24 horas: 0

Ultimos 7 días: 5

Ultimos 30 días: 11

Todo El Tiempo: 146