Saltar al contenido principal

Skullcandy Mix Master DJ Mylar Driver Replacement

Qué necesitas

  1. Skullcandy Mix Master DJ Mylar Driver Replacement, Mylar Driver: paso 1, imagen 1 de 3 Skullcandy Mix Master DJ Mylar Driver Replacement, Mylar Driver: paso 1, imagen 2 de 3 Skullcandy Mix Master DJ Mylar Driver Replacement, Mylar Driver: paso 1, imagen 3 de 3
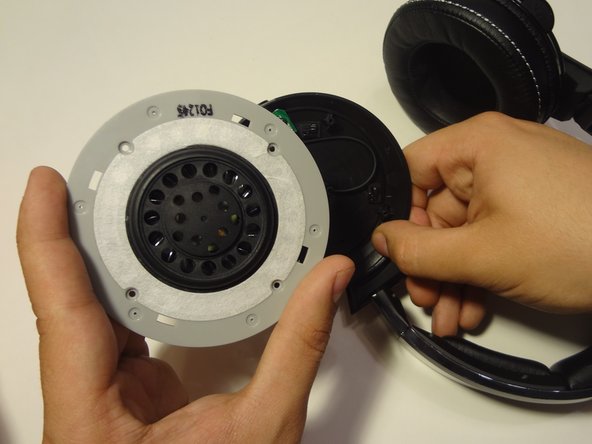
    • With the plastic opening tool, separate the padded ear cup from the main speaker component.

    • Make sure to fold the ear cup inward to avoid getting in the way of the opposite side.

  2. Skullcandy Mix Master DJ Mylar Driver Replacement: paso 2, imagen 1 de 1
    • Using your screw driver, remove the six Philips 2mm screws located on the chrome ring.

  3. Skullcandy Mix Master DJ Mylar Driver Replacement: paso 3, imagen 1 de 2 Skullcandy Mix Master DJ Mylar Driver Replacement: paso 3, imagen 2 de 2
    • Using your screw driver, remove the four 3mm Phillips screws located on the grey speaker.

    • Remove the driver from the gray speaker assembly.

    • Carefully remove the driver assembly since there are wires connected to the headphone jack, headband, and mute button.

  4. Skullcandy Mix Master DJ Mylar Driver Replacement: paso 4, imagen 1 de 2 Skullcandy Mix Master DJ Mylar Driver Replacement: paso 4, imagen 2 de 2
    • Using your screw driver, remove the two 2mm Phillips screws located on the circuit panel of the audio jack.

    • Carefully separate the jack from the ear cup casing.

    • If you are working on the right ear cup, the mute button circuit board may be difficult to remove.

  5. Skullcandy Mix Master DJ Mylar Driver Replacement: paso 5, imagen 1 de 2 Skullcandy Mix Master DJ Mylar Driver Replacement: paso 5, imagen 2 de 2
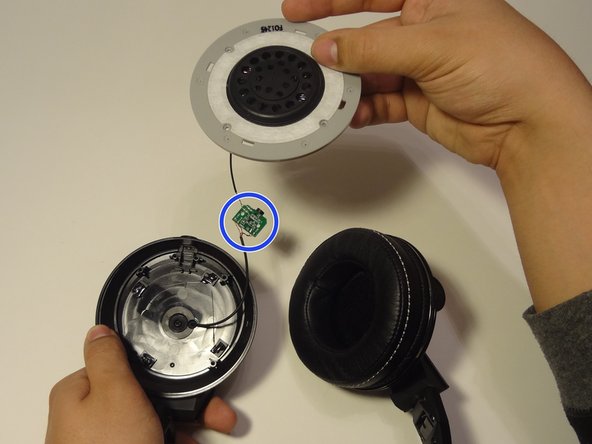
    • The Mylar driver is connected to several small circuit boards by soldered wires. It can only be removed by cutting the connecting wires.

    • Do not pull the driver away too fast since there are wires connecting the driver to the ear cup.

    • Soldering Guide: https://www.youtube.com/watch?v=urGB_IUX...

Conclusión

To reassemble your device, follow these instructions in reverse order.

Una persona más ha completado esta guía.

Sean Herlihy

Miembro Desde 03/30/15

117 Reputación

1 Guía escrita

Equipo

0 comentarios

Agregar Comentario

Ver Estadísticas:

Ultimas 24 horas: 0

Ultimos 7 días: 1

Ultimos 30 días: 7

Todo El Tiempo: 1,484