Saltar al contenido principal

Skil X-Drive 18V Cordless Drill Model No. 2887 Trigger Replacement

Qué necesitas

  1. Skil X-Drive 18V Cordless Drill Model No. 2887 Trigger Replacement, Un-clip Battery: paso 1, imagen 1 de 1
    • Grip the drill. Locate the red locking switch on the back of the battery. Hold the switch down.

  2. Skil X-Drive 18V Cordless Drill Model No. 2887 Trigger Replacement, Remove Battery: paso 2, imagen 1 de 3 Skil X-Drive 18V Cordless Drill Model No. 2887 Trigger Replacement, Remove Battery: paso 2, imagen 2 de 3 Skil X-Drive 18V Cordless Drill Model No. 2887 Trigger Replacement, Remove Battery: paso 2, imagen 3 de 3
    • While holding down the red locking switch, slide the battery towards the back of the drill until the battery is fully removed from the drill.

  3. Skil X-Drive 18V Cordless Drill Model No. 2887 Trigger Replacement, Remove Handle: paso 3, imagen 1 de 3 Skil X-Drive 18V Cordless Drill Model No. 2887 Trigger Replacement, Remove Handle: paso 3, imagen 2 de 3 Skil X-Drive 18V Cordless Drill Model No. 2887 Trigger Replacement, Remove Handle: paso 3, imagen 3 de 3
    • Grip cordless drill firmly with left hand. Grip the cordless drill handle firmly with the right hand. Rotate the handle counterclockwise in order to remove the handle from the drill.

  4. Skil X-Drive 18V Cordless Drill Model No. 2887 Trigger Replacement, Remove Gauge: paso 4, imagen 1 de 1
    • Hold drill upright with one hand and slide the gauge backwards to remove it with the other.

  5. Skil X-Drive 18V Cordless Drill Model No. 2887 Trigger Replacement, Remove the screw from the chuck sleeve: paso 5, imagen 1 de 3 Skil X-Drive 18V Cordless Drill Model No. 2887 Trigger Replacement, Remove the screw from the chuck sleeve: paso 5, imagen 2 de 3 Skil X-Drive 18V Cordless Drill Model No. 2887 Trigger Replacement, Remove the screw from the chuck sleeve: paso 5, imagen 3 de 3
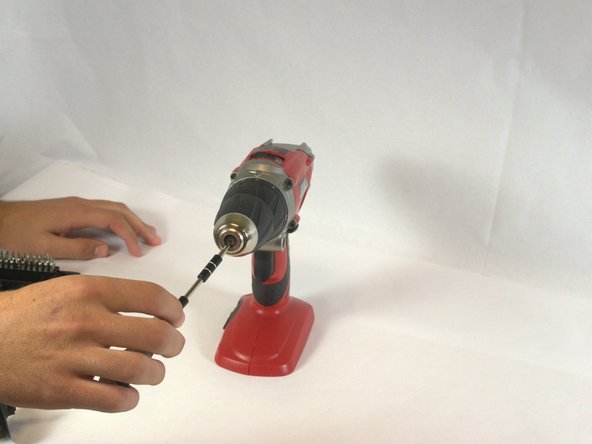
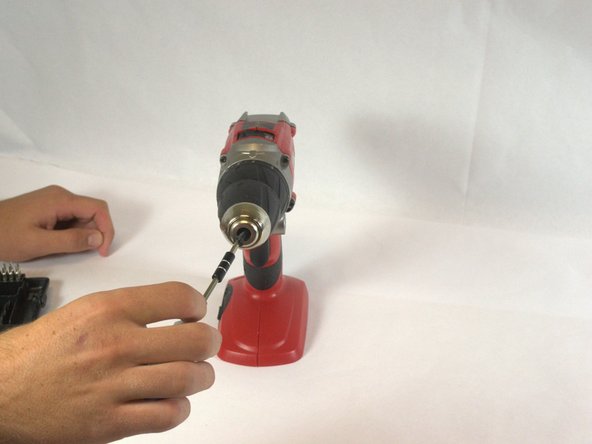
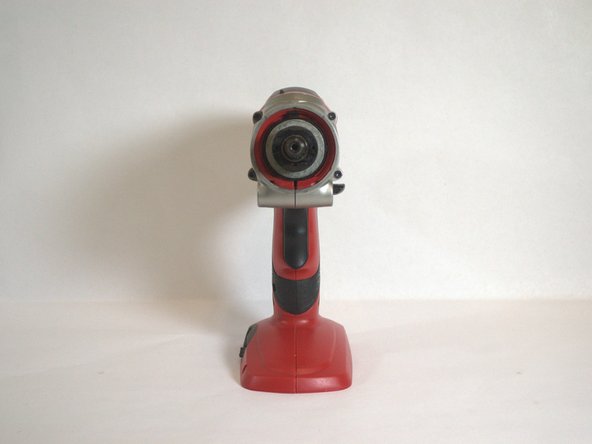
    • The chuck sleeve is held on by a 20mm Phillips #2 screw in the center.This screw is reverse threaded. Insert a Phillips #2 screwdriver and rotate it clockwise to loosen and remove it.

  6. Skil X-Drive 18V Cordless Drill Model No. 2887 Trigger Replacement, Remove the chuck sleeve: paso 6, imagen 1 de 2 Skil X-Drive 18V Cordless Drill Model No. 2887 Trigger Replacement, Remove the chuck sleeve: paso 6, imagen 2 de 2
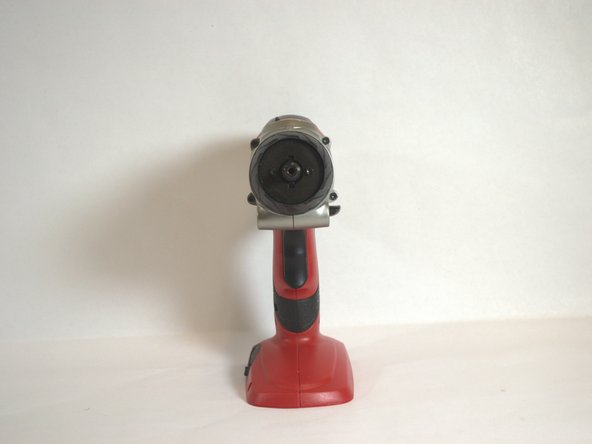
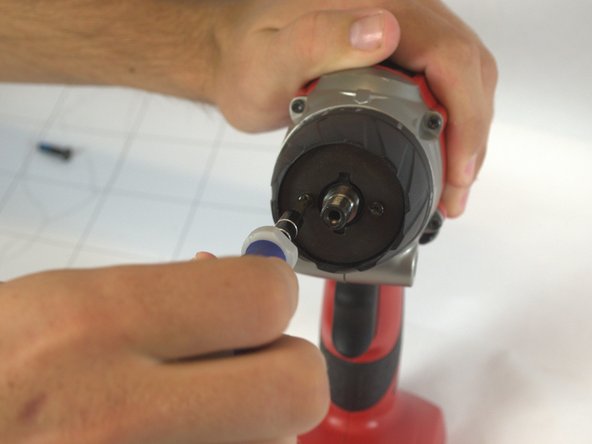
    • The threaded hole the screw was in is in the shape of a 6-point star. Insert a T40 Torx Key and rotate it clockwise to loosen and remove the chuck sleeve.

  7. Skil X-Drive 18V Cordless Drill Model No. 2887 Trigger Replacement, Remove the screws from the adjustable clutch: paso 7, imagen 1 de 2 Skil X-Drive 18V Cordless Drill Model No. 2887 Trigger Replacement, Remove the screws from the adjustable clutch: paso 7, imagen 2 de 2
    • Set the adjustable clutch to the "1" setting before beginning. This will make it easier to remove.

    • The adjustable clutch is held on by 2 20mm T10 Torx screws. Insert a T10 Torx screwdriver and rotate it counterclockwise to loosen and remove each screw.

  8. Skil X-Drive 18V Cordless Drill Model No. 2887 Trigger Replacement, Remove the adjustable clutch: paso 8, imagen 1 de 2 Skil X-Drive 18V Cordless Drill Model No. 2887 Trigger Replacement, Remove the adjustable clutch: paso 8, imagen 2 de 2
    • Firmly grip the outside of the adjustable clutch and pull it off.

    • There is a metal washer behind the adjustable clutch that holds in 12 small ball bearings. Hold the drill so it is pointing up slightly so the washer and bearings do not fall out.

  9. Skil X-Drive 18V Cordless Drill Model No. 2887 Trigger Replacement, Remove front screws: paso 9, imagen 1 de 2 Skil X-Drive 18V Cordless Drill Model No. 2887 Trigger Replacement, Remove front screws: paso 9, imagen 2 de 2
    • Locate 4 screws on front of the drill. Remove using Torx T10

    • Remove front casing piece.

  10. Skil X-Drive 18V Cordless Drill Model No. 2887 Trigger Replacement, Remove back screws: paso 10, imagen 1 de 2 Skil X-Drive 18V Cordless Drill Model No. 2887 Trigger Replacement, Remove back screws: paso 10, imagen 2 de 2
    • Locate 4 screws on back of the drill.Remove using Torx T10.

    • Remove back casing piece.

  11. Skil X-Drive 18V Cordless Drill Model No. 2887 Trigger Replacement, Remove side screws: paso 11, imagen 1 de 2 Skil X-Drive 18V Cordless Drill Model No. 2887 Trigger Replacement, Remove side screws: paso 11, imagen 2 de 2
    • Locate 4 screws on side of the drill. Remove using Torx T10

  12. Skil X-Drive 18V Cordless Drill Model No. 2887 Trigger Replacement, Case removal: paso 12, imagen 1 de 1
    • After all screws have been removed both side casings can be taken apart.

  13. Skil X-Drive 18V Cordless Drill Model No. 2887 Trigger Replacement, Disconnect trigger: paso 13, imagen 1 de 2 Skil X-Drive 18V Cordless Drill Model No. 2887 Trigger Replacement, Disconnect trigger: paso 13, imagen 2 de 2
    • Disconnect all wiring on top of trigger coming from motor and board.

  14. Skil X-Drive 18V Cordless Drill Model No. 2887 Trigger Replacement, Connect new trigger: paso 14, imagen 1 de 1
    • Reconnect all wiring to your new trigger

Conclusión

To reassemble your device, follow these instructions in reverse order.

Daniel

Miembro Desde 09/22/14

143 Reputación

1 Guía escrita

Equipo

USF Tampa, Team 2-3, Blackwell Fall 2014 Miembro de USF Tampa, Team 2-3, Blackwell Fall 2014

USFT-BLACKWELL-F14S2G3

5 Miembros

9 Guías creadas

0 comentarios

Agregar Comentario

Ver Estadísticas:

Ultimas 24 horas: 1

Ultimos 7 días: 4

Ultimos 30 días: 6

Todo El Tiempo: 589