Esta versión puede contener ediciones incorrectas. Cambie a la última instantánea verificada.
Qué necesitas
-
Este paso está sin traducir. Ayuda a traducirlo
-
Take the iFixit opening tool and place it between the crevice as shown.
-
-
Este paso está sin traducir. Ayuda a traducirlo
-
Apply pressure to the iFixit opening tool, pushing down until the the plastic casing pops off.
-
-
-
Este paso está sin traducir. Ayuda a traducirlo
-
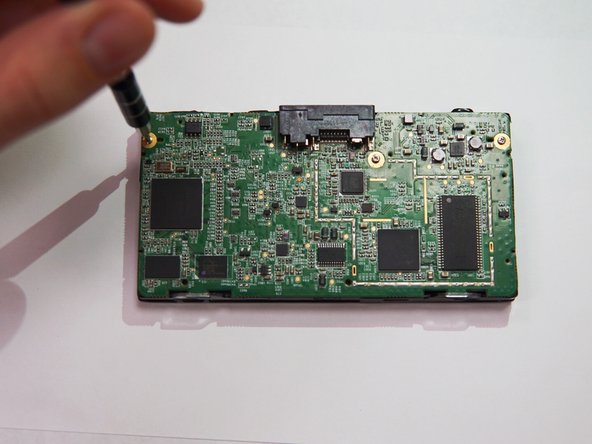
The buttons are on the opposite side of the motherboard. To remove the motherboard, use a 0.8~0.9 mm Phillips #00 screwdriver to remove the three screws that attach the motherboard to the front part of the plastic casing.
-
-
Este paso está sin traducir. Ayuda a traducirlo
-
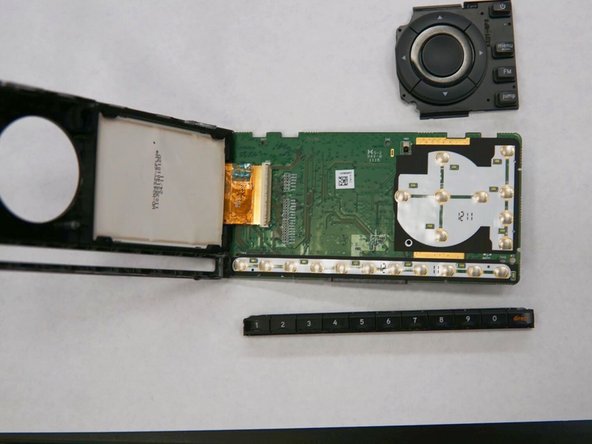
The buttons are resting in the corresponding sections of the motherboard, so pull them off.
-


Cancelar: No complete esta guía.
Una persona más ha completado esta guía.
Equipo

UC Santa Barbara, Team S2-G8, Weedon Fall 2017 Miembro de UC Santa Barbara, Team S2-G8, Weedon Fall 2017
UCSB-WEEDON-F17S2G8
5 Miembros
4 Guías creadas