Introducción
If you have a shower head with a constant drip, follow this simple and easy guide to replace the rubber o-ring in your shower handle. Replacing the O-ring can help prevent hard water build up, rusting, and wasting water.
Qué necesitas
-
-
Using your flat head screwdriver, remove the screw from the middle of the handle.
 Pregunta a FixBot
-
-
-
Use your groove joint pliers to loosen and remove the escutcheon plate.
-
-
-
-
Using your groove joint pliers, loosen and remove the cartridge stem.
-
-
-
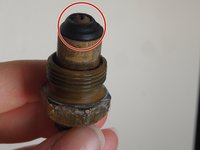
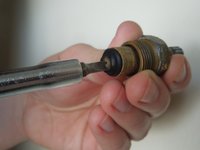
Using your flat head screwdriver, remove the screw from the end of the stem cartridge.
-
Once the screw is removed, replace the damaged O-ring with the new replacement O-ring.
-


Cancelar: No complete esta guía.
3 personas más completaron esta guía.

Equipo

Michigan Tech, Team 1-6, Lauer Spring 2016 Miembro de Michigan Tech, Team 1-6, Lauer Spring 2016
MTU-LAUER-S16S1G6
1 Miembro
1 Guía escrita
4Guía Comentarios
This fixed the dripping shower head but now my shower handles are tight and difficult to turn and the water pressure is affected after replacing the o-rings. What could the issue be?