Introducción
This guide will inform users how to replace their Shark Steam Pocket Mop's Water Tank / Bladder.
Qué necesitas
-
-
Begin by removing the 8 quarter inch phillips head screws found along the back panel
-
Once all 8 screws have been removed, gently remove the back panel from the rest of the mop's body
-
-
-
-
Start by gently moving the midframe from the top portion of the panel to expose the bottom portion of the mop's water tank / bladder.
-
-
-
Remove the 10 quarter inch phillips head screws from the bottom portion of the water tank / bladder.
-
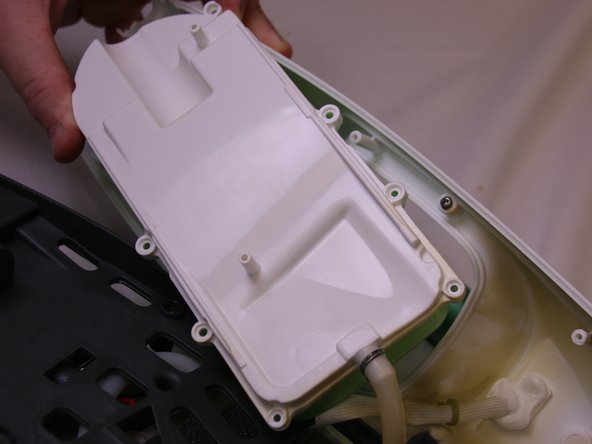
Then gently lift the water tank / bladder out of its plastic housing. and turn it over.
-
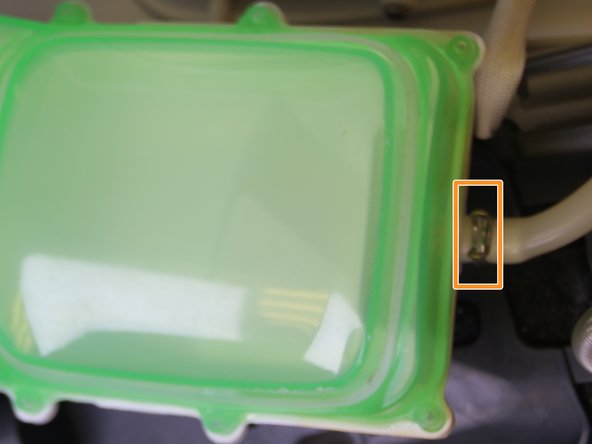
To fully remove the water tank / bladder, use your tweezers to remove the metal ring that keeps the hose fastened to the plastic tank.
-


To reassemble your device, follow these instructions in reverse order.
To reassemble your device, follow these instructions in reverse order.
Equipo

USF Tampa, Team S13-G7, Cagle Fall 2017 Miembro de USF Tampa, Team S13-G7, Cagle Fall 2017
USFT-CAGLE-F17S13G7
4 Miembros
10 Guías creadas