Saltar al contenido principal

Shark Rocket Professional HEPA Filter Replacement

  1. Shark Rocket Professional HEPA Filter Replacement, HEPA Filter: paso 1, imagen 1 de 2 Shark Rocket Professional HEPA Filter Replacement, HEPA Filter: paso 1, imagen 2 de 2
    • Look towards the side of the vacuum for the orange "Floor Nozzle" button.

    • Press the "Floor Nozzle" button and pull out the body of the vacuum up and away from the floor motor.

  2. Shark Rocket Professional HEPA Filter Replacement: paso 2, imagen 1 de 3 Shark Rocket Professional HEPA Filter Replacement: paso 2, imagen 2 de 3 Shark Rocket Professional HEPA Filter Replacement: paso 2, imagen 3 de 3
    • Locate an orange dial at the bottom of the now-separate body of the vacuum.

    • Turn the dial so that it is pointed towards the open-lock icon.

  3. Shark Rocket Professional HEPA Filter Replacement: paso 3, imagen 1 de 3 Shark Rocket Professional HEPA Filter Replacement: paso 3, imagen 2 de 3 Shark Rocket Professional HEPA Filter Replacement: paso 3, imagen 3 de 3
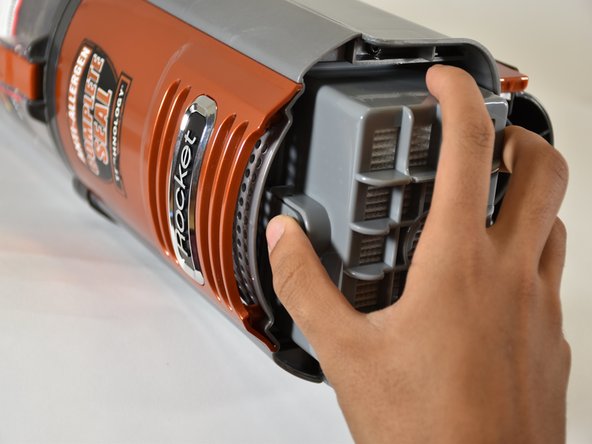
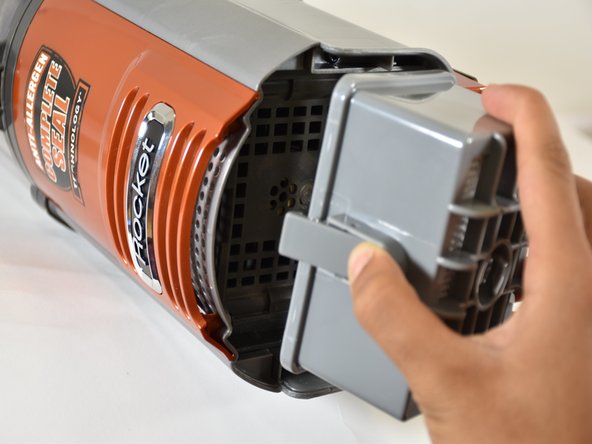
    • Open the cap to reveal the HEPA filter. The HEPA filter is a large grey rectangle with a tab on the side.

    • Press the tab, and pull out the filter.

Conclusión

To reassemble your device, follow these instructions in reverse order.

Una persona más ha completado esta guía.

David Chau

Miembro Desde 01/24/18

130 Reputación

1 Guía escrita

Equipo

Cal Poly, Team S18-G6, Livingston Winter 2018 Miembro de Cal Poly, Team S18-G6, Livingston Winter 2018

CPSU-LIVINGSTON-W18S18G6

4 Miembros

10 Guías creadas

0 comentarios

Agregar Comentario

Ver Estadísticas:

Ultimas 24 horas: 1

Ultimos 7 días: 4

Ultimos 30 días: 18

Todo El Tiempo: 2,723