Esta versión puede contener ediciones incorrectas. Cambie a la última instantánea verificada.
Qué necesitas
-
Este paso está sin traducir. Ayuda a traducirlo
-
Place the monitor face down.
-
Remove the four 11.5mm screws with a #2 Phillips screwdriver.
-
Remove the stand by pulling it out.
-
-
Este paso está sin traducir. Ayuda a traducirlo
-
Remove two 11.5mm screws with a #2 Phillips screwdriver.
-
Remove the plastic bar.
-
-
-
Este paso está sin traducir. Ayuda a traducirlo
-
Using a #2 Phillips screwdriver, remove the six 7mm screws at the circled locations.
-
-
Este paso está sin traducir. Ayuda a traducirlo
-
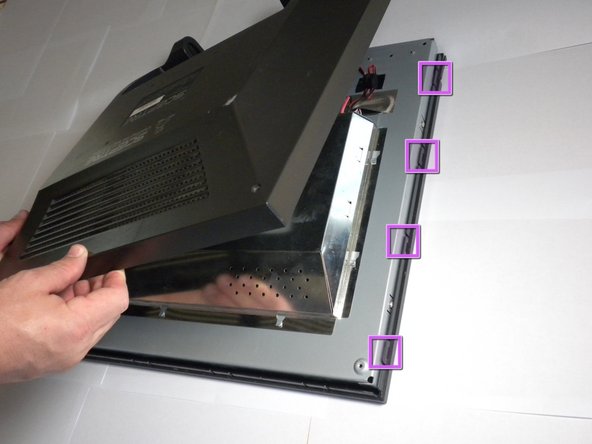
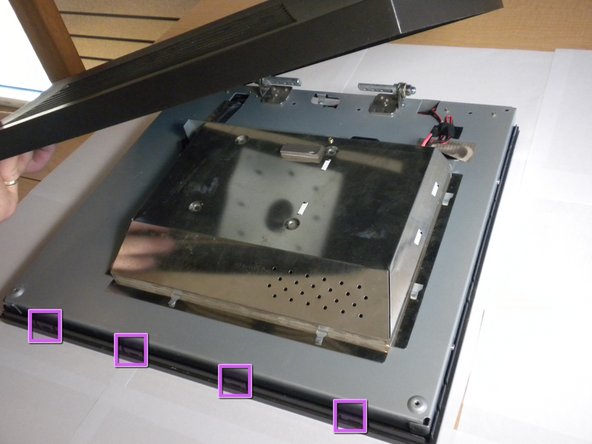
Pry the monitor using the plastic opening tool to release the clips holding the cover on.
-
Once all the clips have been released, remove the cover by pulling it up.
-
-
Este paso está sin traducir. Ayuda a traducirlo
-
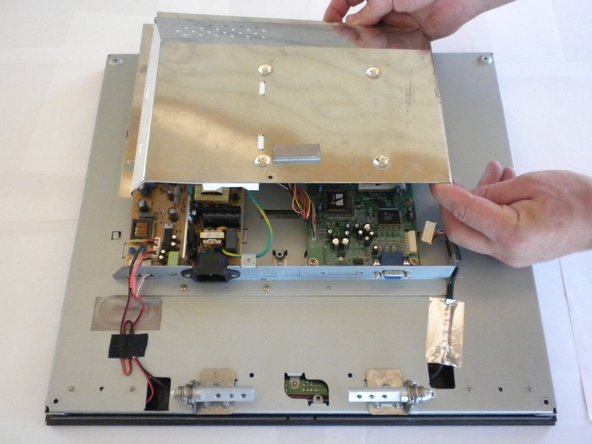
Using the #2 Phillips screwdriver, remove the one 6mm screw.
-
Unplug the indicated cable by pulling on the base.
-
Slide the cover toward the top of the monitor.
-
Remove the cover.
-


Cancelar: No complete esta guía.
Una persona más ha completado esta guía.
Equipo

Cal Poly, Team 16-56, Forte Fall 2012 Miembro de Cal Poly, Team 16-56, Forte Fall 2012
CPSU-FORTE-F12S16G56
5 Miembros
13 Guías creadas