Saltar al contenido principal

Sanyo VPC-X1200 LCD Screen Replacement

Qué necesitas

  1. Sanyo VPC-X1200 LCD Screen Replacement, Back Case: paso 1, imagen 1 de 3 Sanyo VPC-X1200 LCD Screen Replacement, Back Case: paso 1, imagen 2 de 3 Sanyo VPC-X1200 LCD Screen Replacement, Back Case: paso 1, imagen 3 de 3
    • Remove the five case screws with a Phillips #00 Screwdriver.

    • Five 3.5mm Phillips Screws

  2. Sanyo VPC-X1200 LCD Screen Replacement: paso 2, imagen 1 de 1
    • Gently lift up the back cover and set aside.

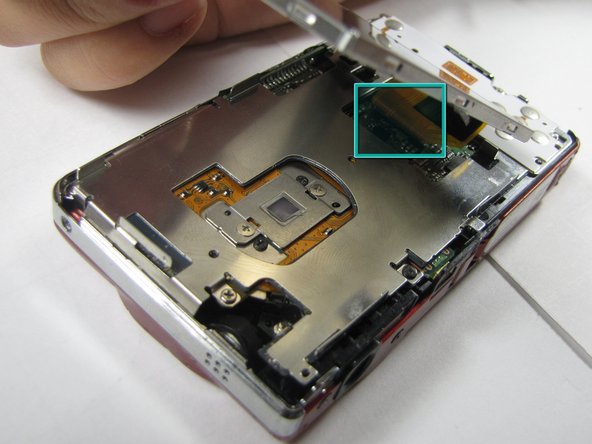
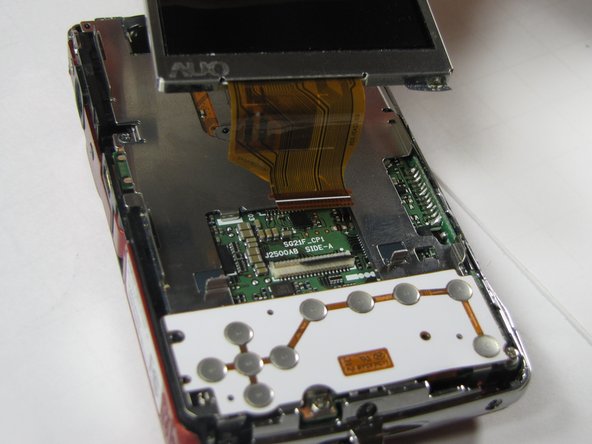
  3. Sanyo VPC-X1200 LCD Screen Replacement, LCD Screen: paso 3, imagen 1 de 2 Sanyo VPC-X1200 LCD Screen Replacement, LCD Screen: paso 3, imagen 2 de 2
    • Gently lift up on the left side of the LCD and slowly pull it to the left side of the camera but do not remove entirely, there is a ribbon connector.

    • Be careful not to rip out the ribbon connector.

  4. Sanyo VPC-X1200 LCD Screen Replacement: paso 4, imagen 1 de 2 Sanyo VPC-X1200 LCD Screen Replacement: paso 4, imagen 2 de 2
    • To clear the ribbon connection underneath the screen, lift up the black ribbon gate with the spudger.

    • Gently lift ribbon out of the gate and set screen aside.

Conclusión

To reassemble your device, follow these instructions in reverse order.

Equipo

Cal Poly, Team 7-10, Maness Spring 2010 Miembro de Cal Poly, Team 7-10, Maness Spring 2010

CPSU-MANESS-S10S7G10

4 Miembros

14 Guías creadas

0 comentarios

Agregar Comentario

Ver Estadísticas:

Ultimas 24 horas: 0

Ultimos 7 días: 0

Ultimos 30 días: 3

Todo El Tiempo: 5,032