Saltar al contenido principal
Únete a la Comunidad de Reparación - Crear Cuenta

Sanyo VPC S1275 LCD Screen Replacement

Qué necesitas

    1. Sanyo VPC S1275 LCD Screen Replacement, Battery: paso 1, imagen 1 de 1
      • Place your thumb on the right side of the camera over the battery door.

      • Slide the battery door to the right until the door lifts up.

      Pregunta a FixBot

      Agregar Comentario

    2. Sanyo VPC S1275 LCD Screen Replacement: paso 2, imagen 1 de 1
      • Remove and recycle old batteries.

      Pregunta a FixBot

      Agregar Comentario

    1. Sanyo VPC S1275 LCD Screen Replacement, Case: paso 3, imagen 1 de 3 Sanyo VPC S1275 LCD Screen Replacement, Case: paso 3, imagen 2 de 3 Sanyo VPC S1275 LCD Screen Replacement, Case: paso 3, imagen 3 de 3
      • Remove the following six screws using the Phillips #00 screwdriver:

      • Two screws on the left side of the camera.

      • Two screws on the right side of the camera.

      • Two screws on the bottom of the camera.

      Pregunta a FixBot

      Agregar Comentario

    2. Sanyo VPC S1275 LCD Screen Replacement: paso 4, imagen 1 de 2 Sanyo VPC S1275 LCD Screen Replacement: paso 4, imagen 2 de 2
      • Open the battery slot on the bottom of the camera by sliding the door to the right.

      • Remove the single 4 mm screw on the bottom right using the Phillips #00 screwdriver.

      Pregunta a FixBot

      Agregar Comentario

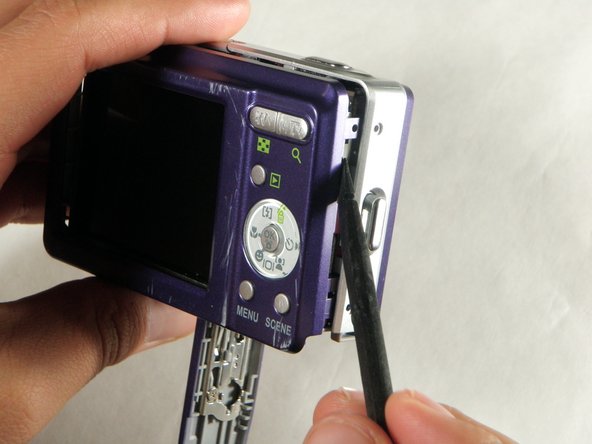
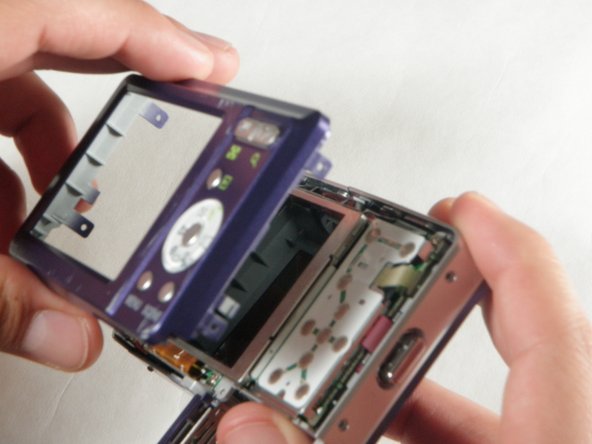
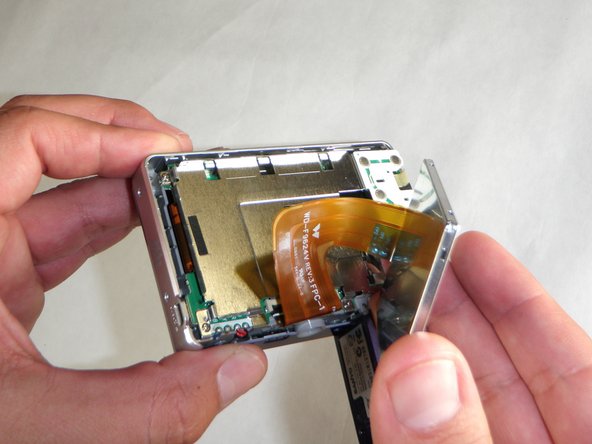
    3. Sanyo VPC S1275 LCD Screen Replacement: paso 5, imagen 1 de 3 Sanyo VPC S1275 LCD Screen Replacement: paso 5, imagen 2 de 3 Sanyo VPC S1275 LCD Screen Replacement: paso 5, imagen 3 de 3
      • Insert a spudger in the seam at the bottom of the camera.

      • Gently separate the rear case from the front of the camera.

      Pregunta a FixBot

      Agregar Comentario

    4. Sanyo VPC S1275 LCD Screen Replacement: paso 6, imagen 1 de 1
      • This step is only needed for the case and logic board replacement

      • Using the Phillips #00 screwdriver, remove the single screw attached to the front casing in the top left corner. The front case should easily separate.

      Pregunta a FixBot

      Agregar Comentario

    5. Sanyo VPC S1275 LCD Screen Replacement: paso 7, imagen 1 de 1
      • This step is only needed for the case replacement.

      • Using the Phillips #00 screwdriver, remove the screw on the inside of the battery door.

      • Slide the battery door off of the hinge.

      Pregunta a FixBot

      Agregar Comentario

    1. Sanyo VPC S1275 LCD Screen Replacement, LCD Screen: paso 8, imagen 1 de 2 Sanyo VPC S1275 LCD Screen Replacement, LCD Screen: paso 8, imagen 2 de 2
      • Using the spudger, carefully lift up the LCD screen, making sure to keep the ribbon cable intact.

      • Place the LCD screen on a non-abrasive surface.

      Pregunta a FixBot

      Agregar Comentario

    2. Sanyo VPC S1275 LCD Screen Replacement: paso 9, imagen 1 de 1
      • Using the spudger lift the black flap up to release the ribbon cable.

      • The LCD screen will now be completely detached from the camera.

      Pregunta a FixBot

      Agregar Comentario

Conclusión

To reassemble your device, follow these instructions in reverse order.

Cancelar: No complete esta guía.

Evan Perez

Miembro Desde 04/15/10

19 Reputación

2 Guías creadas

Equipo

Cal Poly, Team 24-24, Regan Spring 2010 Miembro de Cal Poly, Team 24-24, Regan Spring 2010

CPSU-REGAN-S10S24G24

Miembros de 4

72 Guías creadas

0Guía Comentarios

Agregar Comentario

Ver Estadísticas:

Ultimas 24 horas: 0

Ultimos 7 días: 7

Ultimos 30 días: 27

Todo El Tiempo: 3,715