Saltar al contenido principal

Samsung UBD-K8500 Disc Tray Replacement

Qué necesitas

  1. Samsung UBD-K8500 Disc Tray Replacement, Top Panel: paso 1, imagen 1 de 2 Samsung UBD-K8500 Disc Tray Replacement, Top Panel: paso 1, imagen 2 de 2
    • Remove the six 10 mm screws from the back of the unit using a Phillips #0 screwdriver.

  2. Samsung UBD-K8500 Disc Tray Replacement: paso 2, imagen 1 de 2 Samsung UBD-K8500 Disc Tray Replacement: paso 2, imagen 2 de 2
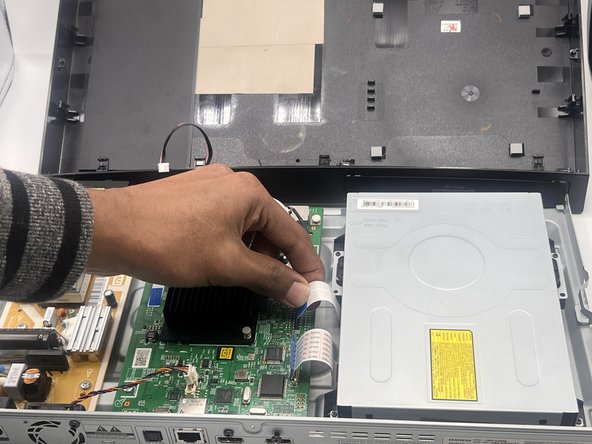
    • Carefully lift up the top panel.

    • There is a cables that must be disconnected before completely removing the panel.

    • Detach the cable connecting the top panel to the motherboard.

    • Take the top off and set it to the side.

  3. Samsung UBD-K8500 Disc Tray Replacement, Disc Tray: paso 3, imagen 1 de 2 Samsung UBD-K8500 Disc Tray Replacement, Disc Tray: paso 3, imagen 2 de 2
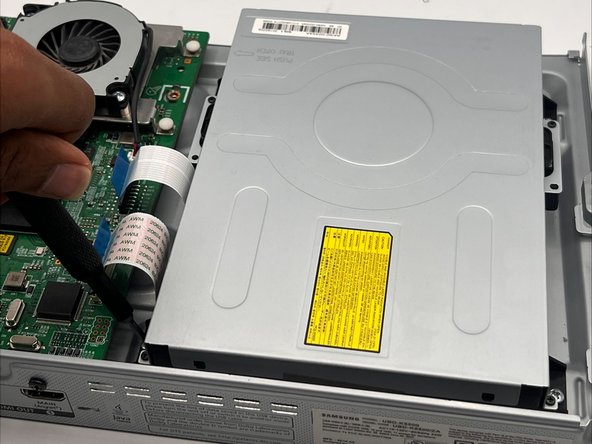
    • Find the blue tabs of the ribbon connectors, and gently pull them both out.

  4. Samsung UBD-K8500 Disc Tray Replacement: paso 4, imagen 1 de 2 Samsung UBD-K8500 Disc Tray Replacement: paso 4, imagen 2 de 2
    • Remove the four 8 mm screws from the disc drive using a Phillips #0 screwdriver.

  5. Samsung UBD-K8500 Disc Tray Replacement: paso 5, imagen 1 de 2 Samsung UBD-K8500 Disc Tray Replacement: paso 5, imagen 2 de 2
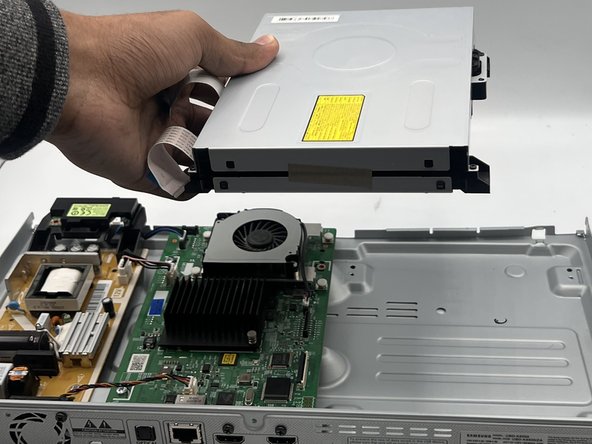
    • Gently remove the disc tray.

Conclusión

To reassemble your device, follow these instructions in reverse order.

0 comentarios

Agregar Comentario

Ver Estadísticas:

Ultimas 24 horas: 0

Ultimos 7 días: 0

Ultimos 30 días: 5

Todo El Tiempo: 82