Saltar al contenido principal
Únete a la Comunidad de Reparación - Crear Cuenta

Samsung Series 7XE700T1A Screen Replacement

Qué necesitas

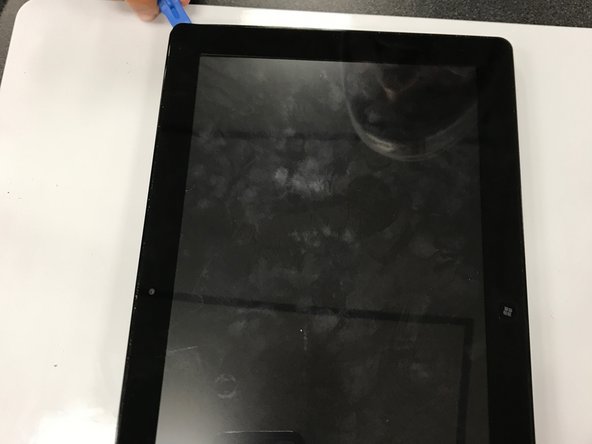
    1. Samsung Series 7XE700T1A Screen Replacement, Screen: paso 1, imagen 1 de 1
      • Wedge the opening tools inside the side of the device, and move it around the parameter until you have loosened the adhesive holding it together.

      Pregunta a FixBot

      Agregar Comentario

    2. Samsung Series 7XE700T1A Screen Replacement: paso 2, imagen 1 de 2 Samsung Series 7XE700T1A Screen Replacement: paso 2, imagen 2 de 2
      • With your hands, open up the back panel, separating it from the tablet.

      Pregunta a FixBot

      Agregar Comentario

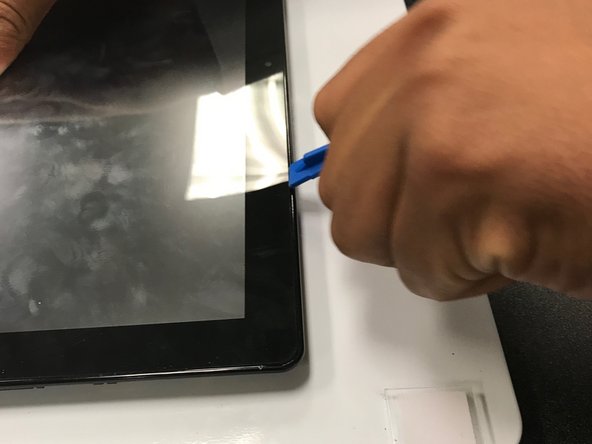
    3. Samsung Series 7XE700T1A Screen Replacement: paso 3, imagen 1 de 3 Samsung Series 7XE700T1A Screen Replacement: paso 3, imagen 2 de 3 Samsung Series 7XE700T1A Screen Replacement: paso 3, imagen 3 de 3
      • With the back panel now removed, wedge the opening tools in between the actual tablet and screen and move it around parameter until you have loosened the adhesive keeping it together.

      Pregunta a FixBot

      Agregar Comentario

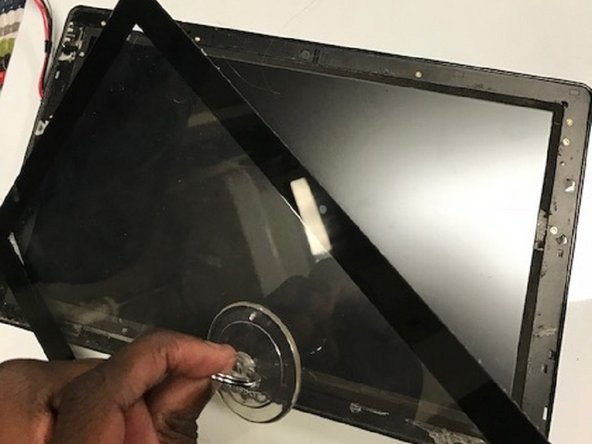
    4. Samsung Series 7XE700T1A Screen Replacement: paso 4, imagen 1 de 2 Samsung Series 7XE700T1A Screen Replacement: paso 4, imagen 2 de 2
      • Place suction cup firmly on screen. When the cup is secure, lift up the screen and remove the screen.

      Pregunta a FixBot

      Agregar Comentario

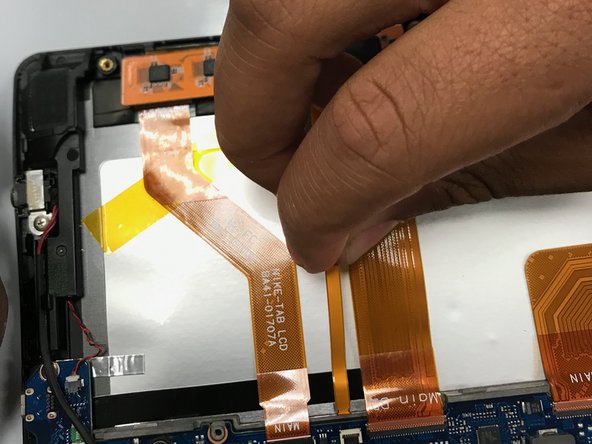
    5. Samsung Series 7XE700T1A Screen Replacement: paso 5, imagen 1 de 3 Samsung Series 7XE700T1A Screen Replacement: paso 5, imagen 2 de 3 Samsung Series 7XE700T1A Screen Replacement: paso 5, imagen 3 de 3
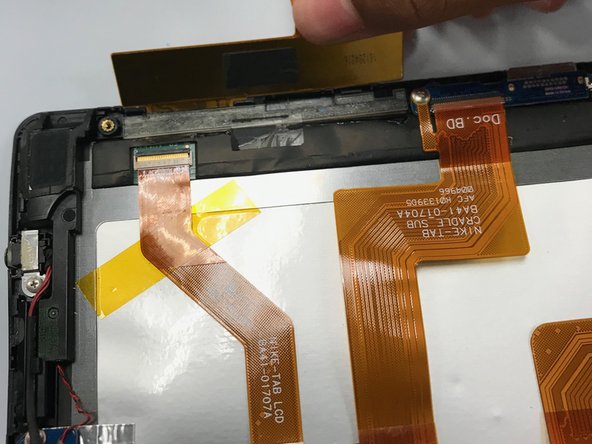
      • There is some circuitry that needs to be removed that is keeping the screen and tablet together.

      • The main circuitry that is connected to the screen and tablet together is the skinny one located in the middle.

      • Using your hands, pull the circuit out from its position to help loosen the connection.

      Pregunta a FixBot

      Agregar Comentario

    6. Samsung Series 7XE700T1A Screen Replacement: paso 6, imagen 1 de 3 Samsung Series 7XE700T1A Screen Replacement: paso 6, imagen 2 de 3 Samsung Series 7XE700T1A Screen Replacement: paso 6, imagen 3 de 3
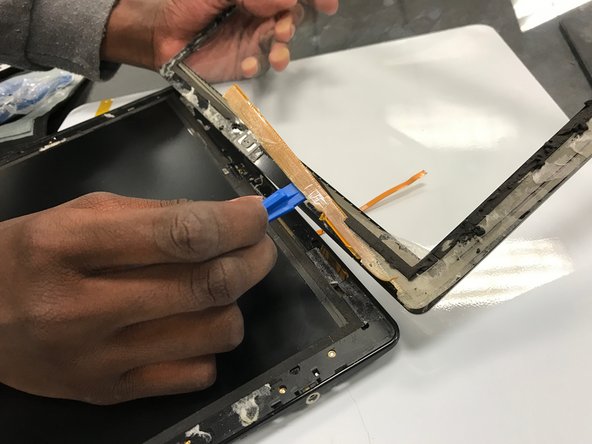
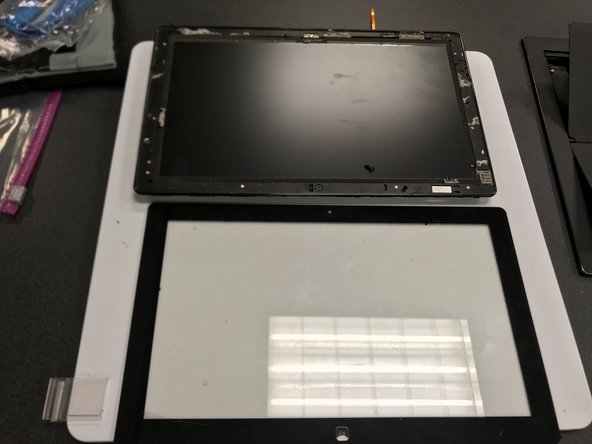
      • With your opening tool, remove the circuitry from off the main screen, thus separating the screen from the tablet completely

      Pregunta a FixBot

      Agregar Comentario

Conclusión

To reassemble your device, follow these instructions in reverse order.

Cancelar: No complete esta guía.

Alex

Miembro Desde 09/25/17

112 Reputación

1 Guía escrita

0Guía Comentarios

Agregar Comentario

Ver Estadísticas:

Ultimas 24 horas: 1

Ultimos 7 días: 5

Ultimos 30 días: 32

Todo El Tiempo: 1,560