Saltar al contenido principal

Samsung Series 5 3G Chromebook CPU Replacement

Guía Archivada
Esta guía se mantiene únicamente para fines históricos. Utiliza la última versión de la guía para llevar a cabo tu reparación.

Qué necesitas

  1. Samsung Series 5 3G Chromebook CPU Replacement, Back Cover: paso 1, imagen 1 de 2 Samsung Series 5 3G Chromebook CPU Replacement, Back Cover: paso 1, imagen 2 de 2
    • Place the laptop on a flat surface with the bottom side facing up.

    • Remove the rubber feet from the bottom of the panel using your fingernails.

    • Remove all the seven screws from the bottom panel.

  2. Samsung Series 5 3G Chromebook CPU Replacement: paso 2, imagen 1 de 2 Samsung Series 5 3G Chromebook CPU Replacement: paso 2, imagen 2 de 2
    • Loosen the back cover panel using a spudger.

  3. Samsung Series 5 3G Chromebook CPU Replacement: paso 3, imagen 1 de 2 Samsung Series 5 3G Chromebook CPU Replacement: paso 3, imagen 2 de 2
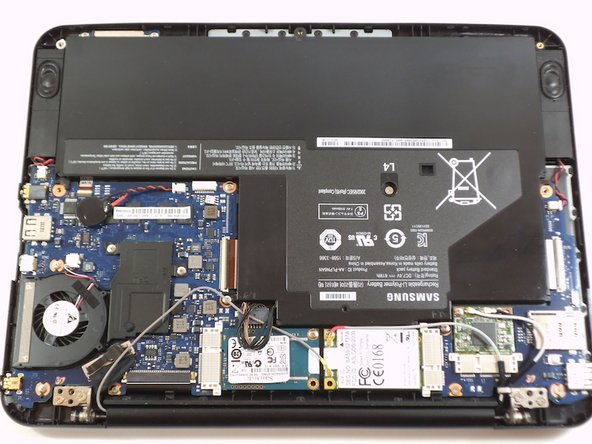
    • Once you work your way around, you can remove the panel.

  4. Samsung Series 5 3G Chromebook CPU Replacement, CPU: paso 4, imagen 1 de 3 Samsung Series 5 3G Chromebook CPU Replacement, CPU: paso 4, imagen 2 de 3 Samsung Series 5 3G Chromebook CPU Replacement, CPU: paso 4, imagen 3 de 3
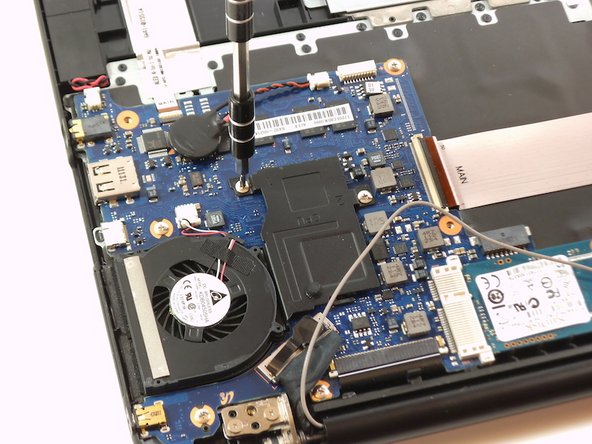
    • Remove the two Phillips screws on the fan.

  5. Samsung Series 5 3G Chromebook CPU Replacement: paso 5, imagen 1 de 3 Samsung Series 5 3G Chromebook CPU Replacement: paso 5, imagen 2 de 3 Samsung Series 5 3G Chromebook CPU Replacement: paso 5, imagen 3 de 3
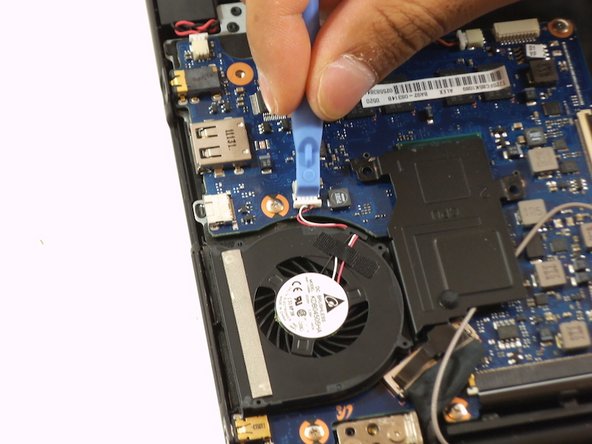
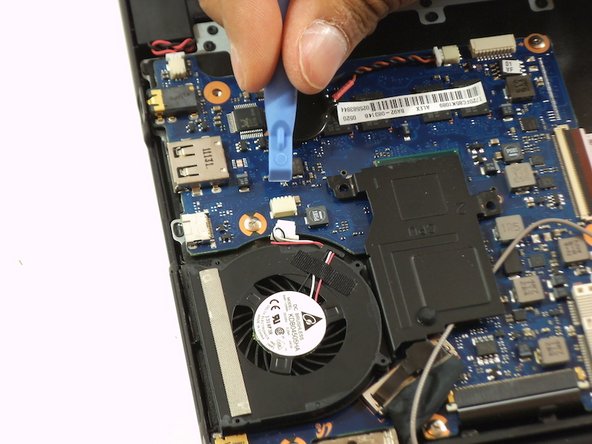
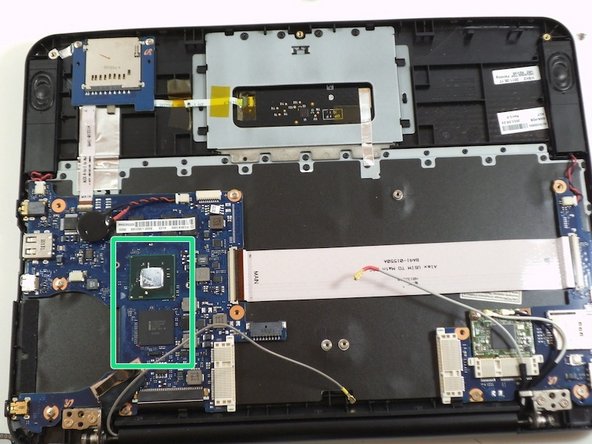
    • Unplug the wires from the motherboard

    • You can now see the CPU attached to the motherboard.

    • The CPU cannot be removed from the motherboard.

Conclusión

To reassemble your device, follow these instructions in reverse order.

Una persona más ha completado esta guía.

0 comentarios

Agregar Comentario

Ver Estadísticas:

Ultimas 24 horas: 2

Ultimos 7 días: 4

Ultimos 30 días: 4

Todo El Tiempo: 2,354