Introducción
The 16 SanDisk is a limited internal memory capability for the Chromebook.
Qué necesitas
-
-
Place the laptop on a flat surface with the bottom side facing up.
-
Remove the rubber feet from the bottom of the panel using your fingernails.
-
Remove all the seven screws from the bottom panel.
-
-
-
-
Remove the single screw.
-
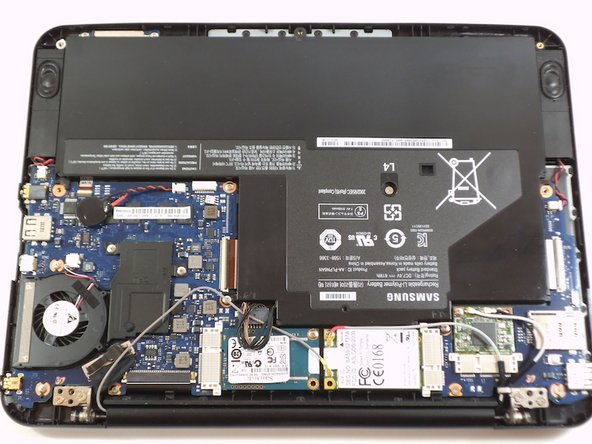
use the plastic tool to disconnect the WWAN antennas from the board.
-
After removing its mounting screw, the 16 GB SanDisk can be removed from the motherboard.
-


To reassemble your device, follow these instructions in reverse order.
To reassemble your device, follow these instructions in reverse order.
Cancelar: No complete esta guía.
2 personas más completaron esta guía.
Equipo

University of Maryland, Team 1-7, Shastany Fall 2013 Miembro de University of Maryland, Team 1-7, Shastany Fall 2013
UMD-SHASTANY-F13S1G7
2 Miembros
9 Guías creadas