Saltar al contenido principal

Samsung SGH-X105 Loud Speaker Replacement

Qué necesitas

  1. Samsung SGH-X105 Loud Speaker Replacement, Battery: paso 1, imagen 1 de 1
    • Rotate the phone onto its front side so that the LCD screen is facing away from you.

  2. Samsung SGH-X105 Loud Speaker Replacement: paso 2, imagen 1 de 3 Samsung SGH-X105 Loud Speaker Replacement: paso 2, imagen 2 de 3 Samsung SGH-X105 Loud Speaker Replacement: paso 2, imagen 3 de 3
    • Remove the battery by pressing down on the battery release button while sliding the battery downwards.

  3. Samsung SGH-X105 Loud Speaker Replacement, Front & Back Panels: paso 3, imagen 1 de 1
    • Remove the four small black screws that secure the back phone panel using the Phillips #00 screwdriver.

    • Complete removal of screws may not be necessary.

  4. Samsung SGH-X105 Loud Speaker Replacement: paso 4, imagen 1 de 3 Samsung SGH-X105 Loud Speaker Replacement: paso 4, imagen 2 de 3 Samsung SGH-X105 Loud Speaker Replacement: paso 4, imagen 3 de 3
    • Carefully separate the front and back panels by gently prying them apart. Start at the bottom of the phone (near the AC charger input).

    • Volume control button will be unsecured and may fall out as soon as the panels are separated.

    • Gentle force may be required to separate the panels at the top latch.

    • There are two wires connecting the front and back panels. Be careful not to rip these wires out when separating the panels.

  5. Samsung SGH-X105 Loud Speaker Replacement: paso 5, imagen 1 de 2 Samsung SGH-X105 Loud Speaker Replacement: paso 5, imagen 2 de 2
    • Using your nails, tweezers, or any precise grabbing tool, pinch the antenna wire connector (clear plastic plug) and pull gently. It should pop out rather easily.

  6. Samsung SGH-X105 Loud Speaker Replacement, Logic Board: paso 6, imagen 1 de 3 Samsung SGH-X105 Loud Speaker Replacement, Logic Board: paso 6, imagen 2 de 3 Samsung SGH-X105 Loud Speaker Replacement, Logic Board: paso 6, imagen 3 de 3
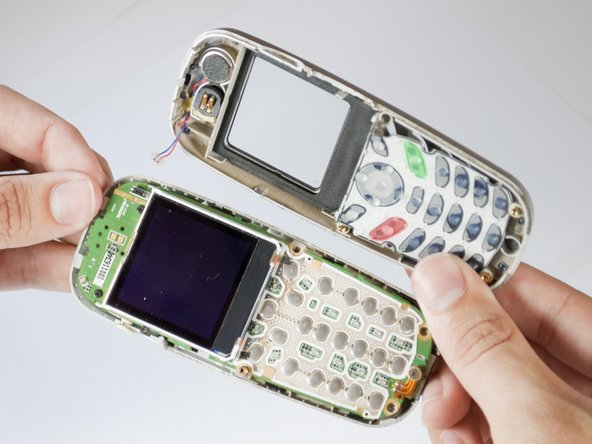
    • Gently remove the logic board and LCD screen from the back cover of the phone.

  7. Samsung SGH-X105 Loud Speaker Replacement: paso 7, imagen 1 de 1
    • Remove the two screws above the LCD screen with a Phillips #00 screw driver. These connect to the white plastic cover in which the speaker is housed located on the reverse side of the logic board.

    • Make sure the white plastic cover remains in contact with the logic board while removing the screws.

  8. Samsung SGH-X105 Loud Speaker Replacement: paso 8, imagen 1 de 3 Samsung SGH-X105 Loud Speaker Replacement: paso 8, imagen 2 de 3 Samsung SGH-X105 Loud Speaker Replacement: paso 8, imagen 3 de 3
    • Rotate the logic board so that the LCD screen is face down.

    • Make sure the white plastic cover remains in contact with the logic board while it is being rotated.

    • Screws may fall out as the object is rotated.

  9. Samsung SGH-X105 Loud Speaker Replacement: paso 9, imagen 1 de 2 Samsung SGH-X105 Loud Speaker Replacement: paso 9, imagen 2 de 2
    • Gently begin to separate the white plastic cover from the logic board.

    • This cover will be connected by two small wires. Be sure not to break this connection.

  10. Samsung SGH-X105 Loud Speaker Replacement: paso 10, imagen 1 de 2 Samsung SGH-X105 Loud Speaker Replacement: paso 10, imagen 2 de 2
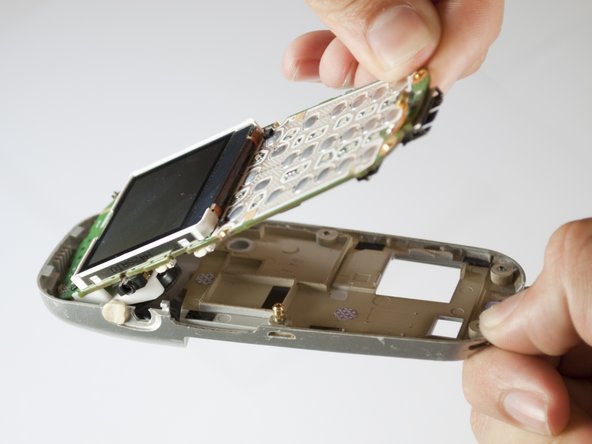
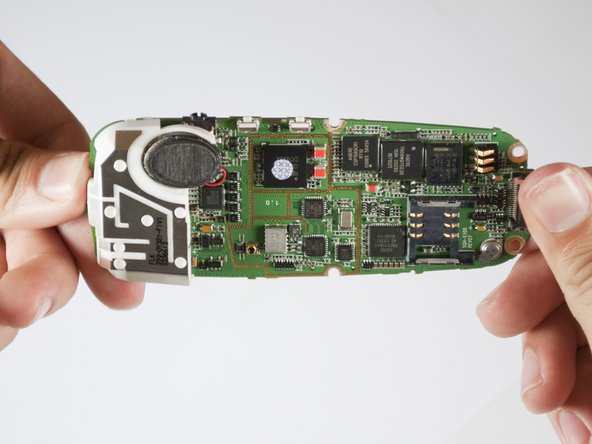
    • Locate the two wires (black and red) which connect the speaker to the logic board.

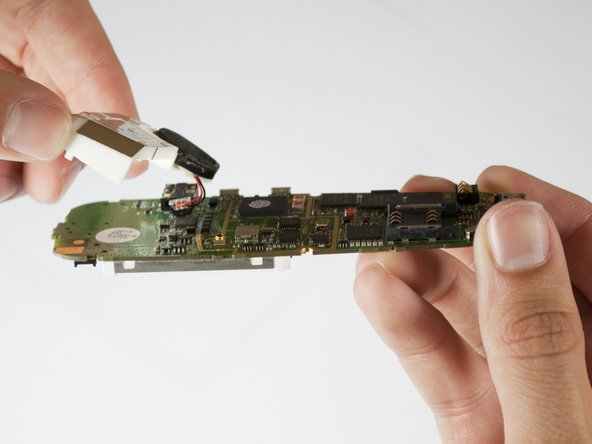
    • Using your nails, tweezers, or any precise grabbing tool, pinch the speaker connector (clear plastic plug that goes into the logic board) and pull gently. It should pop out easily.

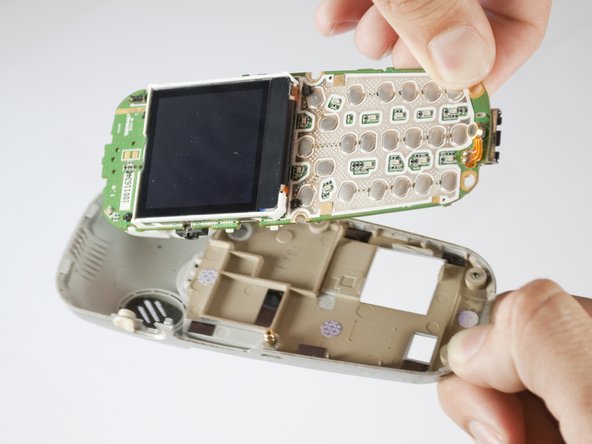
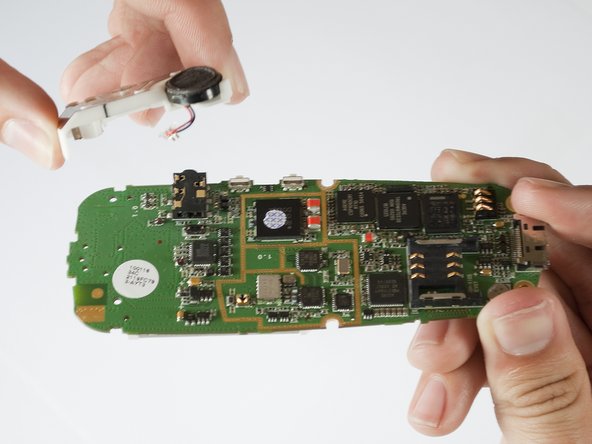
    • Once the wires are disconnected and the screws removed, the white plastic cover can easily be removed from the logic board.

  11. Samsung SGH-X105 Loud Speaker Replacement, Loud Speaker: paso 11, imagen 1 de 3 Samsung SGH-X105 Loud Speaker Replacement, Loud Speaker: paso 11, imagen 2 de 3 Samsung SGH-X105 Loud Speaker Replacement, Loud Speaker: paso 11, imagen 3 de 3
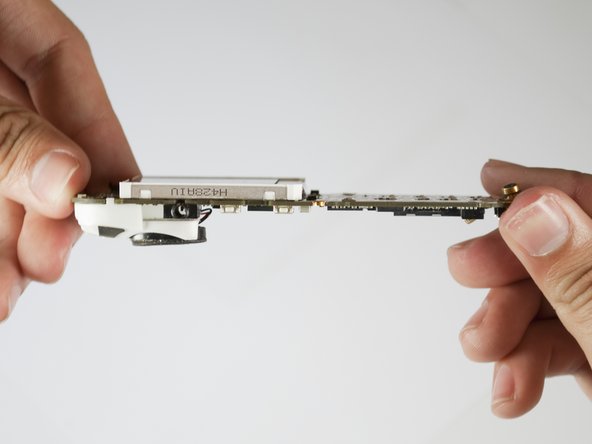
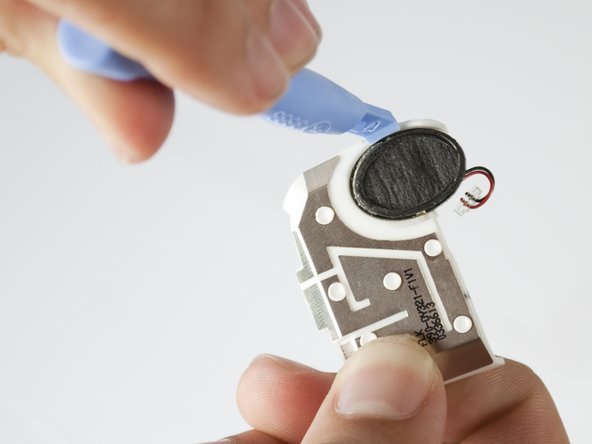
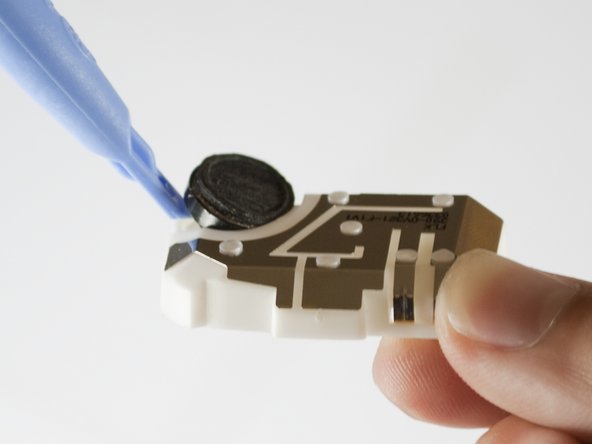
    • Use any small flat object to remove the speaker from the white plastic cover by wedging your tool between the speaker and the cover.

    • The speaker is attached by an adhesive so gently pry the speaker from the cover.

Conclusión

To reassemble your device, follow these instructions in reverse order.

Sutton Smiley

Miembro Desde 04/15/10

1 Reputación

1 Guía escrita

Equipo

Cal Poly, Team 28-29, Regan Spring 2010 Miembro de Cal Poly, Team 28-29, Regan Spring 2010

CPSU-REGAN-S10S28G29

4 Miembros

12 Guías creadas

0 comentarios

Agregar Comentario

Ver Estadísticas:

Ultimas 24 horas: 0

Ultimos 7 días: 0

Ultimos 30 días: 0

Todo El Tiempo: 1,744