Saltar al contenido principal

Samsung NX1000 Motherboard Replacement

Qué necesitas

  1. Samsung NX1000 Motherboard Replacement, Removing the Back Panel: paso 1, imagen 1 de 1
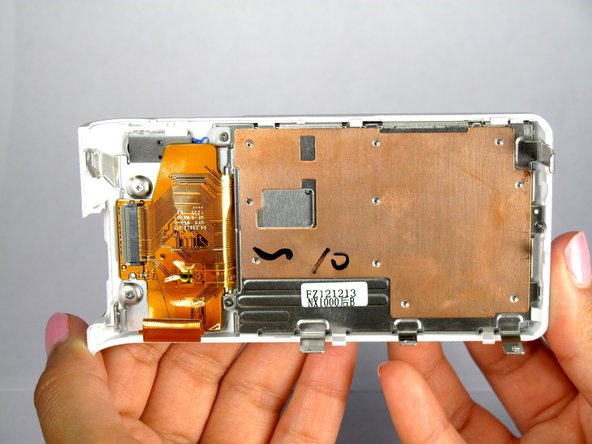
    • Locate the bottom panel of the camera.

    • Unscrew the four 4.5mm Philips #000 (perpendicular cross) screws with the Philips #000 screwdriver.

    • Push the screwdriver firmly into the screw so that the driver will not strip the screw.

  2. Samsung NX1000 Motherboard Replacement: paso 2, imagen 1 de 2 Samsung NX1000 Motherboard Replacement: paso 2, imagen 2 de 2
    • Unscrew the three 4.5mm #000 Philips screws on the sides of the camera using the Philips #000 screwdriver.

  3. Samsung NX1000 Motherboard Replacement: paso 3, imagen 1 de 2 Samsung NX1000 Motherboard Replacement: paso 3, imagen 2 de 2
    • Pry open the back panel using the metal spudger.

    • Do not completely separate the back panel from the camera. There is a ribbon on bottom left back corner underneath the buttons. The ribbon will hold the back panel to the camera. Do not jam the tool in this part or the ribbon will rip.

  4. Samsung NX1000 Motherboard Replacement: paso 4, imagen 1 de 2 Samsung NX1000 Motherboard Replacement: paso 4, imagen 2 de 2
    • Open the two halves of the camera, taking care not to disturb the ribbon cable.

    • Do not completely separate the halves. The ribbon cable needs to be disconnected from the ZIF connection carefully as shown in the next step

  5. Samsung NX1000 Motherboard Replacement: paso 5, imagen 1 de 3 Samsung NX1000 Motherboard Replacement: paso 5, imagen 2 de 3 Samsung NX1000 Motherboard Replacement: paso 5, imagen 3 de 3
    • Remove the ribbon by lifting the grey tab on the ZIF connector with the metal spudger.

    • Push the ribbon out of its socket with the plastic opening tool.

  6. Samsung NX1000 Motherboard Replacement: paso 6, imagen 1 de 2 Samsung NX1000 Motherboard Replacement: paso 6, imagen 2 de 2
    • Completely separate the back panel from the camera.

  7. Samsung NX1000 Motherboard Replacement, Motherboard: paso 7, imagen 1 de 3 Samsung NX1000 Motherboard Replacement, Motherboard: paso 7, imagen 2 de 3 Samsung NX1000 Motherboard Replacement, Motherboard: paso 7, imagen 3 de 3
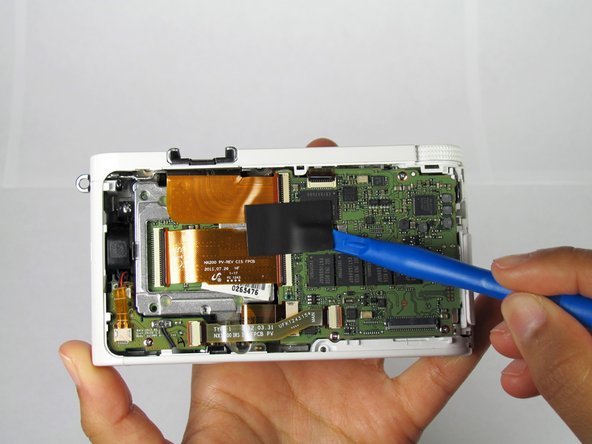
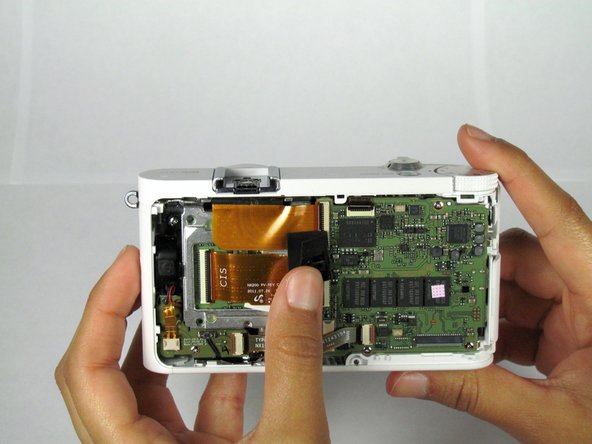
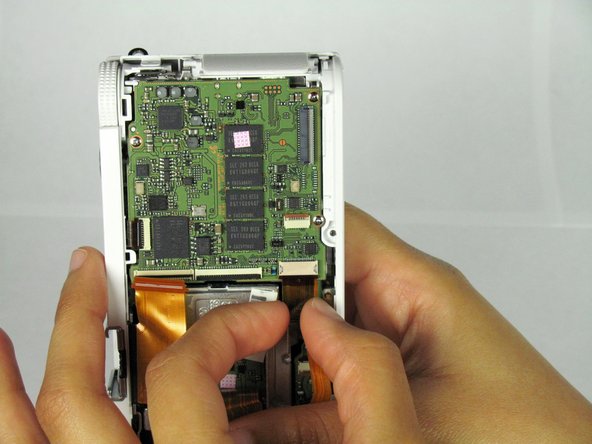
    • Remove the black rubber tape with the plastic opening tool and slowly peel it off.

  8. Samsung NX1000 Motherboard Replacement: paso 8, imagen 1 de 1
    • Disconnect the bottom ribbon by grasping the ribbon and wiggling it out gently from the connection.

  9. Samsung NX1000 Motherboard Replacement: paso 9, imagen 1 de 3 Samsung NX1000 Motherboard Replacement: paso 9, imagen 2 de 3 Samsung NX1000 Motherboard Replacement: paso 9, imagen 3 de 3
    • Open the ZIF connector on both of the larger ribbons by lifting the black latch with the plastic opening tool.

  10. Samsung NX1000 Motherboard Replacement: paso 10, imagen 1 de 2 Samsung NX1000 Motherboard Replacement: paso 10, imagen 2 de 2
    • Disconnect the bottom of the larger ribbons by gently wiggling it away from the ZIF connector.

  11. Samsung NX1000 Motherboard Replacement: paso 11, imagen 1 de 3 Samsung NX1000 Motherboard Replacement: paso 11, imagen 2 de 3 Samsung NX1000 Motherboard Replacement: paso 11, imagen 3 de 3
    • Disconnect the top of the larger ribbons by wiggling it out of the ZIF connector / prying the ribbon out with the plastic opening tool.

    • Make sure to remove this ribbon carefully. The ribbon is connected at the top right corner and can tear if not removed carefully.

  12. Samsung NX1000 Motherboard Replacement: paso 12, imagen 1 de 1
    • Hold back the ribbons to access the second smaller one at the bottom of the camera.

    • Slowly wiggle the ribbon out of the ZIF connection.

  13. Samsung NX1000 Motherboard Replacement: paso 13, imagen 1 de 1
    • Unscrew the three 4.5mm Philips #000 screws with the Philips #000 screwdriver.

  14. Samsung NX1000 Motherboard Replacement: paso 14, imagen 1 de 2 Samsung NX1000 Motherboard Replacement: paso 14, imagen 2 de 2
    • Using the plastic opening tool lift the motherboard up starting from the bottom left side.

  15. Samsung NX1000 Motherboard Replacement: paso 15, imagen 1 de 1
    • Pull out the board to the left, freeing the external ports from the plastic case.

    • Be careful when lifting the motherboard. There is one more ribbon cable to free before fully removing the board.

  16. Samsung NX1000 Motherboard Replacement: paso 16, imagen 1 de 2 Samsung NX1000 Motherboard Replacement: paso 16, imagen 2 de 2
    • Carefully place the motherboard back down to remove the last ribbon. Lift the black latch up from the ZIF connector of the last ribbon with the plastic opening tool.

  17. Samsung NX1000 Motherboard Replacement: paso 17, imagen 1 de 1
    • Slowly and carefully wiggle the ribbon out of the ZIF connection (Do this by holding the back of the ribbon).

Conclusión

To reassemble your device, follow these instructions in reverse order.

Una persona más ha completado esta guía.

Yesenia

Miembro Desde 01/22/15

717 Reputación

6 Guías creadas

Equipo

Cal Poly, Team 20-13, Maness Winter 2015 Miembro de Cal Poly, Team 20-13, Maness Winter 2015

CPSU-MANESS-W15S20G13

4 Miembros

14 Guías creadas

Un comentario

Is NX210 works the same way?

alhilal509 - Contestar

Agregar Comentario

Ver Estadísticas:

Ultimas 24 horas: 1

Ultimos 7 días: 6

Ultimos 30 días: 15

Todo El Tiempo: 2,681