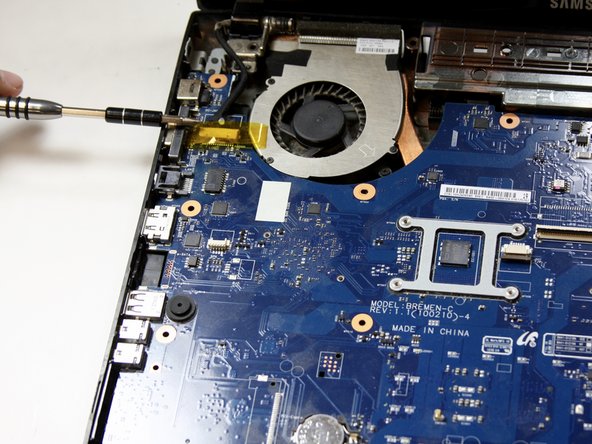
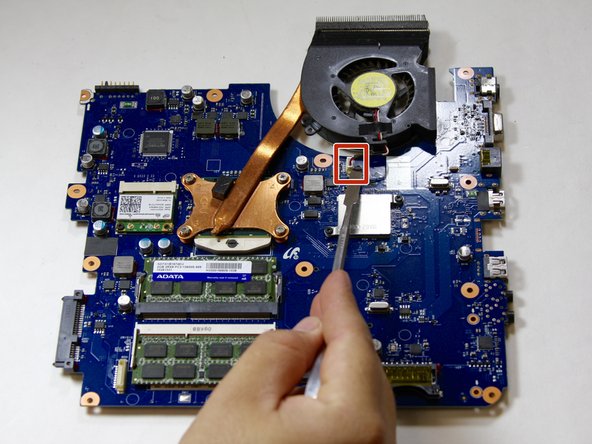
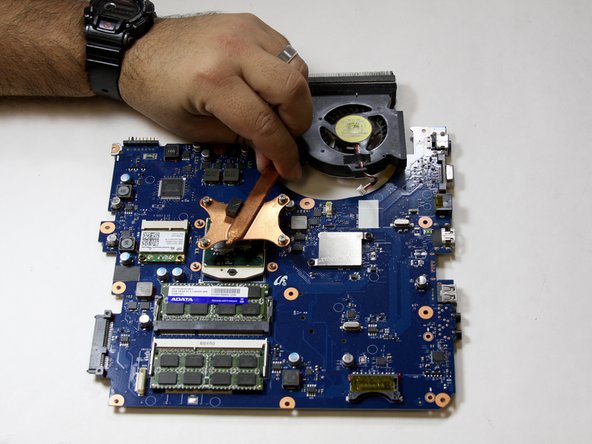
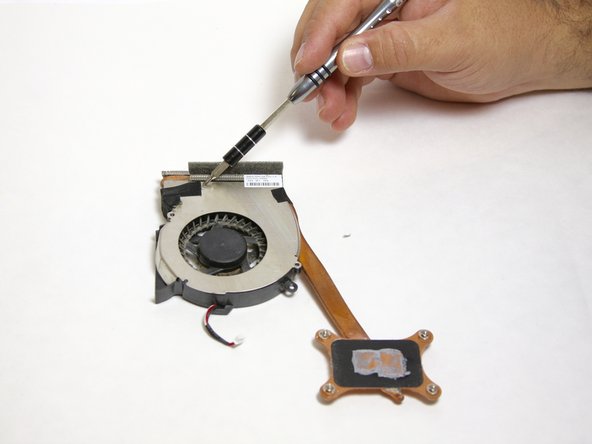
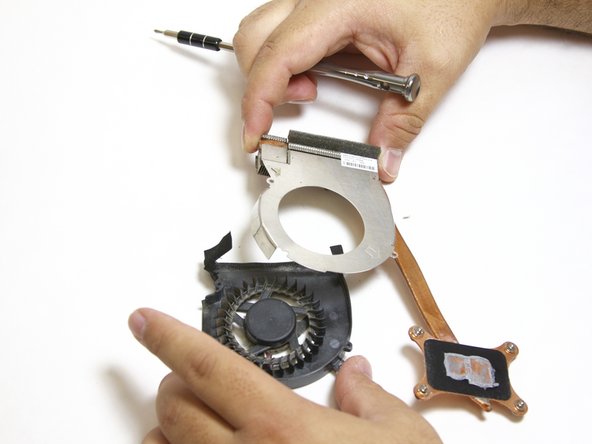
Saltar al contenido principal

Samsung NP R580 JBB2 Cooling Fan Replacement

Qué necesitas

  1. Samsung NP R580 JBB2 Cooling Fan Replacement, Cooling Fan: paso 1, imagen 1 de 3 Samsung NP R580 JBB2 Cooling Fan Replacement, Cooling Fan: paso 1, imagen 2 de 3 Samsung NP R580 JBB2 Cooling Fan Replacement, Cooling Fan: paso 1, imagen 3 de 3
    • Remove the battery by sliding the battery release latches laterally outward into the unlatched position.

    • Slide the battery upwards out of the battery housing.

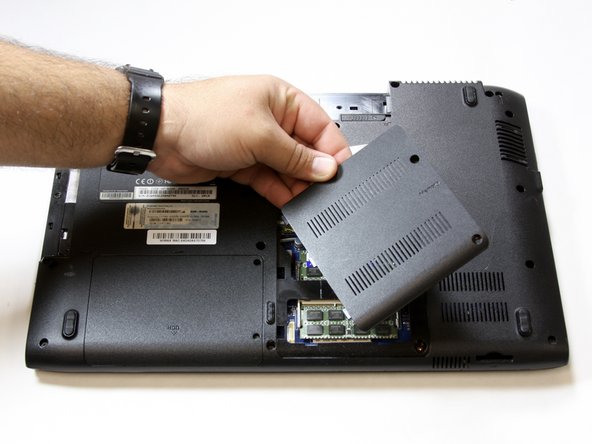
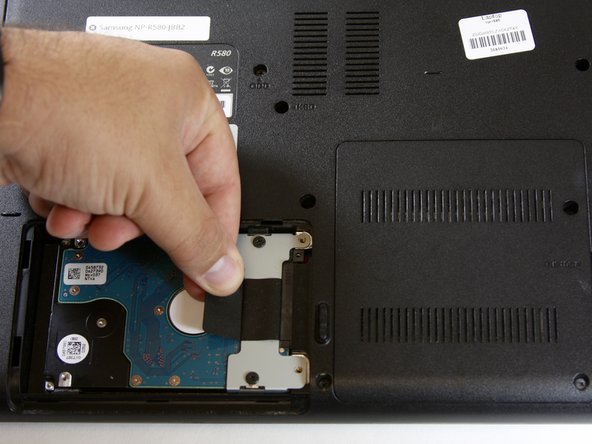
    • Remove the SD card placeholder.

  2. Samsung NP R580 JBB2 Cooling Fan Replacement: paso 2, imagen 1 de 3 Samsung NP R580 JBB2 Cooling Fan Replacement: paso 2, imagen 2 de 3 Samsung NP R580 JBB2 Cooling Fan Replacement: paso 2, imagen 3 de 3
    • Remove the 9mm Phillips head screw labeled "ODD."

    • Slide the DVD drive out of the body.

    • Remove the two 3mm Phillips head housing screws.

  3. Samsung NP R580 JBB2 Cooling Fan Replacement: paso 3, imagen 1 de 3 Samsung NP R580 JBB2 Cooling Fan Replacement: paso 3, imagen 2 de 3 Samsung NP R580 JBB2 Cooling Fan Replacement: paso 3, imagen 3 de 3
    • Remove the two 9mm Phillips head screws on the back plate labeled "memory."

    • Remove the back plate labeled "memory."

    • Disconnect the two gray connectors.

  4. Samsung NP R580 JBB2 Cooling Fan Replacement: paso 4, imagen 1 de 3 Samsung NP R580 JBB2 Cooling Fan Replacement: paso 4, imagen 2 de 3 Samsung NP R580 JBB2 Cooling Fan Replacement: paso 4, imagen 3 de 3
    • Remove the two 5mm Phillips head screws on the back plate labeled "HDD."

    • Remove the back plate to the hard drive by pulling downward and lifting away.

    • Pull laterally to the left on the black tab until it releases its connection and is able to be lifted free.

  5. Samsung NP R580 JBB2 Cooling Fan Replacement: paso 5, imagen 1 de 1
    • Remove the two 7mm Phillips head keyboard screws on the back plate labeled "KBD."

  6. Samsung NP R580 JBB2 Cooling Fan Replacement: paso 6, imagen 1 de 3 Samsung NP R580 JBB2 Cooling Fan Replacement: paso 6, imagen 2 de 3 Samsung NP R580 JBB2 Cooling Fan Replacement: paso 6, imagen 3 de 3
    • Open the computer and locate the three keyboard release tabs. Once located, use a flat metal device to pry the tabs open.

    • Lift the keyboard away to discover its ribbon connector beneath.

    • Lift the black portion of the connector to release the ribbon and set the keyboard aside.

  7. Samsung NP R580 JBB2 Cooling Fan Replacement: paso 7, imagen 1 de 2 Samsung NP R580 JBB2 Cooling Fan Replacement: paso 7, imagen 2 de 2
    • Disconnect the mouse pad ribbon connector by pulling the grey connector downwards toward the mouse-pad, freeing the ribbon.

    • Disconnect speaker wires by pulling it upwards toward the laptop screen.

  8. Samsung NP R580 JBB2 Cooling Fan Replacement: paso 8, imagen 1 de 1
    • Remove the sixteen 9mm Phillips head housing screws on the back plate.

  9. Samsung NP R580 JBB2 Cooling Fan Replacement: paso 9, imagen 1 de 1
    • Pry off the keyboard housing plate with the metal spudger and set aside.

  10. Samsung NP R580 JBB2 Cooling Fan Replacement: paso 10, imagen 1 de 2 Samsung NP R580 JBB2 Cooling Fan Replacement: paso 10, imagen 2 de 2
    • Disconnect the white USB drive plug by pulling outwards using a nylon spudger.

    • Disconnect the blue DVD player ribbon tab by pulling the blue tab outwards laterally away from the mother board using a nylon spudger.

    • Disconnect the screen connection wire by pulling it towards the screen using a nylon spudger.

  11. Samsung NP R580 JBB2 Cooling Fan Replacement: paso 11, imagen 1 de 1
    • Remove the three 5mm Phillips head screws on the motherboard and the one 5mm Phillips head screw on the fan.

    • All screws have white arrows pointing towards them.

  12. Samsung NP R580 JBB2 Cooling Fan Replacement: paso 12, imagen 1 de 2 Samsung NP R580 JBB2 Cooling Fan Replacement: paso 12, imagen 2 de 2
    • Work the motherboard out of the housing by lifting upwards.

    • Disconnect the fan's cord from the motherboard by pulling upwards on it.

  13. Samsung NP R580 JBB2 Cooling Fan Replacement: paso 13, imagen 1 de 3 Samsung NP R580 JBB2 Cooling Fan Replacement: paso 13, imagen 2 de 3 Samsung NP R580 JBB2 Cooling Fan Replacement: paso 13, imagen 3 de 3
    • Loosen the four self-retaining screws located on the copper cooling bar.

    • Lift and remove the fan.

  14. Samsung NP R580 JBB2 Cooling Fan Replacement: paso 14, imagen 1 de 3 Samsung NP R580 JBB2 Cooling Fan Replacement: paso 14, imagen 2 de 3 Samsung NP R580 JBB2 Cooling Fan Replacement: paso 14, imagen 3 de 3
    • Remove the three 3mm Phillips screws on the fan housing.

    • Peel the tape off of the fan housing.

    • Remove the fan from the cooling hardware.

Conclusión

To reassemble your device, follow these instructions in reverse order.

13 personas más completaron esta guía.

Brian Adamson

Miembro Desde 10/10/16

532 Reputación

3 Guías creadas

Equipo

Texas Tech, Team 6-2, Bennett Fall 2016 Miembro de Texas Tech, Team 6-2, Bennett Fall 2016

TTU-BENNETT-F16S6G2

4 Miembros

3 Guías creadas

2 comentarios

Hi where can I get a fan for my R580 Samsung laptop. Please help i have tried to find one but no luck!!! I stay in South Africa. Thanks

Deon Kotze - Contestar

Is it the same with its bigger brother, the NP R780?

Andreas M - Contestar

Agregar Comentario

Ver Estadísticas:

Ultimas 24 horas: 2

Ultimos 7 días: 5

Ultimos 30 días: 16

Todo El Tiempo: 3,875