Saltar al contenido principal

Samsung MV900F Flash Bulb Assembly Replacement

Qué necesitas

  1. Samsung MV900F Flash Bulb Assembly Replacement, Battery: paso 1, imagen 1 de 1
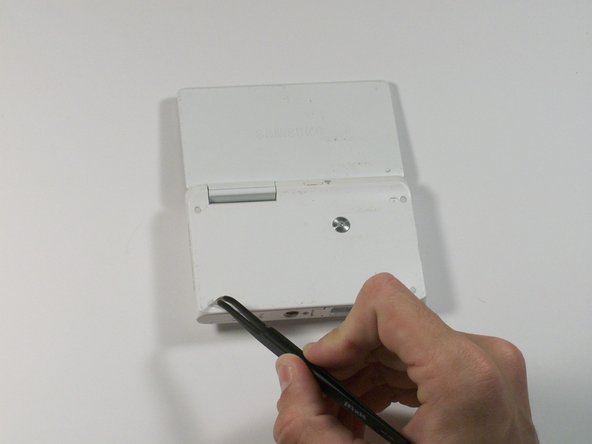
    • Slide the lock towards the middle of the camera, in the same direction of the arrow.

  2. Samsung MV900F Flash Bulb Assembly Replacement: paso 2, imagen 1 de 1
    • Push the blue battery holder up in the direction of the arrow.

  3. Samsung MV900F Flash Bulb Assembly Replacement: paso 3, imagen 1 de 1
    • Pull the battery out of the battery slot.

  4. Samsung MV900F Flash Bulb Assembly Replacement, Screen: paso 4, imagen 1 de 2 Samsung MV900F Flash Bulb Assembly Replacement, Screen: paso 4, imagen 2 de 2
    • Use tweezers to remove the four rubber screw covers.

  5. Samsung MV900F Flash Bulb Assembly Replacement: paso 5, imagen 1 de 2 Samsung MV900F Flash Bulb Assembly Replacement: paso 5, imagen 2 de 2
    • Remove the four Phillips 2.381 mm screws on back side of camera and one Phillips 2.381 mm screw on the bottom of the camera, using a Phillips #00 screwdriver.

  6. Samsung MV900F Flash Bulb Assembly Replacement: paso 6, imagen 1 de 1
    • Remove the back casing by just carefully pulling the casing off of the camera.

  7. Samsung MV900F Flash Bulb Assembly Replacement: paso 7, imagen 1 de 1
    • Use the Phillips #00 screw driver to remove the four 2.381 mm screws next to the screen hinge.

  8. Samsung MV900F Flash Bulb Assembly Replacement: paso 8, imagen 1 de 1
    • Use plastic opening tool to disconnect screen connector from the control board.

  9. Samsung MV900F Flash Bulb Assembly Replacement: paso 9, imagen 1 de 1
    • Remove the old screen.

  10. Samsung MV900F Flash Bulb Assembly Replacement, Lens Assembly: paso 10, imagen 1 de 1
    • Remove the 2.381 mm screw with a Phillips #00 screwdriver.

  11. Samsung MV900F Flash Bulb Assembly Replacement: paso 11, imagen 1 de 1
    • Use the plastic opening tool to remove the silver metal lens cover.

  12. Samsung MV900F Flash Bulb Assembly Replacement: paso 12, imagen 1 de 1
    • Use the tweezers to remove the black electrical tape covering the copper connector to the control board.

  13. Samsung MV900F Flash Bulb Assembly Replacement: paso 13, imagen 1 de 1
    • From the front of the camera, push the lens through the back of the camer.a

  14. Samsung MV900F Flash Bulb Assembly Replacement: paso 14, imagen 1 de 2 Samsung MV900F Flash Bulb Assembly Replacement: paso 14, imagen 2 de 2
    • Use a pair of tweezers to flip up the black retaining bar on each of the two ZIF connectors.

  15. Samsung MV900F Flash Bulb Assembly Replacement: paso 15, imagen 1 de 2 Samsung MV900F Flash Bulb Assembly Replacement: paso 15, imagen 2 de 2
    • Remove the lens assembly from the camera.

  16. Samsung MV900F Flash Bulb Assembly Replacement, Flash Bulb Assembly: paso 16, imagen 1 de 1
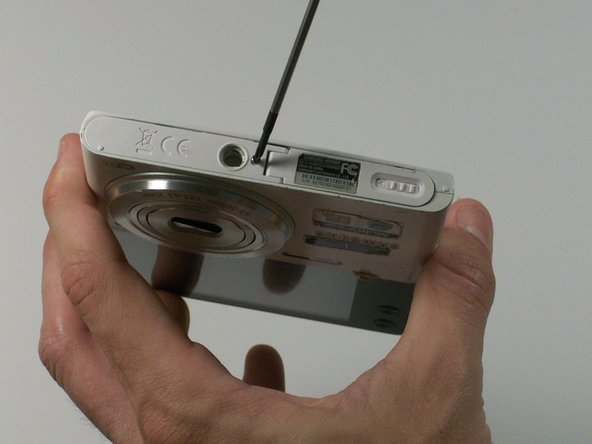
    • Remove the 2.381 mm screw that is holding the copper to the control board with a Phillips #00 screw driver.

  17. Samsung MV900F Flash Bulb Assembly Replacement: paso 17, imagen 1 de 1
    • Use tweezers to pull copper connector from the control board.

  18. Samsung MV900F Flash Bulb Assembly Replacement: paso 18, imagen 1 de 1
    • Use the plastic opening tool to pry the control board up, thus allowing the flash bulb assembly to be removed.

  19. Samsung MV900F Flash Bulb Assembly Replacement: paso 19, imagen 1 de 1
    • Beginning with the battery on the side, gently pull upwards to remove the entire flash bulb assembly.

Conclusión

To reassemble your device, follow these instructions in reverse order.

Justin Smith

Miembro Desde 03/03/15

110 Reputación

1 Guía escrita

0 comentarios

Agregar Comentario

Ver Estadísticas:

Ultimas 24 horas: 1

Ultimos 7 días: 2

Ultimos 30 días: 7

Todo El Tiempo: 286