Esta versión puede contener ediciones incorrectas. Cambie a la última instantánea verificada.
Qué necesitas
-
Este paso está sin traducir. Ayuda a traducirlo
-
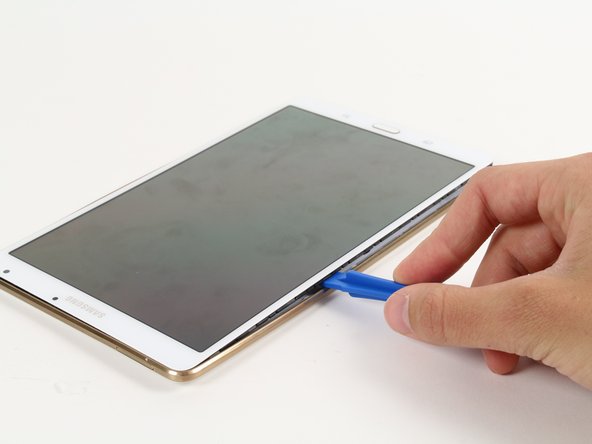
Place the plastic opening tool between the face of the display and rim of the back cover of the device.
-
Move the plastic opening tool in a downward motion until you see separation between the tablet and back cover.
-
-
Este paso está sin traducir. Ayuda a traducirlo
-
By sliding the plastic opening tool around the rim of the device, carefully continue to pry apart the screen and back cover.
-
-
Este paso está sin traducir. Ayuda a traducirlo
-
Remove the back cover after the entire rim is disconnected.
-
-
-
Este paso está sin traducir. Ayuda a traducirlo
-
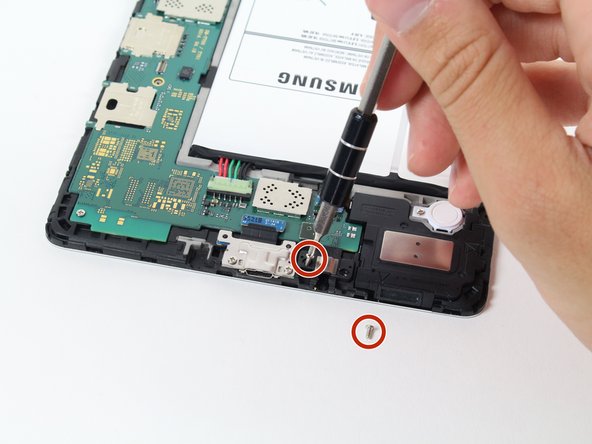
Remove the two 2 mm Phillips #000 securing the headphone jack.
-
-
Este paso está sin traducir. Ayuda a traducirlo
-
Disconnect the blue connector by gently popping it off of the motherboard with a plastic opening tool.
-
-
Este paso está sin traducir. Ayuda a traducirlo
-
Use the metal spudger to pry from the top left corner of the headphone jack/lower speaker assembly.
-
Gently lift the headphone jack/lower speaker assembly free of the device.
-
-
Este paso está sin traducir. Ayuda a traducirlo
-
Locate the top speaker.
-
Use a plastic opening tool to disconnect the green-gold upper speaker connector from the motherboard.
-
-
Este paso está sin traducir. Ayuda a traducirlo
-
Use a spudger to pry the uper speaker up and away from the device.
-


Cancelar: No complete esta guía.
8 personas más completaron esta guía.
Equipo

Cal Poly, Team 12-15, Maness Fall 2015 Miembro de Cal Poly, Team 12-15, Maness Fall 2015
CPSU-MANESS-F15S12G15
4 Miembros
12 Guías creadas