Saltar al contenido principal

Samsung Galaxy Tab E Lite 7 Kids Charging Port Replacement

Qué necesitas

  1. Samsung Galaxy Tab E Lite 7 Kids Charging Port Replacement, Rear Case: paso 1, imagen 1 de 3 Samsung Galaxy Tab E Lite 7 Kids Charging Port Replacement, Rear Case: paso 1, imagen 2 de 3 Samsung Galaxy Tab E Lite 7 Kids Charging Port Replacement, Rear Case: paso 1, imagen 3 de 3
    • Make sure the device is turned off before attempting to disassemble it.

    • Using a plastic opening tool, wedge in the seam between the screen and the case.

    • Rock the tool by moving it towards and away from the middle of the screen, trying to separate the tape holding the screen and case together.

  2. Samsung Galaxy Tab E Lite 7 Kids Charging Port Replacement: paso 2, imagen 1 de 2 Samsung Galaxy Tab E Lite 7 Kids Charging Port Replacement: paso 2, imagen 2 de 2
    • After separating the latches holding the screen and case together, slowly take the screen off the case.

  3. Samsung Galaxy Tab E Lite 7 Kids Charging Port Replacement, Motherboard: paso 3, imagen 1 de 3 Samsung Galaxy Tab E Lite 7 Kids Charging Port Replacement, Motherboard: paso 3, imagen 2 de 3 Samsung Galaxy Tab E Lite 7 Kids Charging Port Replacement, Motherboard: paso 3, imagen 3 de 3
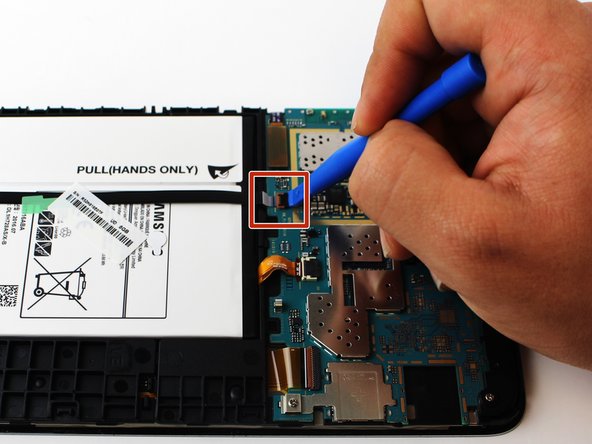
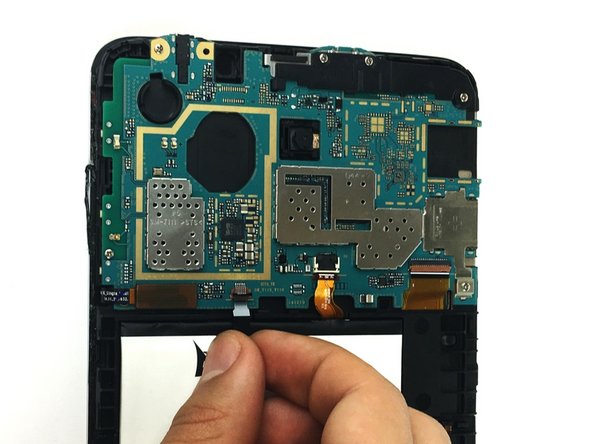
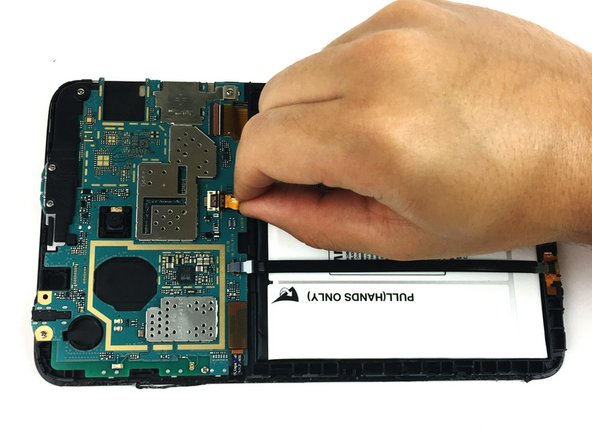
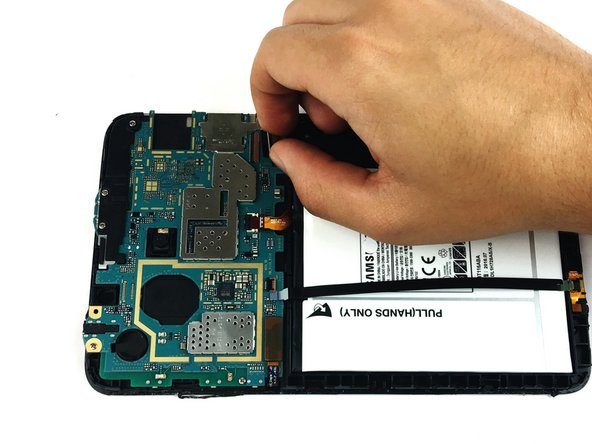
    • Use the plastic opening tool to lift up the black ZIF (zero insertion force) connector.

    • Use your hands to pull the black cable out of its slot.

  4. Samsung Galaxy Tab E Lite 7 Kids Charging Port Replacement: paso 4, imagen 1 de 2 Samsung Galaxy Tab E Lite 7 Kids Charging Port Replacement: paso 4, imagen 2 de 2
    • Use the plastic opening tool to lift the ZIF (zero insertion force) connector holding the ribbon cable.

    • Pull out the battery's ribbon cable.

  5. Samsung Galaxy Tab E Lite 7 Kids Charging Port Replacement: paso 5, imagen 1 de 2 Samsung Galaxy Tab E Lite 7 Kids Charging Port Replacement: paso 5, imagen 2 de 2
    • Use the plastic opening tool to lift up the latch to the ribbon cable.

    • Remove the ribbon cable from the connector.

  6. Samsung Galaxy Tab E Lite 7 Kids Charging Port Replacement: paso 6, imagen 1 de 1
    • Remove the seven 4mm PH000 screws holding the motherboard in place.

  7. Samsung Galaxy Tab E Lite 7 Kids Charging Port Replacement: paso 7, imagen 1 de 1
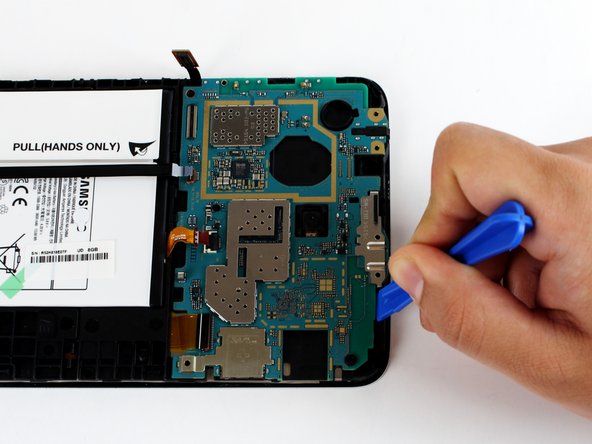
    • Use the plastic opening tool to pry up the tab holding the motherboard in place.

  8. Samsung Galaxy Tab E Lite 7 Kids Charging Port Replacement: paso 8, imagen 1 de 3 Samsung Galaxy Tab E Lite 7 Kids Charging Port Replacement: paso 8, imagen 2 de 3 Samsung Galaxy Tab E Lite 7 Kids Charging Port Replacement: paso 8, imagen 3 de 3
    • Use the precision tweezers to remove the black plastic corner on top of the motherboard.

    • Use the plastic opening tool to pull the motherboard out of the case.

  9. Samsung Galaxy Tab E Lite 7 Kids Charging Port Replacement, Charging Port: paso 9, imagen 1 de 2 Samsung Galaxy Tab E Lite 7 Kids Charging Port Replacement, Charging Port: paso 9, imagen 2 de 2
    • Use a soldering iron to heat 4 spots of solder from the motherboard.

    • To learn more about soldering, check out iFixit's soldering technique guide.

    • Use precision tweezers to remove the charging port.

Conclusión

To reassemble your device, follow these instructions in reverse order.

Una persona más ha completado esta guía.

Equipo

USF Tampa, Team S19-G2, Hoffman Spring 2017 Miembro de USF Tampa, Team S19-G2, Hoffman Spring 2017

USFT-HOFFMAN-S17S19G2

4 Miembros

7 Guías creadas

0 comentarios

Agregar Comentario

Ver Estadísticas:

Ultimas 24 horas: 1

Ultimos 7 días: 1

Ultimos 30 días: 11

Todo El Tiempo: 6,565