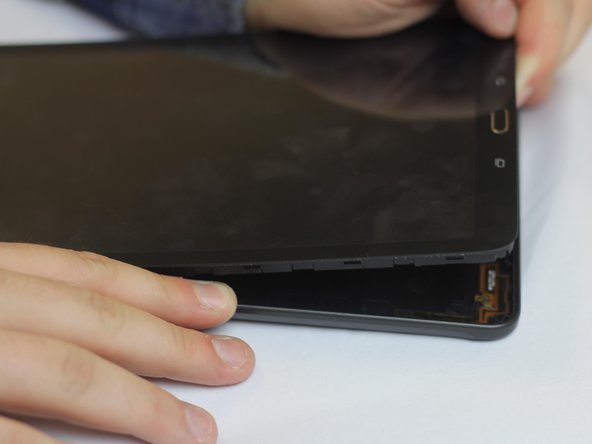
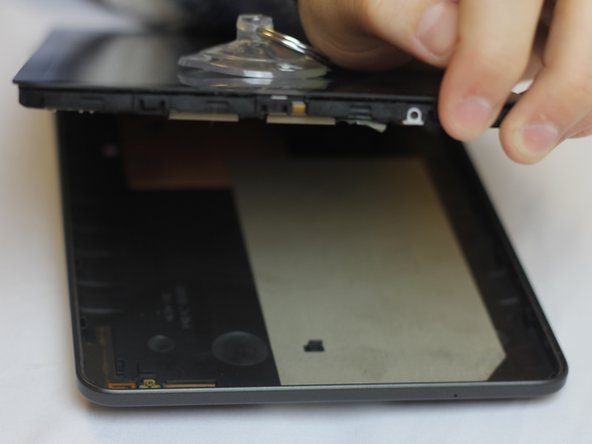
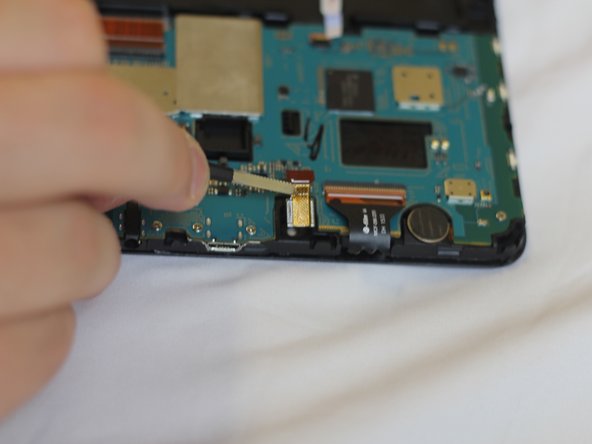
Saltar al contenido principal

Samsung Galaxy Tab E 9.6 Verizon Front Camera Replacement

Qué necesitas

  1. Samsung Galaxy Tab E 9.6 Verizon Front Camera Replacement, Back Casing: paso 1, imagen 1 de 1
    • Remove any micro-SD or SIM cards before continuing.

    • Verify your device is turned OFF.

    • Disconnect all external devices from your tablet.

  2. Samsung Galaxy Tab E 9.6 Verizon Front Camera Replacement: paso 2, imagen 1 de 3 Samsung Galaxy Tab E 9.6 Verizon Front Camera Replacement: paso 2, imagen 2 de 3 Samsung Galaxy Tab E 9.6 Verizon Front Camera Replacement: paso 2, imagen 3 de 3
    • Insert the plastic opening tool by wedging it between the device's screen and back cover.

    • Move the plastic tool around the edges of the device to undo the plastic lips holding the casing together.

    • This step may require more force than expected. If difficult, try using a suction cup on the screen.

  3. Samsung Galaxy Tab E 9.6 Verizon Front Camera Replacement: paso 3, imagen 1 de 3 Samsung Galaxy Tab E 9.6 Verizon Front Camera Replacement: paso 3, imagen 2 de 3 Samsung Galaxy Tab E 9.6 Verizon Front Camera Replacement: paso 3, imagen 3 de 3
    • This process will become easier as more clips are separated.

    • Use your hands to gently pull the back cover off the device after about half of the clips are separated.

    • A suction cup can be used in this step as well to assist in pulling the device apart.

  4. Samsung Galaxy Tab E 9.6 Verizon Front Camera Replacement, Front Camera: paso 4, imagen 1 de 1
    • The front camera is located at the top, middle of the motherboard. The red rectangle in the image to the left depicts its location.

  5. Samsung Galaxy Tab E 9.6 Verizon Front Camera Replacement: paso 5, imagen 1 de 3 Samsung Galaxy Tab E 9.6 Verizon Front Camera Replacement: paso 5, imagen 2 de 3 Samsung Galaxy Tab E 9.6 Verizon Front Camera Replacement: paso 5, imagen 3 de 3
    • Remove the ribbon wires connecting the camera to the motherboard by using tweezers to flip the black latch away from the camera (towards the bottom of the tablet).

    • Carefully pull the camera out.

Conclusión

To reassemble your device, follow these instructions in reverse order.

Equipo

USF Tampa, Team 1-4, Cagle Fall 2016 Miembro de USF Tampa, Team 1-4, Cagle Fall 2016

USFT-CAGLE-F16S1G4

3 Miembros

14 Guías creadas

0 comentarios

Agregar Comentario

Ver Estadísticas:

Ultimas 24 horas: 2

Ultimos 7 días: 4

Ultimos 30 días: 4

Todo El Tiempo: 722