Esta versión puede contener ediciones incorrectas. Cambie a la última instantánea verificada.
Qué necesitas
-
Este paso está sin traducir. Ayuda a traducirlo
-
Start out by separating the screen from the back cover using the larger plastic opening tool to pry them apart.
-
-
Este paso está sin traducir. Ayuda a traducirlo
-
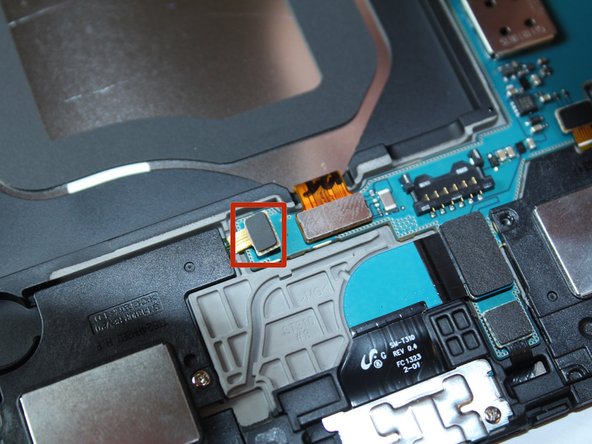
To remove the battery you must use something small, such as tweezers, to disconnect the battery from its port.
-
-
Este paso está sin traducir. Ayuda a traducirlo
-
After the battery is disconnected, use the pulling tab to safely remove the battery.
-
-
Este paso está sin traducir. Ayuda a traducirlo
-
Unscrew the 2.9mm screws from the speakers using a Phillips head #000 screwdriver, then lift the speakers from the device.
-


Cancelar: No complete esta guía.
4 personas más completaron esta guía.
Equipo

USF Tampa, Team 4-2, Brown Fall 2014 Miembro de USF Tampa, Team 4-2, Brown Fall 2014
USFT-BROWN-F14S4G2
3 Miembros
26 Guías creadas