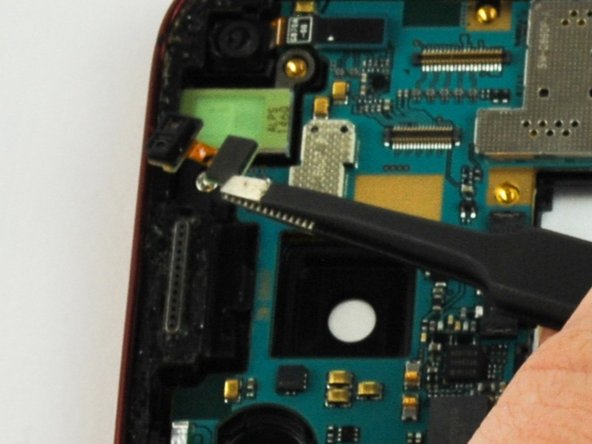
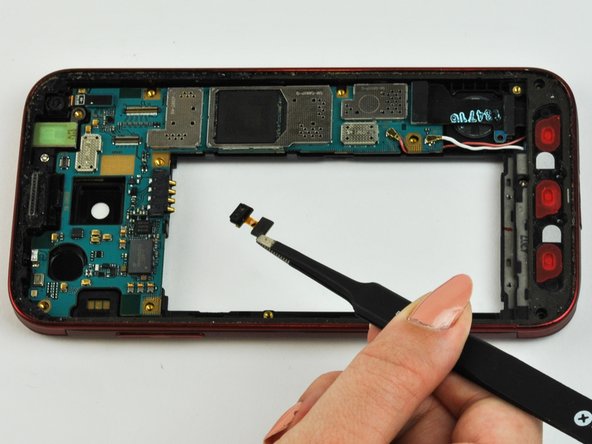
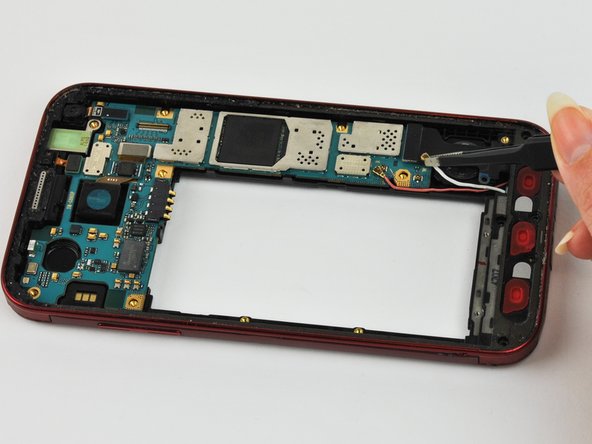
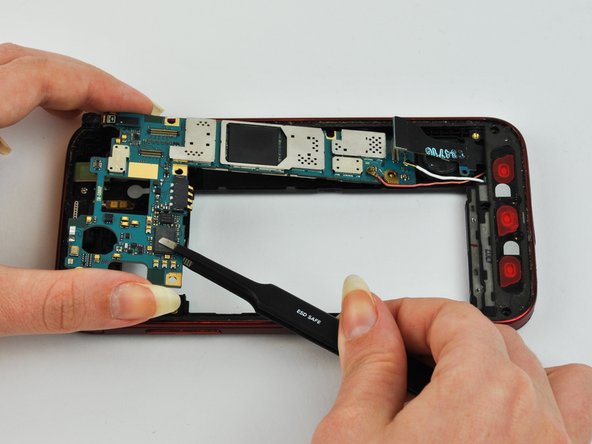
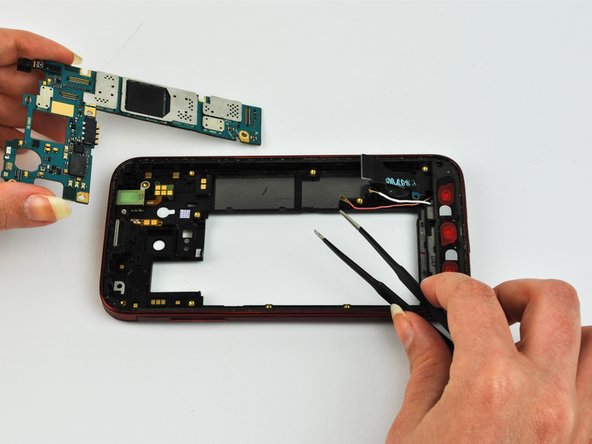
Saltar al contenido principal

Samsung Galaxy S5 Sport Motherboard Replacement

Qué necesitas

  1. Samsung Galaxy S5 Sport Motherboard Replacement, Battery: paso 1, imagen 1 de 3 Samsung Galaxy S5 Sport Motherboard Replacement, Battery: paso 1, imagen 2 de 3 Samsung Galaxy S5 Sport Motherboard Replacement, Battery: paso 1, imagen 3 de 3
    • Remove the back casing of the phone using the notch located at the top.

  2. Samsung Galaxy S5 Sport Motherboard Replacement: paso 2, imagen 1 de 3 Samsung Galaxy S5 Sport Motherboard Replacement: paso 2, imagen 2 de 3 Samsung Galaxy S5 Sport Motherboard Replacement: paso 2, imagen 3 de 3
    • Lift up the battery using a plastic spudger or fingernail.

    • Damaging the battery may result in physical injury and/or damage to the phone.

  3. Samsung Galaxy S5 Sport Motherboard Replacement, Screen: paso 3, imagen 1 de 3 Samsung Galaxy S5 Sport Motherboard Replacement, Screen: paso 3, imagen 2 de 3 Samsung Galaxy S5 Sport Motherboard Replacement, Screen: paso 3, imagen 3 de 3
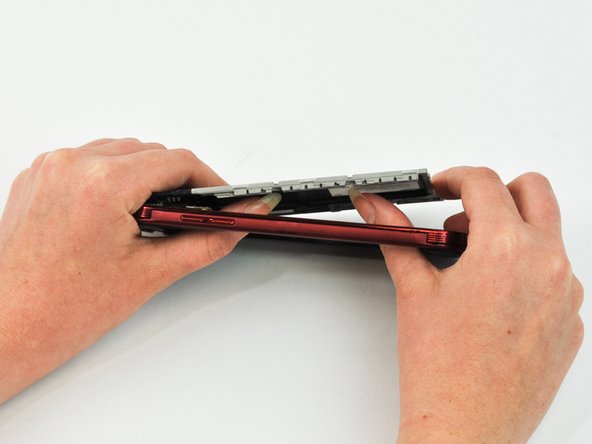
    • Using a plastic opening tool or spudger, pry up the screen after the adhesive has melted.

    • When working with electronics, it's important to choose a tool that's ESD-safe to avoid accidental damage to the device. The metal spudger is great when you need serious prying power, but the regular black nylon spudger or a plastic opening tool should be used whenever possible.

    • Because it is a water-resistant phone, the screen cannot be taken apart without breaking.

  4. Samsung Galaxy S5 Sport Motherboard Replacement: paso 4, imagen 1 de 2 Samsung Galaxy S5 Sport Motherboard Replacement: paso 4, imagen 2 de 2
    • The plastic cover of the phone may separate from the LCD screen. If so, also remove the LCD screen with the regular nylon spudger.

    • In the upper right area of the LCD screen, there is a connecting ribbon. Be careful not to rip its connection to the motherboard.

    • Do not hold the phone too close to your face or eyes. Small glass shards may dislodge or the metal spudger may slip.

  5. Samsung Galaxy S5 Sport Motherboard Replacement, Front-Facing Camera: paso 5, imagen 1 de 3 Samsung Galaxy S5 Sport Motherboard Replacement, Front-Facing Camera: paso 5, imagen 2 de 3 Samsung Galaxy S5 Sport Motherboard Replacement, Front-Facing Camera: paso 5, imagen 3 de 3
    • Remove the screws around the plate

  6. Samsung Galaxy S5 Sport Motherboard Replacement: paso 6, imagen 1 de 3 Samsung Galaxy S5 Sport Motherboard Replacement: paso 6, imagen 2 de 3 Samsung Galaxy S5 Sport Motherboard Replacement: paso 6, imagen 3 de 3
    • Push the plate out by applying pressure to the battery cavity.

  7. Samsung Galaxy S5 Sport Motherboard Replacement: paso 7, imagen 1 de 3 Samsung Galaxy S5 Sport Motherboard Replacement: paso 7, imagen 2 de 3 Samsung Galaxy S5 Sport Motherboard Replacement: paso 7, imagen 3 de 3
    • Remove the camera from the plug at the top of the phone with tweezers. It should pop out fairly easily.

  8. Samsung Galaxy S5 Sport Motherboard Replacement, Motherboard: paso 8, imagen 1 de 3 Samsung Galaxy S5 Sport Motherboard Replacement, Motherboard: paso 8, imagen 2 de 3 Samsung Galaxy S5 Sport Motherboard Replacement, Motherboard: paso 8, imagen 3 de 3
    • Push the plate out by applying pressure to the battery cavity.

  9. Samsung Galaxy S5 Sport Motherboard Replacement: paso 9, imagen 1 de 2 Samsung Galaxy S5 Sport Motherboard Replacement: paso 9, imagen 2 de 2
    • Detach the pink and white wires by pulling gently on the metallic caps that connect them to the motherboard.

  10. Samsung Galaxy S5 Sport Motherboard Replacement: paso 10, imagen 1 de 2 Samsung Galaxy S5 Sport Motherboard Replacement: paso 10, imagen 2 de 2
    • Remove the black connector above the wires by pulling straight up with tweezers.

  11. Samsung Galaxy S5 Sport Motherboard Replacement: paso 11, imagen 1 de 3 Samsung Galaxy S5 Sport Motherboard Replacement: paso 11, imagen 2 de 3 Samsung Galaxy S5 Sport Motherboard Replacement: paso 11, imagen 3 de 3
    • Pull the motherboard out. It should lift easily out of the phone.

Conclusión

To reassemble your device, follow these instructions in reverse order.

Una persona más ha completado esta guía.

Equipo

USF Tampa, Team 1-6, Leahy Spring 2016 Miembro de USF Tampa, Team 1-6, Leahy Spring 2016

USFT-LEAHY-S16S1G6

3 Miembros

10 Guías creadas

0 comentarios

Agregar Comentario

Ver Estadísticas:

Ultimas 24 horas: 0

Ultimos 7 días: 0

Ultimos 30 días: 2

Todo El Tiempo: 1,536