Saltar al contenido principal

Samsung Galaxy S5 Charging Port Replacement

Guía Archivada
Esta guía se mantiene únicamente para fines históricos. Utiliza la última versión de la guía para llevar a cabo tu reparación.

Qué necesitas

  1. Samsung Galaxy S5 Charging Port Replacement, Battery: paso 1, imagen 1 de 3 Samsung Galaxy S5 Charging Port Replacement, Battery: paso 1, imagen 2 de 3 Samsung Galaxy S5 Charging Port Replacement, Battery: paso 1, imagen 3 de 3
    • Remove the rear case by using moderate force to pry the divot on the left of the rear facing camera with a plastic opening tool or your fingernail.

    • Continue to lift the case, working your way around the perimeter until the entire rear cover is removed.

  2. Samsung Galaxy S5 Charging Port Replacement: paso 2, imagen 1 de 2 Samsung Galaxy S5 Charging Port Replacement: paso 2, imagen 2 de 2
    • Lift the battery upward with your finger or plastic opening tool by pushing on the notch located on the bottom of the battery.

    • Remove the battery from the phone.

  3. Samsung Galaxy S5 Charging Port Replacement, microSD Card: paso 3, imagen 1 de 3 Samsung Galaxy S5 Charging Port Replacement, microSD Card: paso 3, imagen 2 de 3 Samsung Galaxy S5 Charging Port Replacement, microSD Card: paso 3, imagen 3 de 3
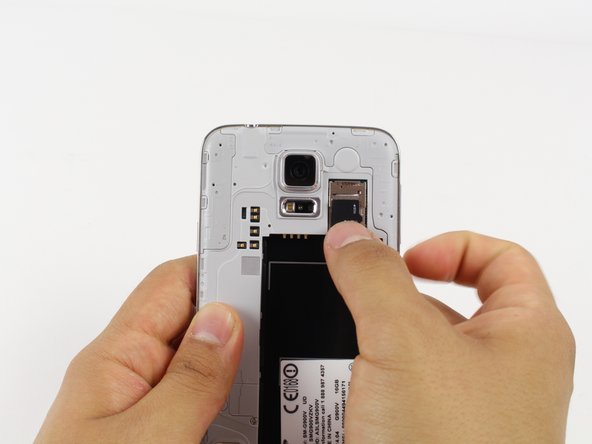
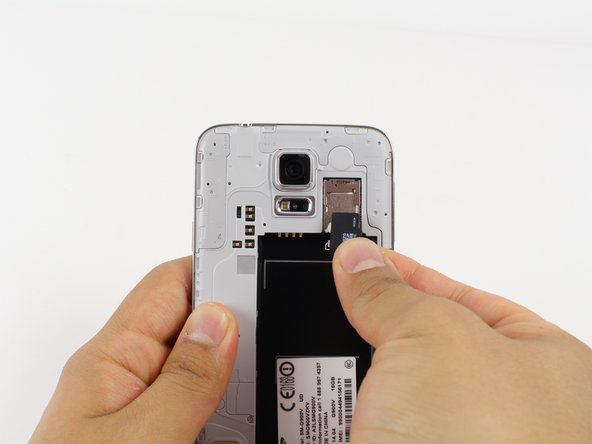
    • Gently slide out the SD card using your fingernail or a plastic opening tool.

    • For reassembly, gently slide in the microSD card until it stops.

  4. Samsung Galaxy S5 Charging Port Replacement, Screen: paso 4, imagen 1 de 3 Samsung Galaxy S5 Charging Port Replacement, Screen: paso 4, imagen 2 de 3 Samsung Galaxy S5 Charging Port Replacement, Screen: paso 4, imagen 3 de 3
    • Removing the screen will cause your device to be less water-resistant.

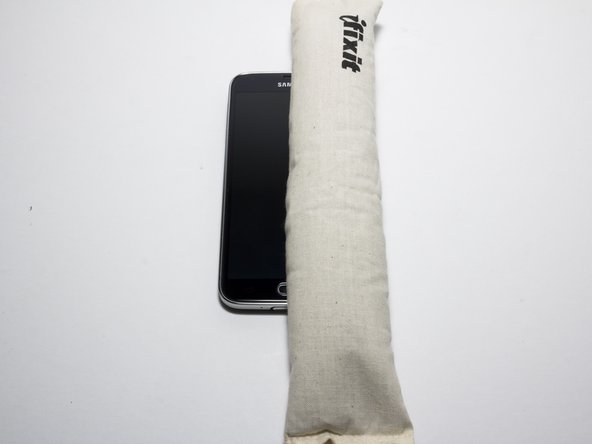
    • There are many ways to remove the adhesive from the screen. You could use a heatgun, blow dryer, or the iOpener. We used an iOpener.

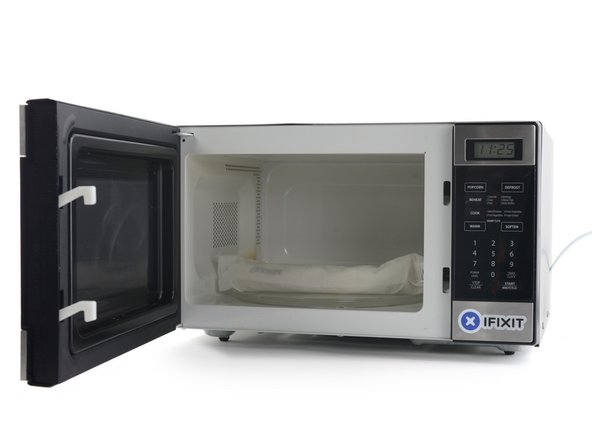
    • We recommend that you clean your microwave before proceeding, as any nasty gunk on the bottom may end up stuck to the iOpener.

    • Place the iOpener in the center of the microwave.

    • For carousel microwaves: Make sure the plate spins freely, if your iOpener gets stuck it may overheat and burn.

    • If you have not used your iOpener for some time, or this is the first time you are using the iOpener, microwave it wrapped in a damp paper towel. This will prevent it from burning if it is overheated.

  5. Samsung Galaxy S5 Charging Port Replacement: paso 5, imagen 1 de 1
    • Heat the iOpener for one minute on the highest power setting.

    • Be careful not to overheat the iOpener during the repair procedure. Wait at least two minutes before reheating the iOpener.

  6. Samsung Galaxy S5 Charging Port Replacement: paso 6, imagen 1 de 1
    • The bag will be very hot, so be careful when handling it. Use an oven mitt if necessary.

    • Remove the iOpener from the microwave, holding it by the printed tag.

  7. Samsung Galaxy S5 Charging Port Replacement: paso 7, imagen 1 de 3 Samsung Galaxy S5 Charging Port Replacement: paso 7, imagen 2 de 3 Samsung Galaxy S5 Charging Port Replacement: paso 7, imagen 3 de 3
    • Throughout this procedure you may need to reheat the iOpener. To prevent overheating the iOpener, always wait at least two minutes before microwaving again. Do not microwave the iOpener for more than one minute at a time.

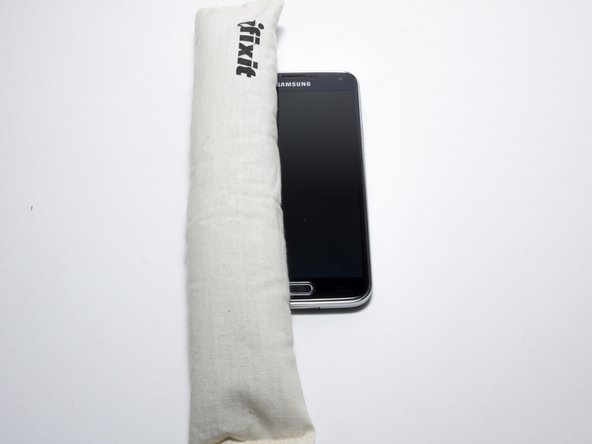
    • Lay the iOpener flat on the bottom of the device, directly over the home button. Smooth the iOpener along the surface to ensure good contact with the device. Leave the bag on the device for around 90 seconds.

    • Repeat the process laying the bag on the left and right edge of the screen.

  8. Samsung Galaxy S5 Charging Port Replacement: paso 8, imagen 1 de 2 Samsung Galaxy S5 Charging Port Replacement: paso 8, imagen 2 de 2
    • Use a light amount of force when removing the screen.

    • A black ribbon cable attaching the display to the motherboard and a black cable attaching the home button to the motherboard will be damaged if you force the screen off.

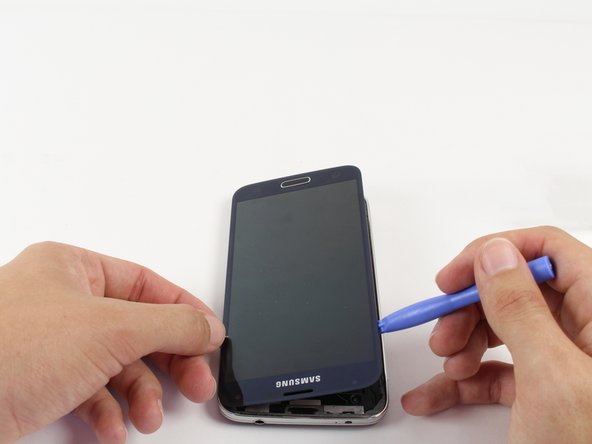
    • Starting at the top of the device, work the plastic opening tool under the screen. The top of the device has the Samsung logo and headphone port.

    • Start separating the screen from the glue. Work your way around the screen until the glue is no longer holding the screen in place.

    • The screen will not come off completely yet, there are still cables attaching it to the phone.

  9. Samsung Galaxy S5 Charging Port Replacement: paso 9, imagen 1 de 3 Samsung Galaxy S5 Charging Port Replacement: paso 9, imagen 2 de 3 Samsung Galaxy S5 Charging Port Replacement: paso 9, imagen 3 de 3
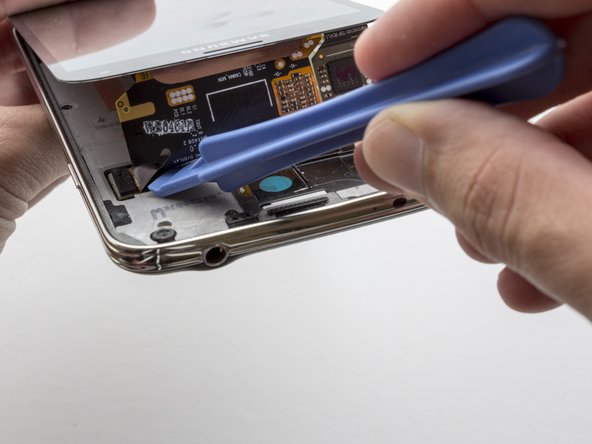
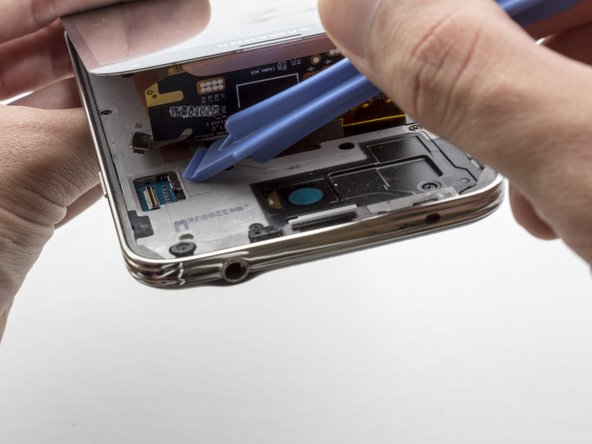
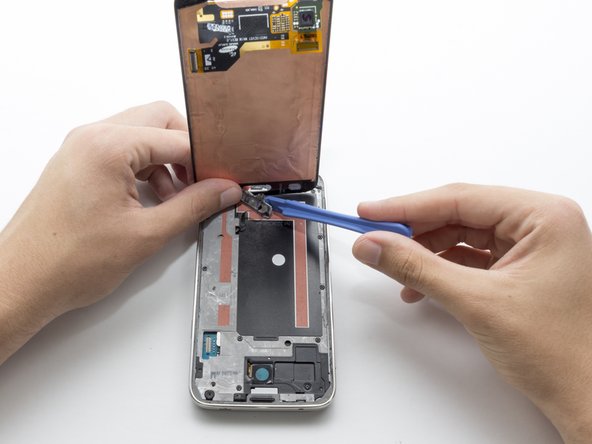
    • Start lifting the screen from the top. You will see a black ribbon cable attaching the display to the motherboard. Use the plastic opening tool to lightly detach the connector.

  10. Samsung Galaxy S5 Charging Port Replacement: paso 10, imagen 1 de 3 Samsung Galaxy S5 Charging Port Replacement: paso 10, imagen 2 de 3 Samsung Galaxy S5 Charging Port Replacement: paso 10, imagen 3 de 3
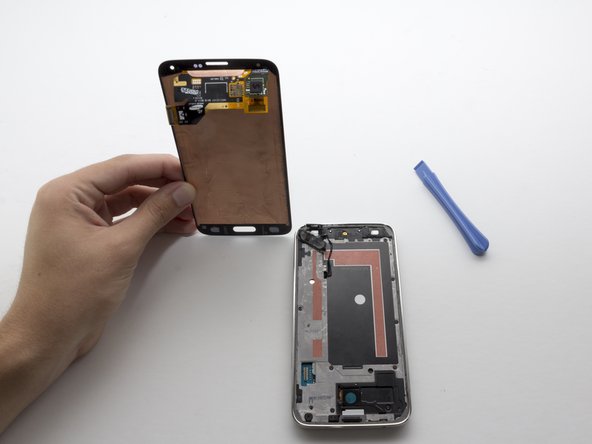
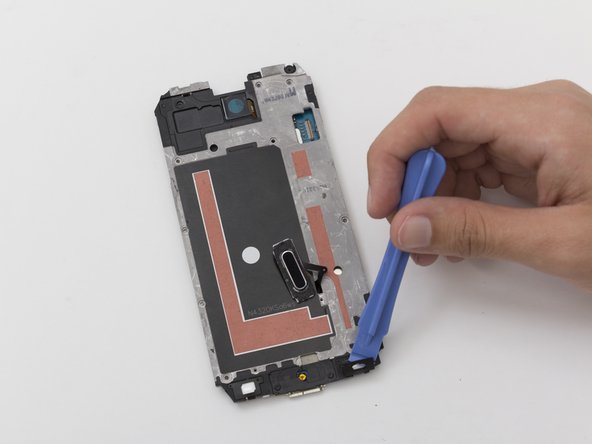
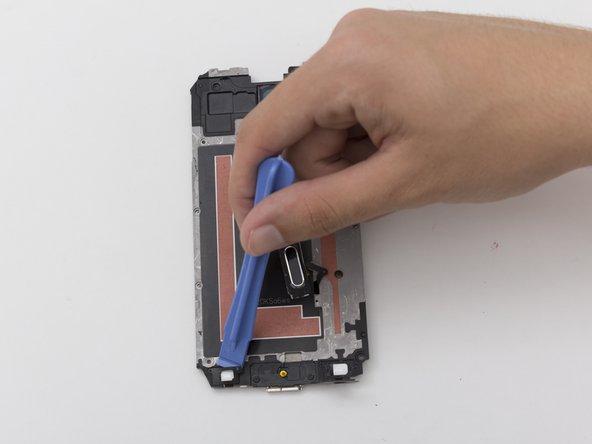
    • Continue to lift the display. You will notice a black cable connecting the home button to the motherboard.

    • Use the plastic opening tool to pry the home button off. Moderate force is required.

    • When reassembling the phone you may need to apply glue to the button to keep it in place.

    • When putting the new screen in place you will need to put double sided tape attaching it to the midframe to stop it from wobbling when in use.

  11. Samsung Galaxy S5 Charging Port Replacement, Midframe: paso 11, imagen 1 de 1
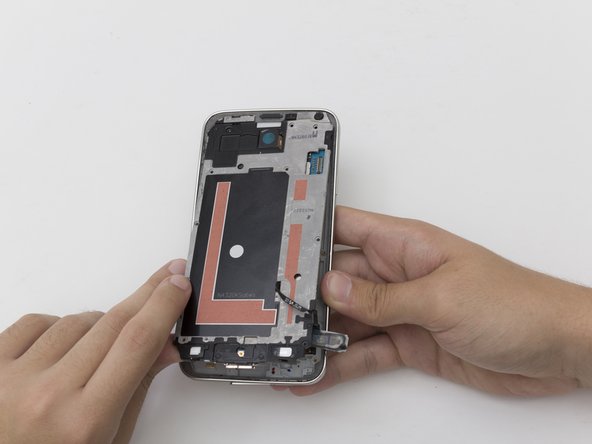
    • Unscrew the ten 4 mm screws from the midframe with a Phillips#00 head screw driver. You may want to use tweezers or a magnetic screwdriver to remove them.

  12. Samsung Galaxy S5 Charging Port Replacement: paso 12, imagen 1 de 1
    • Flip the device over and remove the three 5mm screws with a Phillips#00 head screw driver.

  13. Samsung Galaxy S5 Charging Port Replacement: paso 13, imagen 1 de 3 Samsung Galaxy S5 Charging Port Replacement: paso 13, imagen 2 de 3 Samsung Galaxy S5 Charging Port Replacement: paso 13, imagen 3 de 3
    • Flip the phone back over. First, unlatch the charging port flap at the bottom of the device with your finger.

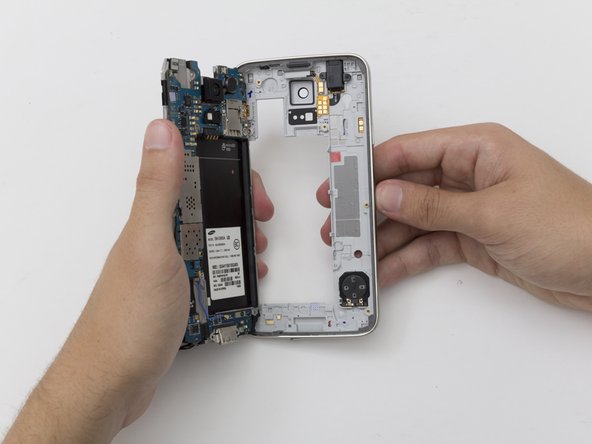
    • Press firmly on corners of the midframe while holding on to the plastic bezel (the outer plastic ring).

    • Hold the device in one hand. Then apply pressure with your fingers to the back of the frame at the top of where the battery was. Then remove the midframe by pulling it outwards and towards the top of the phone.

    • When putting the phone back together, insert the bottom first by inserting the charging port into the notch shaped for it. You must do this first or the midframe will not fit in the plastic bezel.

  14. Samsung Galaxy S5 Charging Port Replacement, Motherboard: paso 14, imagen 1 de 1
    • Remove the single silver 4 mm screw from below the rear camera with a Phillips#00 screw driver.

  15. Samsung Galaxy S5 Charging Port Replacement: paso 15, imagen 1 de 1
    • Remove the single black 4 mm screw from above the charging port with a Phillips#00 head screw driver.

  16. Samsung Galaxy S5 Charging Port Replacement: paso 16, imagen 1 de 3 Samsung Galaxy S5 Charging Port Replacement: paso 16, imagen 2 de 3 Samsung Galaxy S5 Charging Port Replacement: paso 16, imagen 3 de 3
    • Flip the device over

    • Use the plastic opening tool to remove the black plastic covers at the bottom of the phone.

    • When putting the phone back together remember that these plastic covers have light adhesive on the back that may need to be reapplied.

  17. Samsung Galaxy S5 Charging Port Replacement: paso 17, imagen 1 de 2 Samsung Galaxy S5 Charging Port Replacement: paso 17, imagen 2 de 2
    • Be careful not to apply too much pressure when removing the cable. If too much pressure is applied, the cable or the connection to the motherboard can be destroyed.

    • Use the plastic opening tool to remove the ribbon cable connecting the home button to the motherboard.

  18. Samsung Galaxy S5 Charging Port Replacement: paso 18, imagen 1 de 2 Samsung Galaxy S5 Charging Port Replacement: paso 18, imagen 2 de 2
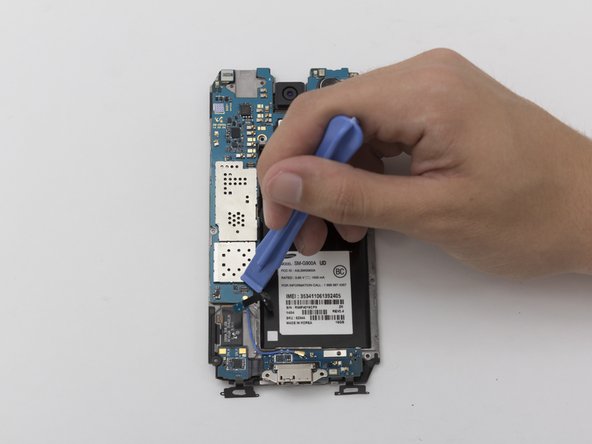
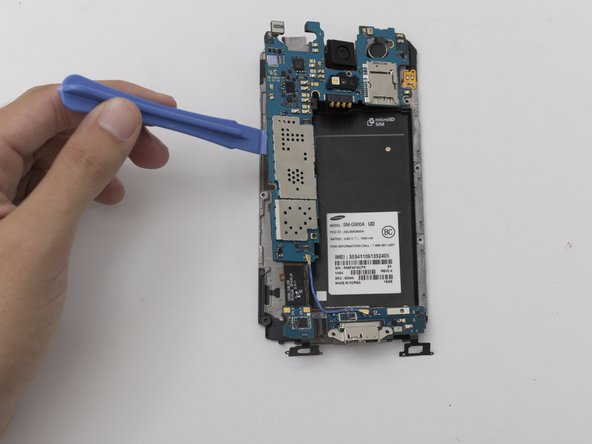
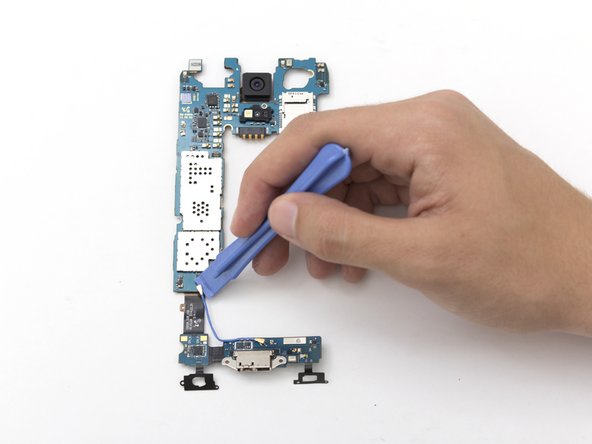
    • Gently lift the motherboard off of the second midframe with the plastic opening tool.

  19. Samsung Galaxy S5 Charging Port Replacement, Charging Port: paso 19, imagen 1 de 2 Samsung Galaxy S5 Charging Port Replacement, Charging Port: paso 19, imagen 2 de 2
    • Gently use the plastic opening tool to remove the blue cable connecting the home button to the motherboard.

  20. Samsung Galaxy S5 Charging Port Replacement: paso 20, imagen 1 de 3 Samsung Galaxy S5 Charging Port Replacement: paso 20, imagen 2 de 3 Samsung Galaxy S5 Charging Port Replacement: paso 20, imagen 3 de 3
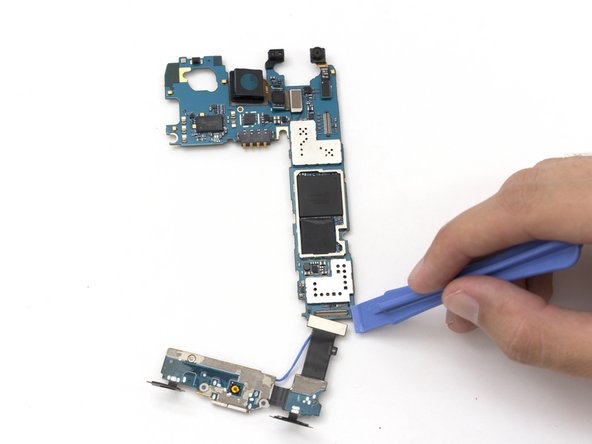
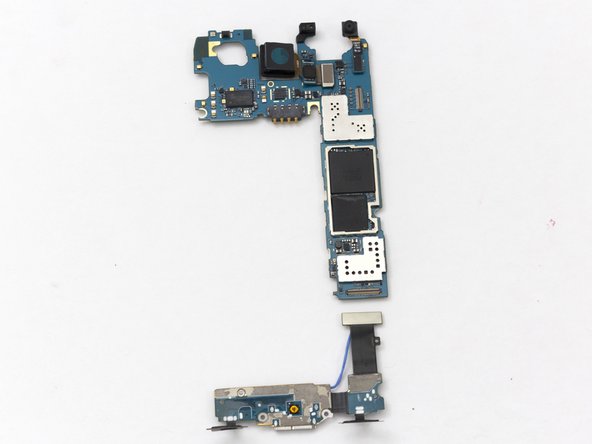
    • Flip the mother board over.

    • Gently use the plastic opening tool to remove the black ribbon cable connecting the charging port to the mother board.

Conclusión

To reassemble your device, follow these instructions in reverse order.

49 personas más completaron esta guía.

Justin Uchimura

Miembro Desde 04/22/14

4,428 Reputación

7 Guías creadas

Equipo

Cal Poly, Team 10-57, Amido Spring 2014 Miembro de Cal Poly, Team 10-57, Amido Spring 2014

CPSU-AMIDO-S14S10G57

4 Miembros

9 Guías creadas

3 comentarios

yo will need it for Display-replacement!!!

Mike - Contestar

Hi i change the chrging pord to galaxy s5 the phone charging but i does not turn on

saad - Contestar

Agregar Comentario

Ver Estadísticas:

Ultimas 24 horas: 0

Ultimos 7 días: 1

Ultimos 30 días: 2

Todo El Tiempo: 51,509