Saltar al contenido principal

Envío gratis en pedidos nacionales de $75 o más

Samsung Galaxy S5 Active Rear-Facing Camera Replacement

Vistas: 25 k

Ver estadísticas:

Últimas 24 horas:
1
Últimos 7 días:
22
Últimos 30 días:
92
Todo El Tiempo:
24,762
Comentarios: 19

13 comentarios sobre los pasos, 6 comentarios sobre la guía.

Ir a los comentarios de la guía
Completado: 7

7 personas han marcado esta guía como "completada". ¿Serás tú la próxima persona en hacerlo?

Favoritos: 7

7 personas han marcado como "Favorita" y se han suscrito a esta guía. ¿Serás tú la próxima persona en hacerlo?

Tiempo Requerido: 40 Minuto
Dificultad: Difícil
Samsung Galaxy S5 Active Rear-Facing Camera Replacement

Introducción

Ir al paso 1 ↓

To replace the 16 megapixel rear-camera, follow the steps to remove all previous components required. Take full precaution when operating tools such as heat guns, as they can cause potential health hazards.

Qué necesitas

Herramientas

    1. Samsung Galaxy S5 Active Rear-Facing Camera Replacement, Rear Case: paso 1, imagen 1 de 3 Samsung Galaxy S5 Active Rear-Facing Camera Replacement, Rear Case: paso 1, imagen 2 de 3 Samsung Galaxy S5 Active Rear-Facing Camera Replacement, Rear Case: paso 1, imagen 3 de 3
      • Insert your fingernail or plastic opening tool into the divot at the top of the rear-facing camera.

      • Gently pry and twist the flexible rear cover off the back of the phone.

      Pregunta a FixBot

      Agregar Comentario

    1. Samsung Galaxy S5 Active Rear-Facing Camera Replacement, Battery: paso 2, imagen 1 de 3 Samsung Galaxy S5 Active Rear-Facing Camera Replacement, Battery: paso 2, imagen 2 de 3 Samsung Galaxy S5 Active Rear-Facing Camera Replacement, Battery: paso 2, imagen 3 de 3
      • Insert a fingernail or plastic opening tool into the recess in the bottom right corner of the battery and lift upward.

      • Remove the battery away from the phone.

      Pregunta a FixBot

      Agregar Comentario

    1. Samsung Galaxy S5 Active Rear-Facing Camera Replacement, SIM Card: paso 3, imagen 1 de 3 Samsung Galaxy S5 Active Rear-Facing Camera Replacement, SIM Card: paso 3, imagen 2 de 3 Samsung Galaxy S5 Active Rear-Facing Camera Replacement, SIM Card: paso 3, imagen 3 de 3
      • Use your fingers to remove the SIM card

      Pregunta a FixBot

      Agregar Comentario

    1. Samsung Galaxy S5 Active Rear-Facing Camera Replacement, Display: paso 4, imagen 1 de 3 Samsung Galaxy S5 Active Rear-Facing Camera Replacement, Display: paso 4, imagen 2 de 3 Samsung Galaxy S5 Active Rear-Facing Camera Replacement, Display: paso 4, imagen 3 de 3
      • Make sure the battery, the SIM card, and the MicroSD card have been removed. If these components are not removed, they may get damaged when the heat is applied.

      • In this step you'll be using a heat gun. The heat gun operates at high temperatures, and it may harm you or the device if not used appropriately. Please follow the heat gun safety procedures indicated in it's manual to prevent any harm.

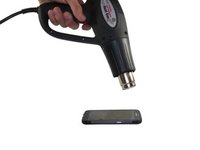
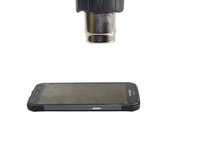
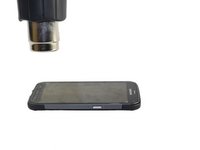
      • Use a heat gun at an approximate distance of 2-3 inches from the phone to apply heat to the phone and loosen up the adhesive in the display.

      Pregunta a FixBot

      Agregar Comentario

    2. Samsung Galaxy S5 Active Rear-Facing Camera Replacement: paso 5, imagen 1 de 2 Samsung Galaxy S5 Active Rear-Facing Camera Replacement: paso 5, imagen 2 de 2
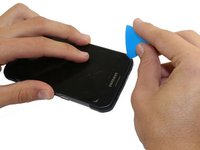
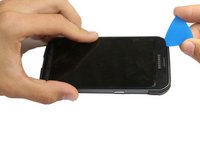
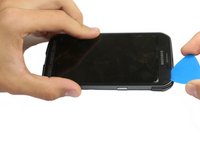
      • Starting from the upper left corner, insert a guitar pick in between the display and the phone case.

      Pregunta a FixBot

      Agregar Comentario

    3. Samsung Galaxy S5 Active Rear-Facing Camera Replacement: paso 6, imagen 1 de 3 Samsung Galaxy S5 Active Rear-Facing Camera Replacement: paso 6, imagen 2 de 3 Samsung Galaxy S5 Active Rear-Facing Camera Replacement: paso 6, imagen 3 de 3
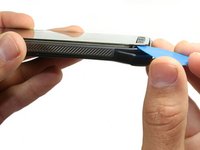
      • Use the pick to pry the display by sliding the pick in the direction shown.

      • Make sure you pry the display around the edge of the phone. At the bottom of the screen there is a thin metallic strip that connects the display to the motherboard, and it can be easily damaged.

      • If any resistance is encountered, stop prying and reapply heat to continue prying.

      Pregunta a FixBot

      Agregar Comentario

    4. Samsung Galaxy S5 Active Rear-Facing Camera Replacement: paso 7, imagen 1 de 3 Samsung Galaxy S5 Active Rear-Facing Camera Replacement: paso 7, imagen 2 de 3 Samsung Galaxy S5 Active Rear-Facing Camera Replacement: paso 7, imagen 3 de 3
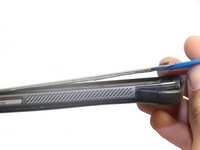
      • Use the pick to pry the sides and lower part of the display by sliding the pick through the phone.

      • If any resistance is encountered, stop prying and reapply heat to continue prying.

      Pregunta a FixBot

      Agregar Comentario

    5. Samsung Galaxy S5 Active Rear-Facing Camera Replacement: paso 8, imagen 1 de 2 Samsung Galaxy S5 Active Rear-Facing Camera Replacement: paso 8, imagen 2 de 2
      • Using the guitar pick, lift the screen slightly.

      • You can remove the home button if desired.

      Pregunta a FixBot

      Agregar Comentario

    6. Samsung Galaxy S5 Active Rear-Facing Camera Replacement: paso 9, imagen 1 de 2 Samsung Galaxy S5 Active Rear-Facing Camera Replacement: paso 9, imagen 2 de 2
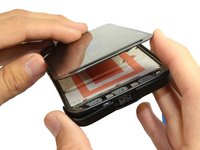
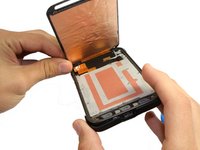
      • Slightly lift, but do not remove, the upper end of display assembly.

      • Do not remove the front panel entirely. It is still attached by a connector.

      • If you are reusing the home button flex cable, be careful not to sever the cable from the home button. Adhesive can cause the cable to rip apart from the home button. While the home button will still work, the fingerprint scanner will not.

      Pregunta a FixBot

      Agregar Comentario

    7. Samsung Galaxy S5 Active Rear-Facing Camera Replacement: paso 10, imagen 1 de 3 Samsung Galaxy S5 Active Rear-Facing Camera Replacement: paso 10, imagen 2 de 3 Samsung Galaxy S5 Active Rear-Facing Camera Replacement: paso 10, imagen 3 de 3
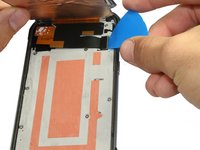
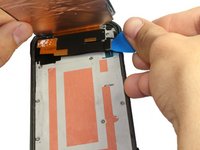
      • Use the sharp tip of a guitar pick to lift the front panel assembly cable connector straight up off its socket on the motherboard.

      • Safely remove the front panel assembly from phone.

      Pregunta a FixBot

      Agregar Comentario

    1. Samsung Galaxy S5 Active Rear-Facing Camera Replacement, Rear-Facing Camera: paso 11, imagen 1 de 3 Samsung Galaxy S5 Active Rear-Facing Camera Replacement, Rear-Facing Camera: paso 11, imagen 2 de 3 Samsung Galaxy S5 Active Rear-Facing Camera Replacement, Rear-Facing Camera: paso 11, imagen 3 de 3
      • Use a Phillips 0 screwdriver to remove all 12 Phillips #0 screws.

      Pregunta a FixBot

      Agregar Comentario

    2. Samsung Galaxy S5 Active Rear-Facing Camera Replacement: paso 12, imagen 1 de 3 Samsung Galaxy S5 Active Rear-Facing Camera Replacement: paso 12, imagen 2 de 3 Samsung Galaxy S5 Active Rear-Facing Camera Replacement: paso 12, imagen 3 de 3
      • Push upward from the back side your phone (where the battery should go) to pop out the large gray piece.

      Pregunta a FixBot

      Agregar Comentario

    3. Samsung Galaxy S5 Active Rear-Facing Camera Replacement: paso 13, imagen 1 de 1
      • You should now have two different pieces. To continue we will only use the piece with the motherboard (Shown on the right side of the picture).

      Pregunta a FixBot

      Agregar Comentario

    4. Samsung Galaxy S5 Active Rear-Facing Camera Replacement: paso 14, imagen 1 de 2 Samsung Galaxy S5 Active Rear-Facing Camera Replacement: paso 14, imagen 2 de 2
      • Use your finger or a plastic opening tool to disconnect the rear-facing camera from the motherboard.

      Pregunta a FixBot

      Agregar Comentario

    5. Samsung Galaxy S5 Active Rear-Facing Camera Replacement: paso 15, imagen 1 de 2 Samsung Galaxy S5 Active Rear-Facing Camera Replacement: paso 15, imagen 2 de 2
      • Use your hands to gently remove the rear-facing camera from the motherboard.

      Pregunta a FixBot

      Agregar Comentario

Conclusión

To reassemble your device, follow these instructions in reverse order.

Cancelar: No complete esta guía.

7 personas más completaron esta guía.

Autor

con

Nils David Corrales Tovar

Miembro Desde 09/22/14

3,228 Reputación

7 Guías creadas

Equipo

USF Tampa, Team 1-5, Hickman Fall 2014 Miembro de USF Tampa, Team 1-5, Hickman Fall 2014

USFT-HICKMAN-F14S1G5

Miembros de 3

84 Guías creadas

6Guía Comentarios

Where did you purchase the replacement camera/lens?

Joseph Whitehouse - Contestar Compartir

Same here. I only need the lens cover.

Charlie Zhao - Contestar Compartir

On ebay sales

jeremy lopez - Contestar Compartir

What if I'm just replacing the glass and not the entire camera?

Brittani Alvey - Contestar Compartir

Did you get an answer already? Or did you find a solution in the mean while? My cameraglass is also broken...

edwinegberts - Contestar Compartir

Agregar Comentario

Ver Estadísticas:

Ultimas 24 horas: 1

Ultimos 7 días: 22

Ultimos 30 días: 92

Todo El Tiempo: 24,762