Saltar al contenido principal

Samsung Galaxy S4 Active I537 Charging port Replacement

Qué necesitas

  1. Samsung Galaxy S4 Active I537 Charging port Replacement, Rear Cover: paso 1, imagen 1 de 2 Samsung Galaxy S4 Active I537 Charging port Replacement, Rear Cover: paso 1, imagen 2 de 2
    • Remove back cover

    • Remove battery

  2. Samsung Galaxy S4 Active I537 Charging port Replacement, remove screws: paso 2, imagen 1 de 1
    • remove battery before taking off screws

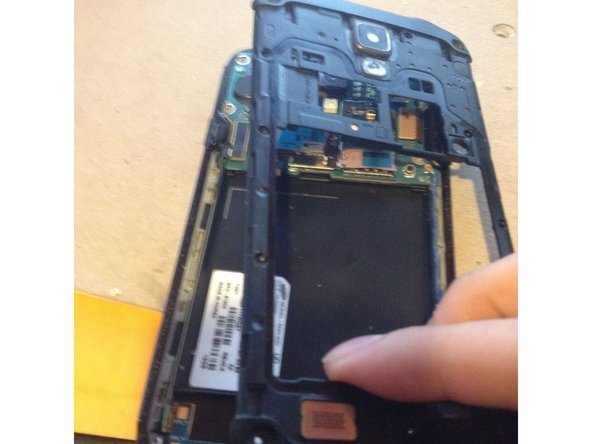
    • remove the 8 screws in the back using a small Phillips screw driver

  3. Samsung Galaxy S4 Active I537 Charging port Replacement, Covers: paso 3, imagen 1 de 1
    • using a prying tool or something remove the 4 covers that are blocking the last 4 screws

    • you might have to put a bit of pressure to get them off

  4. Samsung Galaxy S4 Active I537 Charging port Replacement, More screws: paso 4, imagen 1 de 2 Samsung Galaxy S4 Active I537 Charging port Replacement, More screws: paso 4, imagen 2 de 2
    • Remove the 4 screws

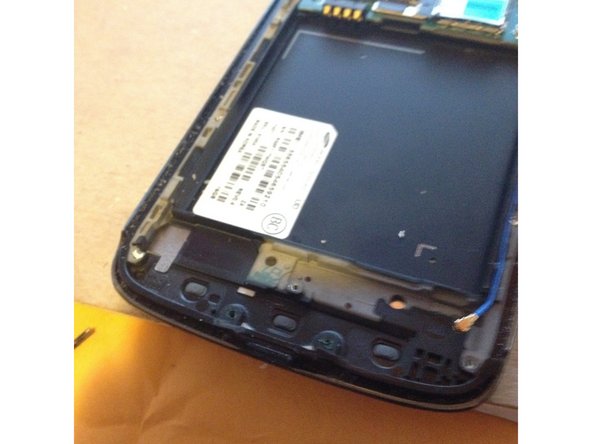
    • with a prying tool or fingers go around the edges to remove the plastic back part of the phone

    • be carefull not to break it by using too much force

  5. Samsung Galaxy S4 Active I537 Charging port Replacement, Screws: paso 5, imagen 1 de 1
    • Remove these 2 screws then take off the white plastic part

  6. Samsung Galaxy S4 Active I537 Charging port Replacement, Antenna cable: paso 6, imagen 1 de 1
    • use prying tool or finger to unplug antenna cable

    • be extra careful unplugging this

  7. Samsung Galaxy S4 Active I537 Charging port Replacement: paso 7, imagen 1 de 1
    • use prying tool or fingers to unplug this connection

    • again be careful

  8. Samsung Galaxy S4 Active I537 Charging port Replacement: paso 8, imagen 1 de 2 Samsung Galaxy S4 Active I537 Charging port Replacement: paso 8, imagen 2 de 2
    • you can now use the prying tool or fingers to remove the charging port and replace it with the new one

    • follow steps in reverse to resemble

    • carefully

Conclusión

To reassemble your device, follow these instructions in reverse order.

16 personas más completaron esta guía.

ted582 ted583

Miembro Desde 07/01/15

529 Reputación

1 Guía escrita

3 comentarios

Good tear down procedure.

tcjd1976 - Contestar

I replaced Charging Port on my Samsung SGH-i537 about a week ago (Before I found this “Tear-Down Procedure”.)! You did a nice job putting this information together!

It’s relatively simple, although sometimes I feel like “the more information the better”!

I DO HAVE A QUESTION: After I removed the screws, and separated the two halves of my phone, I turned the front half face-up, and a small, flat, black clip I didn’t notice, fell from SOMEWHERE! Despite my looking for many various possibilities as to where this clip goes back into my phone, I didn't find a place that it would fit properly. I’m sure it’s location is staring me in the face, but I’m still not finding it!

After a whole lot more looking, one square centimeter at a time, I reluctantly decided to put my phone back together without this “clip”.

The phone works great! But I know this “clip” was in it for a reason, so I’m having a hard time calling this repair a complete success!

Does anybody know exactly where this “clip” goes?

Thanks!

Roger.

Roger C. Smith - Contestar

I think it holds the midframe in. No worries, my midframe stays in with 3 screws.

[deleted] -

Agregar Comentario

Ver Estadísticas:

Ultimas 24 horas: 0

Ultimos 7 días: 3

Ultimos 30 días: 13

Todo El Tiempo: 7,839