Introducción
The SIM card is used for receiving and transmitting signals as well as holding contacts in memory. If you are unable to take or make calls, you may need a new SIM card. Removing the SIM card is as simple as removing the battery, and you can easily use your fingers to remove the card.
Qué necesitas
-
-
Insert your fingernail or a plastic tool into the opening near the headphone jack on top of the phone.
-
Gently pry apart the rear case from the midframe and remove.
-
-
-
Insert your fingernail, or a plastic tool, into the crevice on the lower left side of the back side.
-
Gently pry the battery from the back of the phone.
-
-
-
-
With the Phillips head screwdriver, remove all seven 4.0 mm screws, highlighted in red, from the rear case.
-
Carefully remove mid-frame from the front panel.
-
-
-
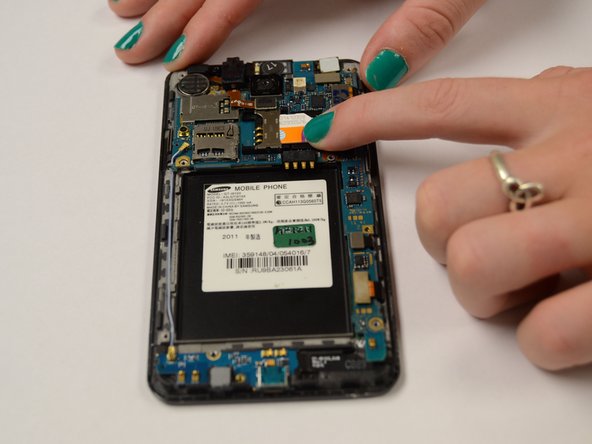
Remove or replace SIM Card by pushing into metal slot above the battery holder.
-


To reassemble your device, follow these instructions in reverse order.
To reassemble your device, follow these instructions in reverse order.
Equipo

Clemson, Team 3-3, Benson Fall 2014 Miembro de Clemson, Team 3-3, Benson Fall 2014
CLEM-BENSON-F14S3G3
5 Miembros
8 Guías creadas