Introducción
Sigue esta guía para remover y reemplazar la batería en tu Samsung Galaxy Note5.
Antes de desmontar tu teléfono, descarga la batería por debajo del 25%. Una batería cargada de iones de litio puede incendiarse y/o explotar si se perfora accidentalmente.
Si tu batería está hinchada, no calientes tu teléfono. Si es necesario, puedes usar un gotero o jeringa para inyectar alcohol isopropílico (90%) alrededor de los bordes de la tapa posterior para debilitar el adhesivo. Las baterías hinchadas pueden ser muy peligrosas, por lo que debes usar protección para los ojos y ejercer la precaución debida, o llevarlo a un profesional si no estás seguro de cómo proceder.
Luego de completar esta guía, calibra tu batería nueva.
Qué necesitas
-
-
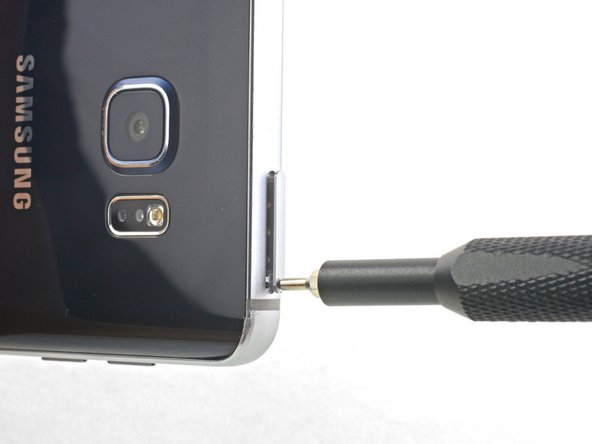
Inserta una herramienta de expulsión de SIM, un bit de expulsión de SIM o un clip de papel enderezado en el pequeño orificio en la bandeja de la tarjeta SIM en la parte superior del teléfono.
-
Pulsa para expulsar la bandeja. Esto puede requerir algo de fuerza.
-
Retira la bandeja de la tarjeta SIM.
-
-
-
Con la uña del dedo, presiona el botón S-Pen hasta que haga clic y salga del teléfono.
-
Retira el S-Pen.
Hola mi priblema es que meti al reves el spen en el orificio y al sacarlo pues ya no funciona …. Tiene reparacion es un galaxy note 5
-
-
-
Aplica un iOpener caliente en la parte inferior del teléfono durante unos dos minutos.
-
-
-
Aplica una ventosa lo más cerca posible del borde inferior del teléfono.
-
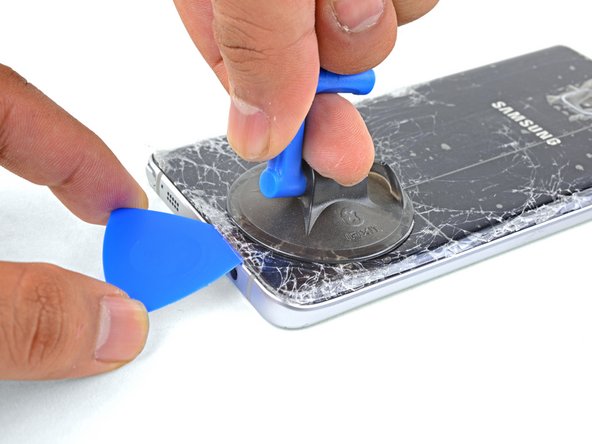
Levanta la ventosa e inserta una punta de apertura debajo del vidrio trasero.
Yes very fragile, i dont know how to remove without cracking the glass back.
It IS possible, because I just did it. You have to be extremely patient and use firm but gentle pressure. It took me nearly an hour just to get the back off.
One more thing: I discovered that the only way that I could get enough heat into it to soften the adhesive it is to fold the hot iOpener so that you heat from both sides.
-
-
-
-
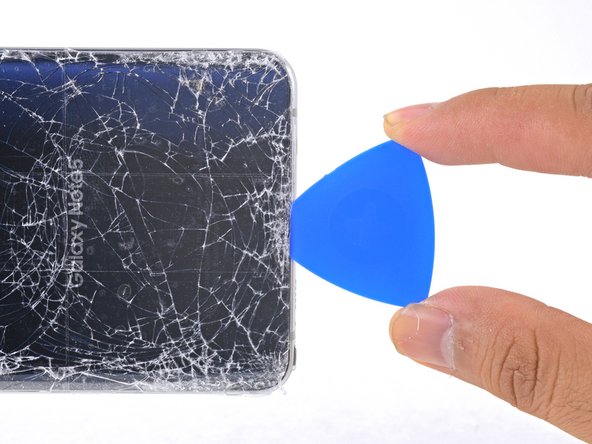
Usa pinzas para retirar cualquier adhesivo restante de la cubierta posterior y del chasis del teléfono.
-
Limpia las áreas de adhesión con alcohol isopropílico de alta concentración (al menos 90%) y un paño que no suelte pelusa. Pasa solo en una dirección, no hacia adelante y hacia atrás. Esto ayudará a preparar la superficie para el nuevo adhesivo.
-
Asegúrate de encender su teléfono y probar su reparación antes de instalar un nuevo adhesivo y volver a sellar el teléfono.
-
Después de instalar la cubierta posterior, aplica una presión fuerte y constante en el teléfono durante varios minutos para ayudar a que el adhesivo forma una buena unión, por ejemplo, colocándolo debajo de una pila de libros pesados.
-
-
-
Retira los 20 tornillos Phillips de 3.3 mm
the phone was gave to me and I bought a replacement battery but two of the screw around the camera won't come out it's like their stripped what do I do
-
-
-
Sujeta la estructura central por los bordes y levántala hacia arriba mientras presionas contra la batería con un dedo.
-
Retira el marco medio.
During this step, I destroyed my phone. Some of the circuit board at the bottom of the battery is attached to the mid-frame. When I pushed on the battery as instructed, it broke apart. The phone is useless.
Hi Edward,
I’m sorry to hear that! My guess would be that a stray screw held the board to the midframe. If your phone had an extra screw that I missed, please notify me and I’ll correct it!
-
-
-
Usando el extremo plano de un spudger, levanta el conector de batería de su zócalo en la placa madre.
-
-
-
Desliza una púa de apertura bajo el borde inferior de la batería para hacer palanca lentamente y sacarla de la carcasa.
-
-
-
Saca la batería de la caja.
-
Retira cualquier resto de adhesivo del teléfono y limpia las zonas pegadas con alcohol isopropílico y un paño que no suelte pelusa.
-
Fija la batería nueva con adhesivo precortado o cinta adhesiva de doble cara. Para colocarla correctamente, aplica el nuevo adhesivo dentro del teléfono, no directamente sobre la batería. El adhesivo debe rodear el perímetro del compartimento de la batería, pero no en el corte rectangular del centro (que en realidad es la parte trasera de la pantalla).
-
Presiona la batería firmemente en su sitio durante 5-10 segundos.
-


Compara tu nueva pieza de repuesto con la pieza original. Es posible que debas transferir los componentes restantes o quitar los respaldos adhesivos de la pieza nueva antes de instalarlos.
Para volver a montar tu dispositivo, sigue los pasos anteriores en orden inverso. Lleva tus desechos electrónicos a un reciclador certificado R2 o e-Stewards.
¿La reparación no salió según lo planeado? Consulta nuestra comunidad de respuestas para obtener ayuda para la solución de problemas.
Cancelar: No complete esta guía.
119 personas más completaron esta guía.
Un agradecimiento especial a estos traductores:
100%


Estos traductores nos están ayudando a reparar el mundo! ¿Quieres contribuir?
Empezar a traducir ›


43 comentarios
Yes if you over heat the back for a long time. If you just heating it up to remove adhesive you should be fine.
Would doing this void my warranty?
Ofcourse it will void your warranty..You seriously think opening up fixed battery wont void your warranty lol..
By the time you need a new battery, your warranty will be out anyway most likely.
Kathy -
is the battery linked in this post the same one that comes in Note 5 stock? i'm hesitant to buy a battery that might be worse than i currently have.
Yes the battery is OEM
check the connections when it plugged in to the main board, see if any prongs are bent or broken. Make sure there are no tears in the ribbon from the batteries.
I swapped the battery and saw 24hr use with normal usage. Old oem battery had blown up and was all lumpy. Amazing how much better it is. I don't know how not to break the glass whIle removing the back cover though, would recommend buying a spare back cover just in case since it breaks easily.
joinhalo -
dbpaul, best way to avoid damages is to heat the back cover area and use 2 suction holders. 1 attached to the LCD and one to the back cover. gently pull them appart and the glues will begin to seperate. you can get them on this site for ~$3 a piece.
Suction Handle
Product code: IF145-361
What tool are you using to heat/melt the adhesive? I tried using a hair dryer but it did not work :(
Thank you so much (: i had to buy a heat gun from my local hardware store the blow dryer just didnt get hot enough . The most difficult part of this process was removing the actual battery it didnt just pop out like the video . it was glued in place i couldn't just rip it out either becaue the screen was on the other side i didnt want to yank it around to much and crack the screen underneath. but i slide a thin card and seperated the glue from battery (: yay all fixed !
Will you have to replace the back if it is cracked when you take it off?
Will you have to replace the back if it is cracked whenever you take it off to replace the battery?
I just did a battery replacement on my dad's refurbished note 5. Getting the back to 450F was enough to seperate it. Do not use a small suction cup. Find something that takes up alot more surface area so you don't have to pull as hard. If your back does crack buy a replacement one its like ~10$ and mine came with pre-applied adhesive.
I wouldn´t do that in advance, because it may damage some part and the phone is not waterproof and dustproof anymore.
I changed the battery and but forgot to take out the sim initially. I checked the sim on other phone and thats working ok. But on this phone, no sim is getting signals or registered... any idea.. did i spoil something?
Did you check the contacts in the phone for the sim? Are they in a good condition und clean? Try to clean them with a clean piece of cloth and a litte amount of alcohol on it.
Is samsung galaxy note 5 a strong phone to use, does the battery last?
Is samsung galaxy note 5 a strong phone to use, does the battery last longer, pls wats the major problems with this brand?
Grrrr lol, my first Note 4 and i cracked the digitizer and glass. I cracked them by gently pushing on the back of the battery so the sub-chassis could come out. Next time i’m putting the heat gun on Volcano to melt that %#*@ glue!! :-)
Grrrr.!!! I broke the screen and digitizer while gently pressing on the back of the battery so the sub-chassis could come out, but no, it didn’t come out. So, next time i’m setting the heat gun to Volcano and melt that glue the heck out of there!!! :-)
Thanks ,++Heat Gun++ setting temperature is?
These are some of the stupidest comments I've ever read in my life Samsung enclosed the housing to keep water in moisture from getting inside of the device seconds the Note 5 is a huge upgrade compared to this shity ass Note 4. And the expandable memory saying that's why they make Dropbox yes Samsung did not put expandable memory in this phone because they wanted everybody to buy the next model and yes that is kind of shity of them but they send signals and updates to your phone to slow it down so that you get the next phone. The reason being new technologies are coming out and they can't continue to produce old technology when they are making new technologies it's the wave of the future get used to it or don't use a %#*@ cell phone
Why is the Note 4 so bad? I went from the 3 to the 5, and they really aren’t much different at all.
I did it! Only casualty was the back case but I found an OEM on Amazon for that at 13 bucks. Since I use the Samsung S-view case, I am able to use my phone immediately. When the new back comes I will put that back on. Thanks Sophia!
This will be my 3rd battery replacement. Once you do it its not so bad, the factory outside shell was a major pain but my replacements have come off very easy and I did NOT have to replace it. 2nd battery was bad. 3rd was oem VERIZON compatiable MAKE SURE you get the battery for your service provider (att/sprint/verizon/etc..) it does make a difference, there are dozens if not more batteries out there.
THANK YOU FOR THIS TUTORIAL IT WAS SPOT ON EASY TO FOLLOW!!!!! Much easier than youtube
I’m currious as to whether or not my saved data, etc will be affected by a battery swap? I’ll back it up anyway, but is losing it something I need to worry about?
You should not lose any data when doing a battery replacement. That said, you are very wise to back it up in case something goes awry with the repair.
Do I need new glue to replace the old one ? I am going to buy a battery replacement on amazonkit but any glue seems to me included , is that ok ?
Without the glue its no more protected against humidity. If thats no problem for you, you don´t need to use one.
But I would recommend you to use it. Its not really expensive.
For example on ebay, you could get a pre-cut tape for some bucks.
I was able to complete the replacement without needing a new back glass cover. But I’d like to add a few observations:
1. The bottom side of my back glass was much more stubborn than usual, maybe it’s because my phone is 5 years old. No amount of heating and pulling revealed any opening on the bottom. But I was able to start the process on the right side instead. If the bottom side is too tough for you, maybe you can look around for other locations.
2. The black adhesive on my front display (what makes up the bezel on the top and bottom edges) started to peel when I was removing the midframe. I don’t know if this was avoidable, since it looked like the adhesive was stuck quite strongly to the midframe. The peeling is just a cosmetic blemish on the screen, but I heard that you can fix this by filling the peeled section with LOCA UV glue.
My battery was swollen and when I tried to remove it, I got a sweet smell from the battery.
Took it outside to let the gas fully escape. The battery was fully discharged for a few months and cold.
Should I attempt to remive the battery again, I assume the chance of ot catching fire would be less since the gas is gone.
If the battery is fully discharged and vented, you can proceed to remove the battery. Wear gloves and do not use heat to remove the battery.
We sell replacement Note5 batteries here!
Step 13 my phone was destroyed.
The bottom of the circuit board was attached to the top somehow. It broke apart during this step.