Saltar al contenido principal

Samsung Galaxy Note 8.0 Headphone Jack Replacement

Qué necesitas

  1. Samsung Galaxy Note 8.0 Headphone Jack Replacement, Back Cover: paso 1, imagen 1 de 1
    • Remove the Samsung S-Pen stylus.

    • Remove the micro SD storage card.

  2. Samsung Galaxy Note 8.0 Headphone Jack Replacement: paso 2, imagen 1 de 1
    • Using the plastic opening tool, start where the S-pen was located and carefully pry up the corner.

  3. Samsung Galaxy Note 8.0 Headphone Jack Replacement: paso 3, imagen 1 de 1
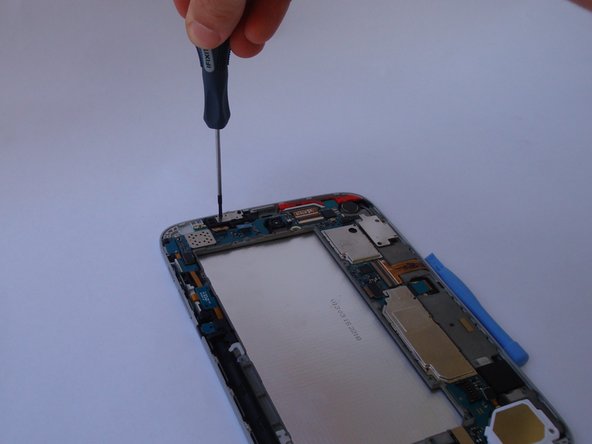
    • Work your way around the entire device by carefully prying and sliding the plastic opening tool.

    • There are clips approximately 2cm apart. As you are removing the back cover you should hear the clips being dislocated from the tablet.

    Nicht nur die Micro SD Karte… auch die SIM Karte sollte entfernt werden.

    Klaus Hummel - Contestar

  4. Samsung Galaxy Note 8.0 Headphone Jack Replacement, Battery: paso 4, imagen 1 de 2 Samsung Galaxy Note 8.0 Headphone Jack Replacement, Battery: paso 4, imagen 2 de 2
    • Remove the 8 Phillips#00 3-mm screws holding the battery in place.

    The photo highlighting the screws is incorrect, the highlight in the upper right side is a plastic tab, whereas the actual 8th screw to remove is on the bottom (but that's fairly easy to identify when performing the fix).

    fortyseveneffects - Contestar

    Can’t loosen screws on battery

    Mary - Contestar

  5. Samsung Galaxy Note 8.0 Headphone Jack Replacement: paso 5, imagen 1 de 1
    • Lift the top left corner of the battery up by the black tab.

  6. Samsung Galaxy Note 8.0 Headphone Jack Replacement: paso 6, imagen 1 de 1
    • Gently grasp and lift up the white connector located at the bottom right corner of the battery. It is connected to the battery by two blue and two red wires.

    • Do not yank the connector by the wires. If it does not disconnect easily, slide a plastic opening tool between the white connector and the board to lift the connector away from the board.

    the white battery connectory also has 2 black wires, so 2 blue/2red/2black

    suziquirke - Contestar

    There is some sort of safe unit in the upper left corner. It is a connector that opens when you lift off the backside. The safe was not in properly fit when I closed the back. In fact, the most difficult step was to get the safe unit properly in place while closing the backside.

    henriknaslund - Contestar

    Thanks @henriknaslund for note on the "Safe Unit" I succesfully managed to hold it in pace with a little basic sticky tape. Did the job.

    derek - Contestar

    Piece of cake. Entire procedure took just 15 minutes. Thank you, Joel & Co., for making this so easy!

    Flipped Gazelle - Contestar

    why is this under galaxy note 8? the note 8 is not a tablet??? Please respond to my comment as I will check back. I need to fix my NOTE 8 POWER BUTTON…does not work properly. Makes a “short” sound…as in electrical.

    HELP!!

    Barbara Lamb - Contestar

    The Galaxy Note 8 was the designation for the 8 inch WiFi tablet long before Samsung confused everyone with the Note 8 phone. When Im looking for items for the tablet I usually only get things for the phone.

    J E De Armond - Contestar

    When the Galaxy Note 8 Battery is replaced is all data, contact info,

    downloads, photos etc lost ??

    Allan PRING-SHAMBLER - Contestar

  7. Samsung Galaxy Note 8.0 Headphone Jack Replacement, Headphone Jack: paso 7, imagen 1 de 2 Samsung Galaxy Note 8.0 Headphone Jack Replacement, Headphone Jack: paso 7, imagen 2 de 2
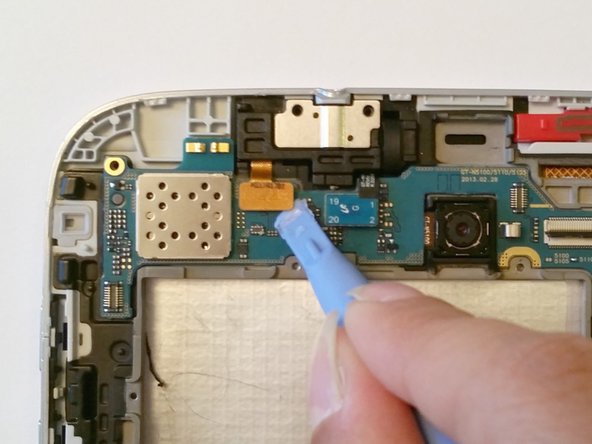
    • Remove the two 4.5-mm black phillips head screws using a #00Phillips screwdriver.

  8. Samsung Galaxy Note 8.0 Headphone Jack Replacement: paso 8, imagen 1 de 2 Samsung Galaxy Note 8.0 Headphone Jack Replacement: paso 8, imagen 2 de 2
    • Gently pry up the teal connector.

    • Do not yank the connector. If it does not disconnect easily use a plastic opening tool between the connector and the board to lift the connector away from the board.

  9. Samsung Galaxy Note 8.0 Headphone Jack Replacement: paso 9, imagen 1 de 2 Samsung Galaxy Note 8.0 Headphone Jack Replacement: paso 9, imagen 2 de 2
    • Gently pry up the gold connector.

    • Do not yank the connector. If it does not disconnect easily use a plastic opening tool between the connector and the board to lift the connector away from the board.

  10. Samsung Galaxy Note 8.0 Headphone Jack Replacement: paso 10, imagen 1 de 1
    • Remove the headphone jack from it's housing.

    • If difficult, use a plastic opening tool to pry up.

Conclusión

To reassemble your device, follow these instructions in reverse order.

6 personas más completaron esta guía.

Joel

Miembro Desde 09/23/14

1,862 Reputación

6 Guías creadas

Equipo

USF Tampa, Team 12-2, Blackwell Fall 2014 Miembro de USF Tampa, Team 12-2, Blackwell Fall 2014

USFT-BLACKWELL-F14S12G2

4 Miembros

16 Guías creadas

3 comentarios

Lightning struck while my son was on his tablet... no more headset audio? Replaced recommend parts still no audio. Plays fine without earbuds??? Insurance claim? What else could be the issue? Motherboard?

Shasta - Contestar

what are these connectors on the left side of headphone jack which are connected to the backside plate?

sanco - Contestar

this did not help getting the broken headphone jack out of my Samsung note 8

joshua- collins - Contestar

Agregar Comentario

Ver Estadísticas:

Ultimas 24 horas: 0

Ultimos 7 días: 0

Ultimos 30 días: 4

Todo El Tiempo: 6,795