Introducción
In this guide, you will learn how to replace the motherboard in a Samsung Galaxy Note 10.1 2012 tablet.
The motherboard connects all of the other components together so that the tablet can operate. Without it, nothing else would function.
Before using this guide, check out the troubleshooting page for the tablet. This is a crucial step because it is difficult to determine when a motherboard is faulty. The issue could be caused by another component, rather than the motherboard itself.
Qué necesitas
-
-
This is the back of the device and where you will begin to take it apart
-
It is neccesary to remove this piece first before removing the bigger back piece.
-
Use the plastic opening tools to pry along the indicated box.
-
Lift up the silver piece to reveal the rest of the back cover.
-
-
-
Unscrew the three 5 mm screws indicated by the red circles with the Philips #00 screwdriver.
-
Using the plastic opening tools pry along the bottom of the device, moving to the sides of the cover to the top.
-
Remove the back cover.
-
-
-
-
Carefully remove all of the ribbons that connect over the battery.
-
-
-
Remove all of the 3 mm screws indicated by a red circle with the #00 Philips Screwdriver.
-
Disconnect the battery connector from the motherboard.
-
Now you may remove the battery. The replacement battery should be 3.7 Volts and 25.9 kWh.
-
-
-
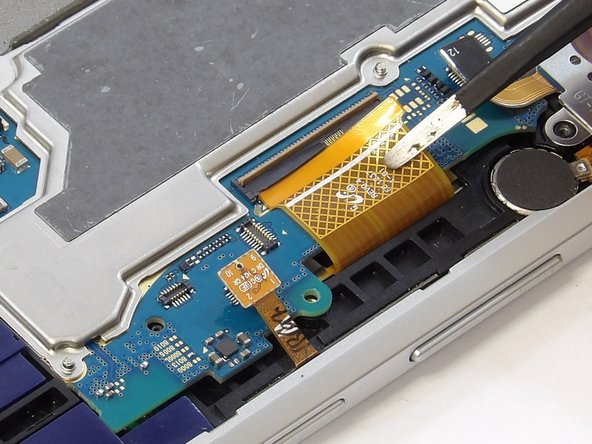
Disconnect the cable connectors from the motherboard by gently lifting the connection hubs.
-
Remove each ribbon cable by lifting the locking mechanism on the casing holding the cable.
-
Gently pull the ribbon cable from the casing with your fingers or tweezers.
-



To reassemble your device, follow these instructions in reverse order.
To reassemble your device, follow these instructions in reverse order.
Cancelar: No complete esta guía.
3 personas más completaron esta guía.


Equipo

Idaho State University, Team S1-G4, Watkins Fall 2019 Miembro de Idaho State University, Team S1-G4, Watkins Fall 2019
ISU-WATKINS-F19S1G4
3 Miembros
2 Guías creadas
