Introducción
Replace the motherboard on your Samsung Galaxy Light.
Qué necesitas
-
-
Using a plastic opening tool (or your fingernails), pry up the back cover of the device.
-
Remove the back cover.
-
-
-
-
Using a Phillips #0 screwdriver, remove all nine (9) screws attaching the midframe to the front of the device.
-
-
-
Using the plastic opening tool, separate the midframe from the front panel of the device.
-
Remove the midframe.
-
-
-
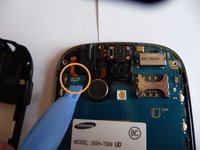
To detach the motherboard from the device:
-
Using the plastic opening tool, carefully pry up the digitizer connector from the motherboard.
-
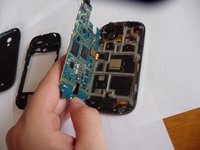
Carefully lift the motherboard up and move it toward the left side of the device.
-
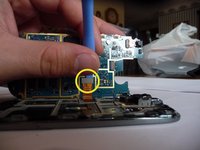
Using the plastic opening tool, carefully pry up the display connector on the back side of the motherboard.
-


To reassemble your device, follow these instructions in reverse order.
To reassemble your device, follow these instructions in reverse order.
Cancelar: No complete esta guía.
7 personas más completaron esta guía.

Equipo

UMass Dartmouth, Team 5-2, Vijaybhaskar Fall 2014 Miembro de UMass Dartmouth, Team 5-2, Vijaybhaskar Fall 2014
UMASSD-VIJAYBHASKAR-F14S5G2
3 Miembros
5 Guías creadas