Saltar al contenido principal

Samsung Galaxy Express 3 Home Button Replacement

Qué necesitas

  1. Samsung Galaxy Express 3 Home Button Replacement, Battery: paso 1, imagen 1 de 2 Samsung Galaxy Express 3 Home Button Replacement, Battery: paso 1, imagen 2 de 2
    • Locate the indent area highlighted in red and use either your fingernail or a Prying Tool (such as a guitar pick) to separate the back from the body of the phone.

  2. Samsung Galaxy Express 3 Home Button Replacement: paso 2, imagen 1 de 3 Samsung Galaxy Express 3 Home Button Replacement: paso 2, imagen 2 de 3 Samsung Galaxy Express 3 Home Button Replacement: paso 2, imagen 3 de 3
    • Once the cover is removed, locate the battery that reads "SAMSUNG."

    • Use either your fingernail or a Plastic Prying Tool (such as a guitar pick) to lift up the bottom indent of the battery.

    • Do not use a metal tool, as it can cause injury.

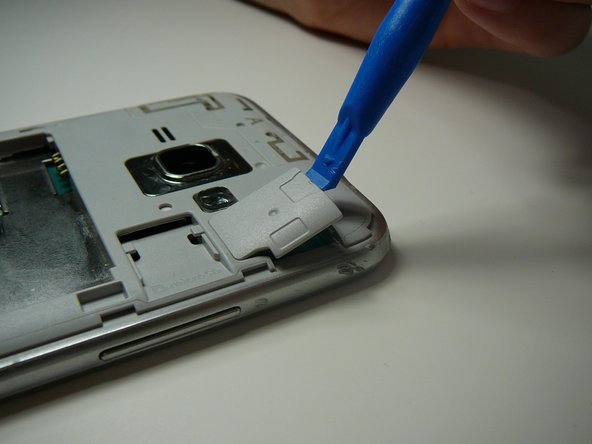
  3. Samsung Galaxy Express 3 Home Button Replacement, Screen: paso 3, imagen 1 de 2 Samsung Galaxy Express 3 Home Button Replacement, Screen: paso 3, imagen 2 de 2
    • Use a Plastic Prying Tool (such as a spudger) to pop out piece shown.

  4. Samsung Galaxy Express 3 Home Button Replacement: paso 4, imagen 1 de 1
    • Detach the screen connector.

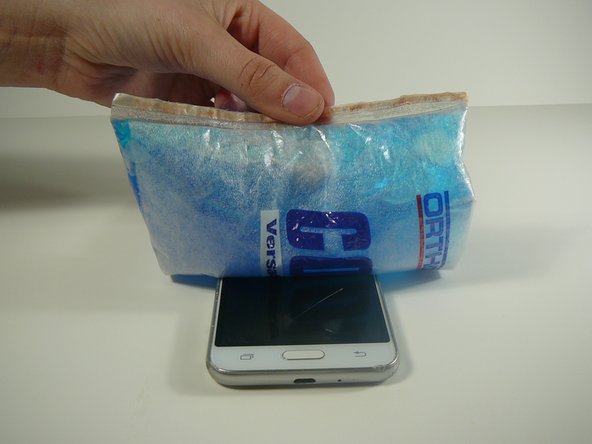
  5. Samsung Galaxy Express 3 Home Button Replacement: paso 5, imagen 1 de 2 Samsung Galaxy Express 3 Home Button Replacement: paso 5, imagen 2 de 2
    • Use a blow dryer or heating pad to heat up the screen.

    • Do not skip this step, as it may result in a broken screen and/or LCD.

    • This step loosens the glue holding the screen in place.

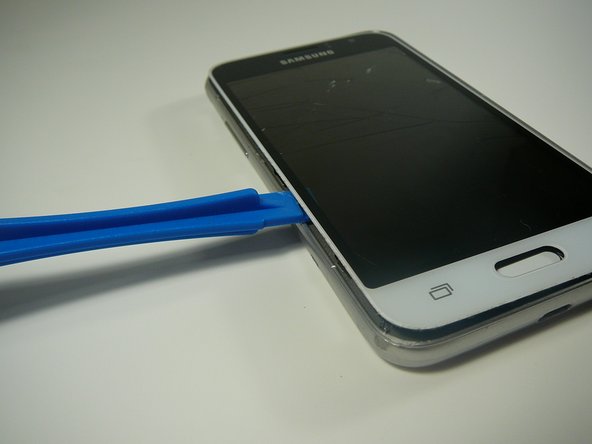
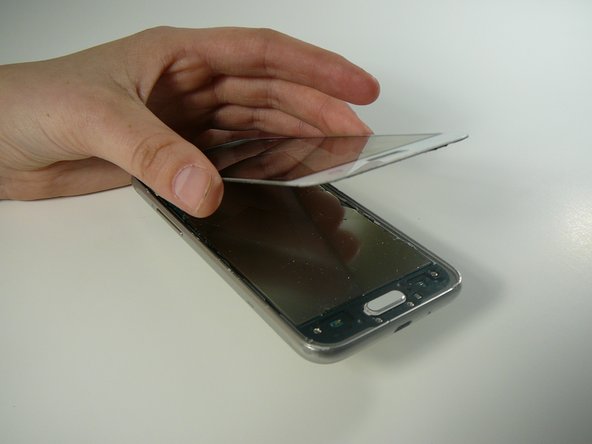
  6. Samsung Galaxy Express 3 Home Button Replacement: paso 6, imagen 1 de 3 Samsung Galaxy Express 3 Home Button Replacement: paso 6, imagen 2 de 3 Samsung Galaxy Express 3 Home Button Replacement: paso 6, imagen 3 de 3
    • Use a Thin Plastic Tool (such as a guitar pick) or Plastic Prying Tool (such as a spudger) to lift out the glass digitizer and LCD screen around the edges.

    • Do this slowly and carefully, as both parts can crack very easily.

    • Ensure your tool is plastic, as a metal tool can damage the screen easily.

  7. Samsung Galaxy Express 3 Home Button Replacement, Back and Recent Apps Touch Sensor Button(s): paso 7, imagen 1 de 2 Samsung Galaxy Express 3 Home Button Replacement, Back and Recent Apps Touch Sensor Button(s): paso 7, imagen 2 de 2
    • Use a plastic tool to remove back and/or recent tabs circuit buttons.

    • Use a plastic tool as a metal tool can be dangerous to the phone or you.

  8. Samsung Galaxy Express 3 Home Button Replacement, Home Button: paso 8, imagen 1 de 2 Samsung Galaxy Express 3 Home Button Replacement, Home Button: paso 8, imagen 2 de 2
    • Use a #0 Phillips bit screwdriver to remove the four screws from the black, plastic piece surrounding the home button.

    • All four screws are the same size.

  9. Samsung Galaxy Express 3 Home Button Replacement: paso 9, imagen 1 de 2 Samsung Galaxy Express 3 Home Button Replacement: paso 9, imagen 2 de 2
    • Using a sharp plastic tool such as a guitar pick or prying tool to pop up and remove the black, plastic piece.

    • Do not use a metal tool as it can be dangerous to you or the motherboard.

  10. Samsung Galaxy Express 3 Home Button Replacement: paso 10, imagen 1 de 2 Samsung Galaxy Express 3 Home Button Replacement: paso 10, imagen 2 de 2
    • The white button will be connected to the black piece.

    • Slightly bend the black piece and gently push the white button until it pops out of the black, plastic piece.

Conclusión

To reassemble your device, follow these instructions in reverse order.

Una persona más ha completado esta guía.

0 comentarios

Agregar Comentario

Ver Estadísticas:

Ultimas 24 horas: 0

Ultimos 7 días: 0

Ultimos 30 días: 0

Todo El Tiempo: 390