Saltar al contenido principal

Samsung Galaxy Core Prime Volume Buttons Replacement

Qué necesitas

  1. Samsung Galaxy Core Prime Volume Buttons Replacement, Battery: paso 1, imagen 1 de 1
    • Turn the smartphone off by using the power button on the right-hand side.

  2. Samsung Galaxy Core Prime Volume Buttons Replacement: paso 2, imagen 1 de 1
    • Turn the smartphone over so that the rear camera is face up.

  3. Samsung Galaxy Core Prime Volume Buttons Replacement: paso 3, imagen 1 de 1
    • Use your fingernail or a flat tool to lift the back cover.

  4. Samsung Galaxy Core Prime Volume Buttons Replacement: paso 4, imagen 1 de 2 Samsung Galaxy Core Prime Volume Buttons Replacement: paso 4, imagen 2 de 2
    • Locate the battery near the bottom of the phone. The battery is square, flat, and is labeled 'SAMSUNG'.

  5. Samsung Galaxy Core Prime Volume Buttons Replacement: paso 5, imagen 1 de 1
    • Use your fingernail or a flat tool to lift the battery out.

  6. Samsung Galaxy Core Prime Volume Buttons Replacement, Volume Button: paso 6, imagen 1 de 2 Samsung Galaxy Core Prime Volume Buttons Replacement, Volume Button: paso 6, imagen 2 de 2
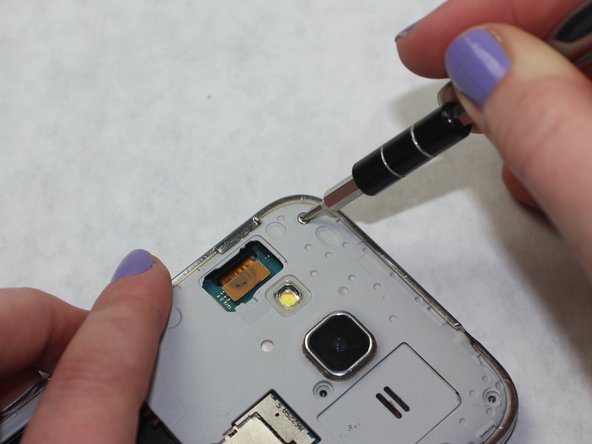
    • Use a Phillips #00 screwdriver to remove the eight 4mm screws from the midframe.

  7. Samsung Galaxy Core Prime Volume Buttons Replacement: paso 7, imagen 1 de 1
    Herramienta utilizada en este paso:
    iOpener
    $19.99
    Comprar
    • Flip the phone over (screen up). Use an iOpener to heat the frame. Do this until the adhesive is loose.

    • Use care when handling these heating tools!

  8. Samsung Galaxy Core Prime Volume Buttons Replacement: paso 8, imagen 1 de 2 Samsung Galaxy Core Prime Volume Buttons Replacement: paso 8, imagen 2 de 2
    Herramienta utilizada en este paso:
    iFixit Opening Tool
    $1.99
    Comprar
    • Use an iFixit Opening Tool or a similarly shaped tool like a guitar pick to lift the mid-frame.

  9. Samsung Galaxy Core Prime Volume Buttons Replacement: paso 9, imagen 1 de 2 Samsung Galaxy Core Prime Volume Buttons Replacement: paso 9, imagen 2 de 2
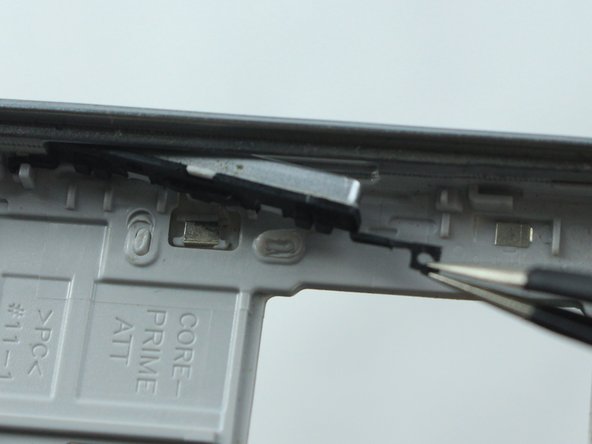
    • Use tweezers to unhook both of the rubber fixtures holding the volume button to the frame.

Conclusión

To reassemble your device, follow these instructions in reverse order.

2 personas más completaron esta guía.

Olivia Jensen

Miembro Desde 10/02/18

634 Reputación

2 Guías creadas

0 comentarios

Agregar Comentario

Ver Estadísticas:

Ultimas 24 horas: 0

Ultimos 7 días: 3

Ultimos 30 días: 8

Todo El Tiempo: 800