Saltar al contenido principal

Samsung DV300F Back Button Control Replacement

Qué necesitas

  1. Samsung DV300F Back Button Control Replacement, Front and Rear Casing: paso 1, imagen 1 de 3 Samsung DV300F Back Button Control Replacement, Front and Rear Casing: paso 1, imagen 2 de 3 Samsung DV300F Back Button Control Replacement, Front and Rear Casing: paso 1, imagen 3 de 3
    • Remove the two black 4.2 mm screws on the right side of the camera using a Phillips #0 screwdriver.

    • Remove the two black 4.2 mm screws on the left side of the camera using a Phillips #0 screwdriver.

    • Remove the two black 4.2 mm screws on the bottom of the camera using a Phillips #0 screwdriver.

  2. Samsung DV300F Back Button Control Replacement: paso 2, imagen 1 de 2 Samsung DV300F Back Button Control Replacement: paso 2, imagen 2 de 2
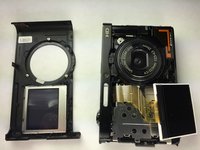
    • Remove the back case of the camera carefully.

  3. Samsung DV300F Back Button Control Replacement: paso 3, imagen 1 de 3 Samsung DV300F Back Button Control Replacement: paso 3, imagen 2 de 3 Samsung DV300F Back Button Control Replacement: paso 3, imagen 3 de 3
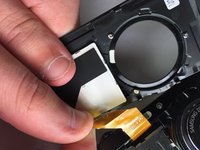
    • Remove the front case of the camera.

    • Remove the front LCD screen from the front case next to the lens.

  4. Samsung DV300F Back Button Control Replacement, Back Button Control: paso 4, imagen 1 de 2 Samsung DV300F Back Button Control Replacement, Back Button Control: paso 4, imagen 2 de 2
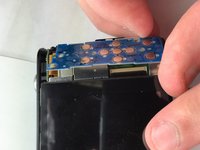
    • Remove the blue button control from its position next to the LCD screen.

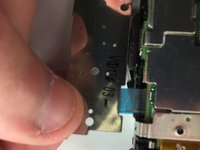
    • Pull the ribbon cable to disconnect the blue button control from the camera.

Conclusión

To reassemble your device, follow these instructions in reverse order.

3 personas más completaron esta guía.

Equipo

Baylor, Team 5-10, Williams Spring 2015 Miembro de Baylor, Team 5-10, Williams Spring 2015

BU-WILLIAMS-S15S5G10

3 Miembros

10 Guías creadas

0 comentarios

Agregar Comentario

Ver Estadísticas:

Ultimas 24 horas: 0

Ultimos 7 días: 5

Ultimos 30 días: 22

Todo El Tiempo: 663