Esta versión puede contener ediciones incorrectas. Cambie a la última instantánea verificada.
Qué necesitas
-
Este paso está sin traducir. Ayuda a traducirlo
-
Remove the back cover by pressing on the bottom section of the phone and sliding the bottom piece downward.
-
Lift up the back cover.
-
-
Este paso está sin traducir. Ayuda a traducirlo
-
Place your finger on the bottom of the battery and lift to remove.
-
-
-
Este paso está sin traducir. Ayuda a traducirlo
-
Insert the spudger underneath the bottom section of the phone.
-
Gently lift and push the spudger to slide the bottom section down to reveal two hidden screws.
-
-
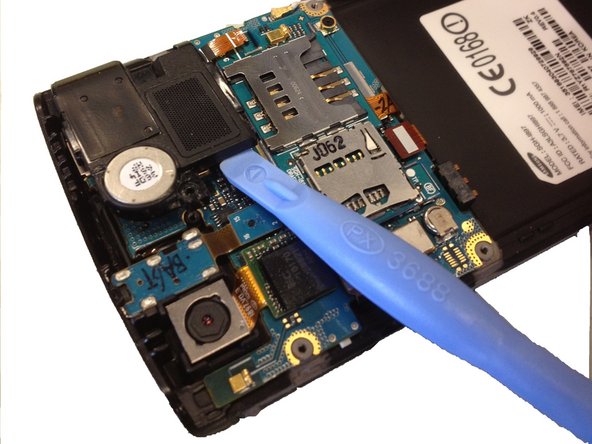
Este paso está sin traducir. Ayuda a traducirlo
-
Starting at a bottom corner, use the spudger to separate the rear case from the front display.
-
Move the spudger towards the top on both sides. The plastic opening tool is easier to use for this step.
-
-
Este paso está sin traducir. Ayuda a traducirlo
-
Use the Phillips 00 screwdriver to remove the single screw holding the speaker assembly to the LCD.
-
-
Este paso está sin traducir. Ayuda a traducirlo
-
Pull out the ribbon cable.
-
Use a spudger or plastic opening tool to lift up the speaker, and use your hands to remove it.
-


Cancelar: No complete esta guía.
11 personas más completaron esta guía.
Equipo

Cal Poly, Team 20-25, Maness Fall 2011 Miembro de Cal Poly, Team 20-25, Maness Fall 2011
CPSU-MANESS-F11S20G25
3 Miembros
9 Guías creadas