Saltar al contenido principal

Esta versión puede contener ediciones incorrectas. Cambiar a la última instantánea verificada.

Qué necesitas

  1. Este paso está sin traducir. Ayuda a traducirlo

    : paso 1, imagen 1 de 3 : paso 1, imagen 2 de 3 : paso 1, imagen 3 de 3
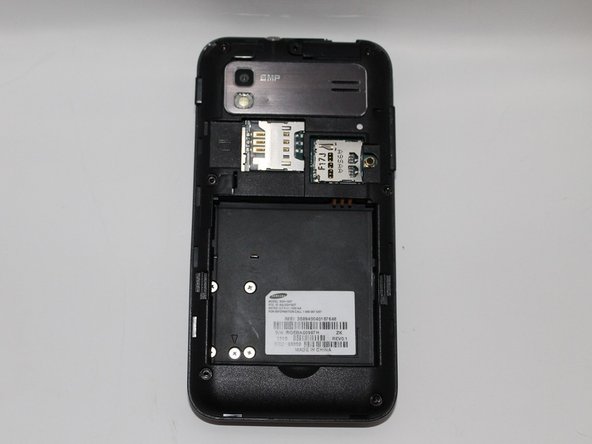
    • Remove back cover using fingernail or plastic opening tool. The cover pulls up and off.

  2. Este paso está sin traducir. Ayuda a traducirlo

    : paso 2, imagen 1 de 2 : paso 2, imagen 2 de 2
    • Remove battery with plastic opening tool or finger.

  3. Este paso está sin traducir. Ayuda a traducirlo

    : paso 3, imagen 1 de 2 : paso 3, imagen 2 de 2
    • Remove the seven screws from backplate using the #00 screwdriver.

  4. Este paso está sin traducir. Ayuda a traducirlo

    : paso 4, imagen 1 de 3 : paso 4, imagen 2 de 3 : paso 4, imagen 3 de 3
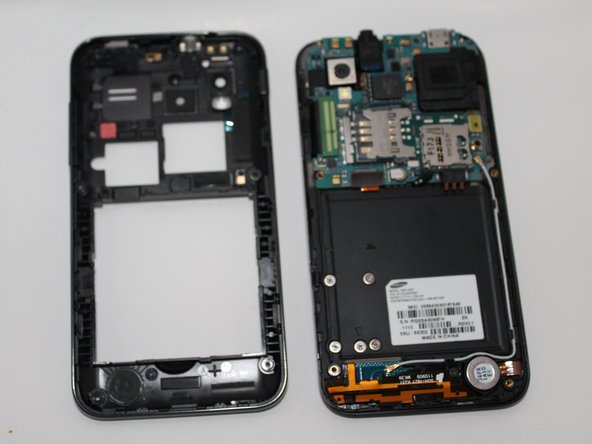
    • Remove the back plate using the plastic opening tool.

    • There is a lip on each side, and both must be pried up.

    • You can work your way around the edges after prying the two sides.

  5. Este paso está sin traducir. Ayuda a traducirlo

    : paso 5, imagen 1 de 2 : paso 5, imagen 2 de 2
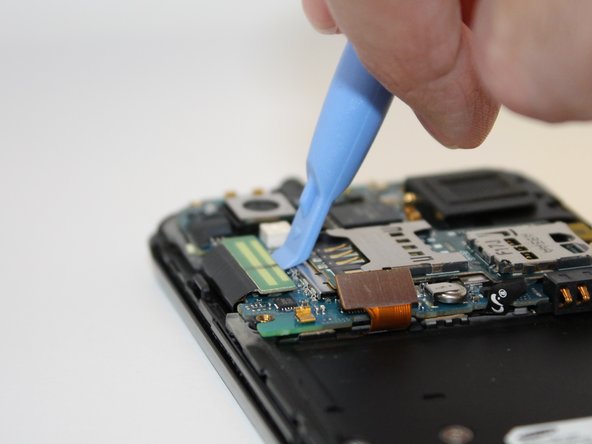
    • Use the plastic opening tool to detach the two tabs connecting the motherboard to the base of the phone.

  6. Este paso está sin traducir. Ayuda a traducirlo

    : paso 6, imagen 1 de 1
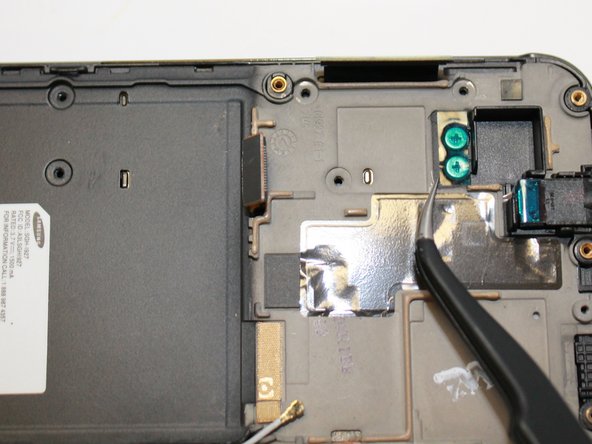
    • Disconnect the antenna cable from the motherboard using tweezers.

  7. Este paso está sin traducir. Ayuda a traducirlo

    : paso 7, imagen 1 de 1
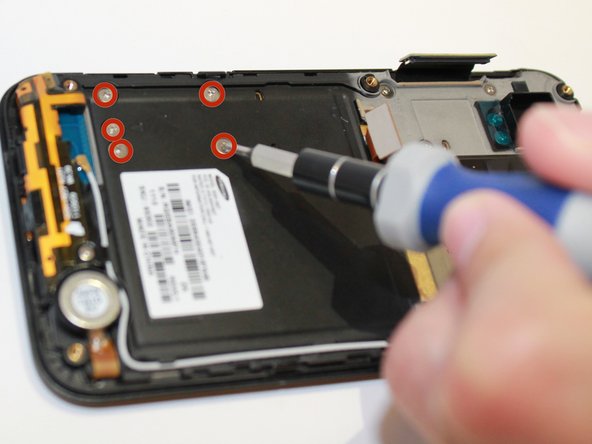
    • Remove the single screw connecting the motherboard to the base of the phone by using the #00 Phillips screwdriver.

  8. Este paso está sin traducir. Ayuda a traducirlo

    : paso 8, imagen 1 de 2 : paso 8, imagen 2 de 2
    • Lift the motherboard out of the base of the phone.

  9. Este paso está sin traducir. Ayuda a traducirlo

    : paso 9, imagen 1 de 2 : paso 9, imagen 2 de 2
    • Remove the eight screws using the #00 screw driver.

  10. Este paso está sin traducir. Ayuda a traducirlo

    : paso 10, imagen 1 de 2 : paso 10, imagen 2 de 2
    • Remove blue tape using the tweezers.

  11. Este paso está sin traducir. Ayuda a traducirlo

    : paso 11, imagen 1 de 1
    • Remove screws using the #00 screwdriver.

  12. Este paso está sin traducir. Ayuda a traducirlo

    : paso 12, imagen 1 de 1
    • Using the plastic opening tool, remove the back plate by prying on the four main points.

    • You may encounter difficultly at certain points. Work the plastic opening tool along the edge to keep back plate from closing again.

  13. Este paso está sin traducir. Ayuda a traducirlo

    : paso 13, imagen 1 de 1
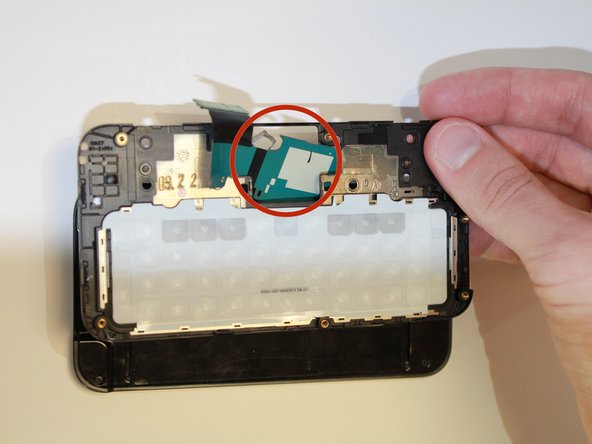
    • Lift the back plate.

    • To remove the attached flex cable, gently peel the flex cable connecting to the back plate.

    • Flex cable is attached to the back plate with an adhesive.

  14. Este paso está sin traducir. Ayuda a traducirlo

    : paso 14, imagen 1 de 3 : paso 14, imagen 2 de 3 : paso 14, imagen 3 de 3
    • Slide the flex cable through the slot.

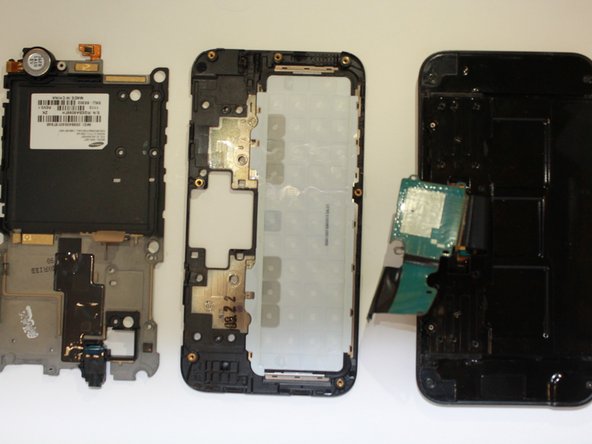
    • Set the front plate down. Now you have free access to the keyboard.

  15. Este paso está sin traducir. Ayuda a traducirlo

    : paso 15, imagen 1 de 1
    • Manually lift the keyboard and replace with new keyboard.

    • Make sure the new keyboard is placed with the keyboard letters facing down, and the white back facing up.

Linea de Meta

2 personas más completaron esta guía.

Equipo

USF Tampa, Team 5-3, Mcgee Fall 2014 Miembro de USF Tampa, Team 5-3, Mcgee Fall 2014

USFT-MCGEE-F14S5G3

4 Miembros

5 Guías creadas

0 comentarios

Agregar Comentario

Ver Estadísticas:

Ultimas 24 horas: 0

Ultimos 7 días: 0

Ultimos 30 días: 0

Todo El Tiempo: 411