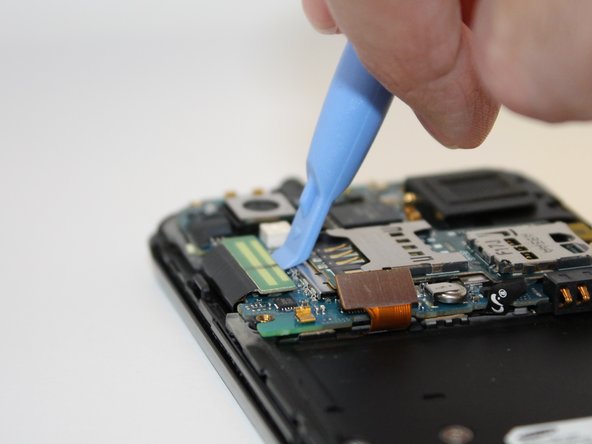
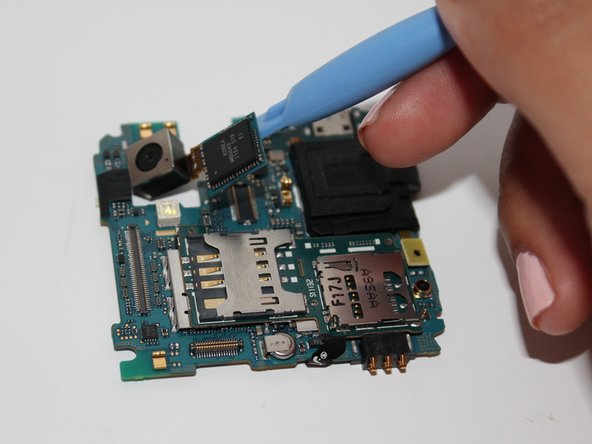
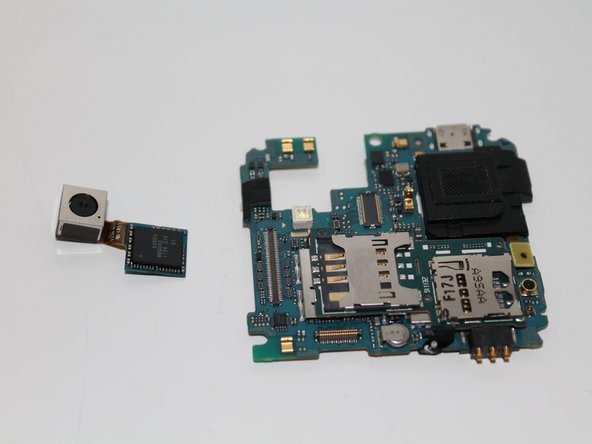
Saltar al contenido principal

Samsung Captivate Glide Camera Replacement

Qué necesitas

  1. Samsung Captivate Glide Camera Replacement, Motherboard: paso 1, imagen 1 de 3 Samsung Captivate Glide Camera Replacement, Motherboard: paso 1, imagen 2 de 3 Samsung Captivate Glide Camera Replacement, Motherboard: paso 1, imagen 3 de 3
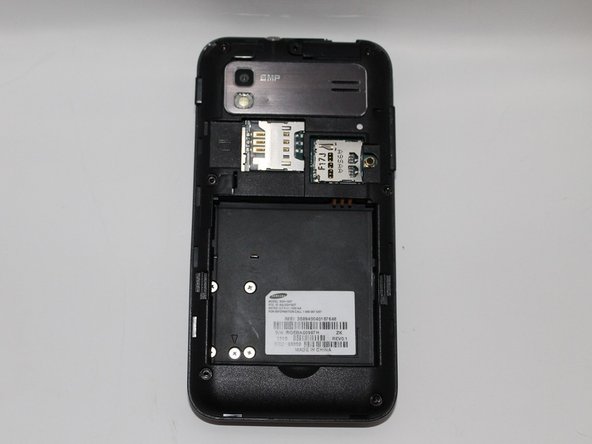
    • Remove back cover using fingernail or plastic opening tool. The cover pulls up and off.

  2. Samsung Captivate Glide Camera Replacement: paso 2, imagen 1 de 2 Samsung Captivate Glide Camera Replacement: paso 2, imagen 2 de 2
    • Remove battery with plastic opening tool or finger.

  3. Samsung Captivate Glide Camera Replacement: paso 3, imagen 1 de 2 Samsung Captivate Glide Camera Replacement: paso 3, imagen 2 de 2
    • Remove the seven screws from backplate using the #00 screwdriver.

  4. Samsung Captivate Glide Camera Replacement: paso 4, imagen 1 de 3 Samsung Captivate Glide Camera Replacement: paso 4, imagen 2 de 3 Samsung Captivate Glide Camera Replacement: paso 4, imagen 3 de 3
    • Remove the back plate using the plastic opening tool.

    • There is a lip on each side, and both must be pried up.

    • You can work your way around the edges after prying the two sides.

  5. Samsung Captivate Glide Camera Replacement: paso 5, imagen 1 de 2 Samsung Captivate Glide Camera Replacement: paso 5, imagen 2 de 2
    • Use the plastic opening tool to detach the two tabs connecting the motherboard to the base of the phone.

  6. Samsung Captivate Glide Camera Replacement: paso 6, imagen 1 de 1
    • Disconnect the antenna cable from the motherboard using tweezers.

  7. Samsung Captivate Glide Camera Replacement: paso 7, imagen 1 de 1
    • Remove the single screw connecting the motherboard to the base of the phone by using the #00 Phillips screwdriver.

  8. Samsung Captivate Glide Camera Replacement: paso 8, imagen 1 de 2 Samsung Captivate Glide Camera Replacement: paso 8, imagen 2 de 2
    • Lift the motherboard out of the base of the phone.

  9. Samsung Captivate Glide Camera Replacement, Camera: paso 9, imagen 1 de 3 Samsung Captivate Glide Camera Replacement, Camera: paso 9, imagen 2 de 3 Samsung Captivate Glide Camera Replacement, Camera: paso 9, imagen 3 de 3
    • Using the opening tool, pry up the camera attachment from the motherboard.

Conclusión

To reassemble your device, follow these instructions in reverse order.

Una persona más ha completado esta guía.

Equipo

USF Tampa, Team 5-3, Mcgee Fall 2014 Miembro de USF Tampa, Team 5-3, Mcgee Fall 2014

USFT-MCGEE-F14S5G3

4 Miembros

5 Guías creadas

0 comentarios

Agregar Comentario

Ver Estadísticas:

Ultimas 24 horas: 0

Ultimos 7 días: 1

Ultimos 30 días: 9

Todo El Tiempo: 621