Saltar al contenido principal

Ryobi VC120 Motor Replacement

Qué necesitas

  1. Ryobi VC120 Motor Replacement, Filter: paso 1, imagen 1 de 1
    • Pull the black nose off of the body of the vacuum, by pushing in the orange button closest to the nose.

  2. Ryobi VC120 Motor Replacement: paso 2, imagen 1 de 2 Ryobi VC120 Motor Replacement: paso 2, imagen 2 de 2
    • Grab the filter with two fingers and slide it out.

  3. Ryobi VC120 Motor Replacement, Motor: paso 3, imagen 1 de 2 Ryobi VC120 Motor Replacement, Motor: paso 3, imagen 2 de 2
    • Using a Philips head screwdriver, remove the four screws located on the side panel of the vacuum.

    • There are two types of screws on this device. You may want to use a magnetic screw pad to organize your screws to be sure they return to their designated holes.

    • 4x 19.1mm

    • 1x 14.3mm

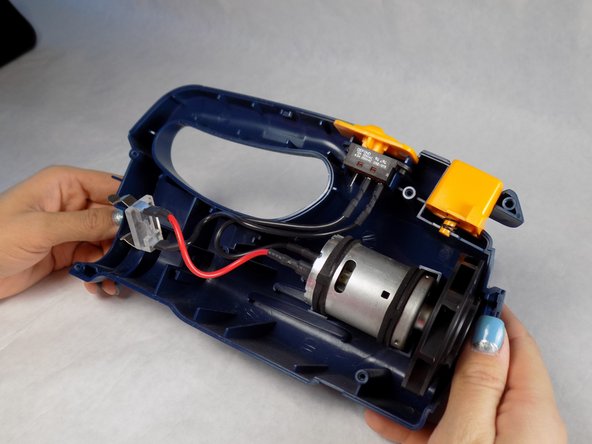
    • Once the screws are removed, you should be able to separate the side panel from the rest of the device.

  4. Ryobi VC120 Motor Replacement: paso 4, imagen 1 de 3 Ryobi VC120 Motor Replacement: paso 4, imagen 2 de 3 Ryobi VC120 Motor Replacement: paso 4, imagen 3 de 3
    • Pull your motor out, and remove the black and red cables from the motor by hand.

Conclusión

To reassemble your device, follow these instructions in reverse order.

3 personas más completaron esta guía.

Allison Schoch

Miembro Desde 09/16/15

689 Reputación

4 Guías creadas

Equipo

IUPUI, Team 2-4, Baechle Fall 2015 Miembro de IUPUI, Team 2-4, Baechle Fall 2015

IUPUI-BAECHLE-F15S2G4

3 Miembros

8 Guías creadas

0 comentarios

Agregar Comentario

Ver Estadísticas:

Ultimas 24 horas: 1

Ultimos 7 días: 4

Ultimos 30 días: 9

Todo El Tiempo: 787