Saltar al contenido principal

Ryobi RJ1861V Motor Housing Replacement

Qué necesitas

  1. Ryobi RJ1861V Motor Housing Replacement, Trigger Assembly: paso 1, imagen 1 de 1
    • Use a Torx T20 screwdriver to remove the nine 16.5 mm screws around the trigger assembly.

  2. Ryobi RJ1861V Motor Housing Replacement: paso 2, imagen 1 de 2 Ryobi RJ1861V Motor Housing Replacement: paso 2, imagen 2 de 2
    • Use a Torx T20 screwdriver to remove the two 16.5 mm screws near the trigger.

  3. Ryobi RJ1861V Motor Housing Replacement, Motor Housing: paso 3, imagen 1 de 1
    • Use a Torx T20 bit or screwdriver to remove the six 19 mm screws securing the gear case cover.

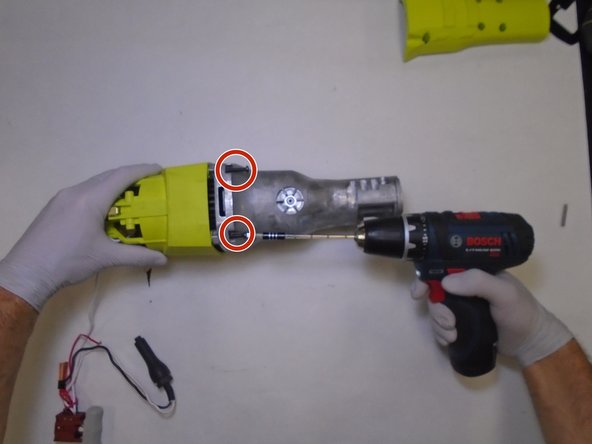
  4. Ryobi RJ1861V Motor Housing Replacement: paso 4, imagen 1 de 2 Ryobi RJ1861V Motor Housing Replacement: paso 4, imagen 2 de 2
    • Use a Phillips #2 bit or screwdriver to remove the four 37 mm screws from the top and the bottom of the gear case.

    • Once these 4 screws are removed, you have access to the motor assembly.

Conclusión

To reassemble your device, follow these instructions in reverse order.

0 comentarios

Agregar Comentario

Ver Estadísticas:

Ultimas 24 horas: 0

Ultimos 7 días: 1

Ultimos 30 días: 6

Todo El Tiempo: 117