Saltar al contenido principal

Ryobi P501G Motor Replacement

Qué necesitas

  1. Ryobi P501G Motor Replacement, Motor: paso 1, imagen 1 de 1
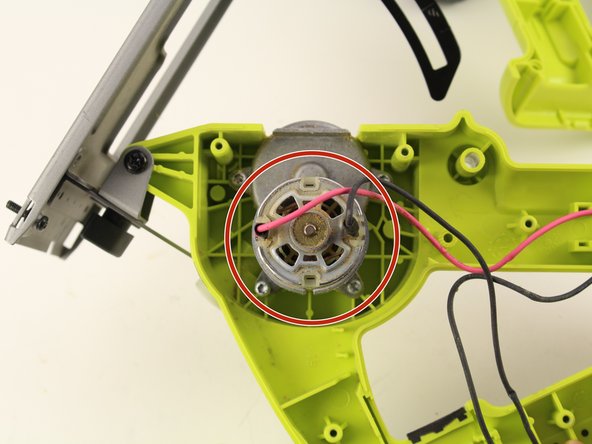
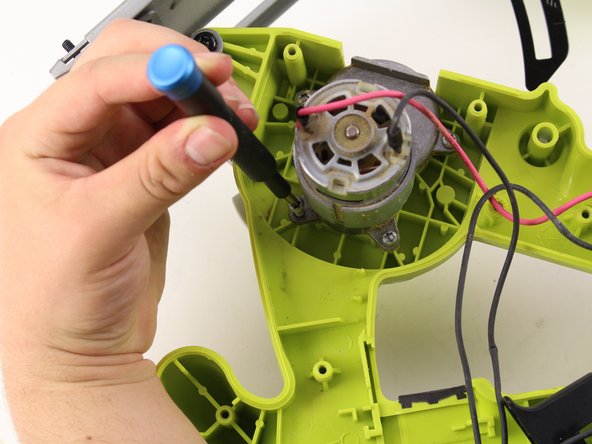
    • Locate the screws at the top face of the saw, on the green plastic surface covering.

  2. Ryobi P501G Motor Replacement: paso 2, imagen 1 de 2 Ryobi P501G Motor Replacement: paso 2, imagen 2 de 2
    • Locate the eight outer screws of the plastic green encasement. They are marked in red in the picture.

    • Using a T15 torx screwdriver, unscrew all the holes, taking care not to lose any!

  3. Ryobi P501G Motor Replacement: paso 3, imagen 1 de 2 Ryobi P501G Motor Replacement: paso 3, imagen 2 de 2
    • Open up the top side of the encasement to reveal the internal parts of the saw.

    • Locate the motor.

  4. Ryobi P501G Motor Replacement: paso 4, imagen 1 de 2 Ryobi P501G Motor Replacement: paso 4, imagen 2 de 2
    • Using the T15 torx screwdriver, unscrew all four of the screws to free the motor from the encasement.

  5. Ryobi P501G Motor Replacement: paso 5, imagen 1 de 1
    • Remove the motor and replace with a new one if needed.

    • Be careful when handling the motor- it may be very dirty/greasy. You might want to wear gloves for this step!

Conclusión

To reassemble your device, follow these instructions in reverse order.

Sophia Arias

Miembro Desde 04/21/19

255 Reputación

2 Guías creadas

Equipo

Cal Poly, Team S1-G2, Maness Spring 2019 Miembro de Cal Poly, Team S1-G2, Maness Spring 2019

CPSU-MANESS-S19S1G2

4 Miembros

7 Guías creadas

0 comentarios

Agregar Comentario

Ver Estadísticas:

Ultimas 24 horas: 0

Ultimos 7 días: 8

Ultimos 30 días: 29

Todo El Tiempo: 1,830