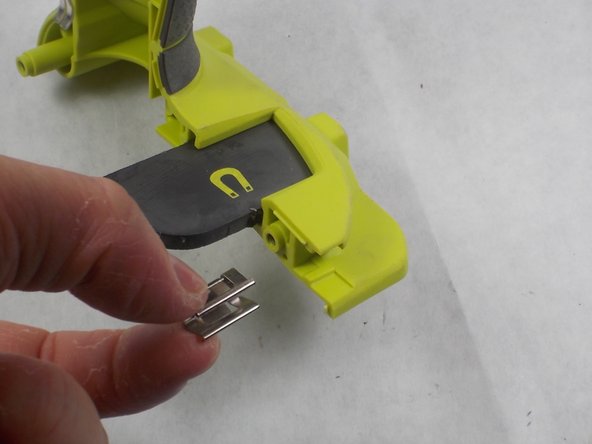
Saltar al contenido principal

Ryobi P235 Bit-Holder Replacement

Qué necesitas

  1. Ryobi P235 Bit-Holder Replacement, Battery: paso 1, imagen 1 de 2 Ryobi P235 Bit-Holder Replacement, Battery: paso 1, imagen 2 de 2
    • Push in both push tabs on the battery at the same time.

    • They are located below the green housing and are in the middle on both sides of the battery.

  2. Ryobi P235 Bit-Holder Replacement: paso 2, imagen 1 de 2 Ryobi P235 Bit-Holder Replacement: paso 2, imagen 2 de 2
    • Pull the battery away from the drill housing while holding in both tabs.

  3. Ryobi P235 Bit-Holder Replacement, Bit-Holder: paso 3, imagen 1 de 2 Ryobi P235 Bit-Holder Replacement, Bit-Holder: paso 3, imagen 2 de 2
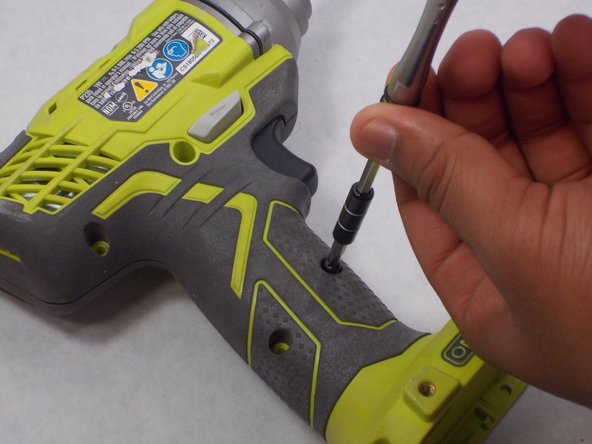
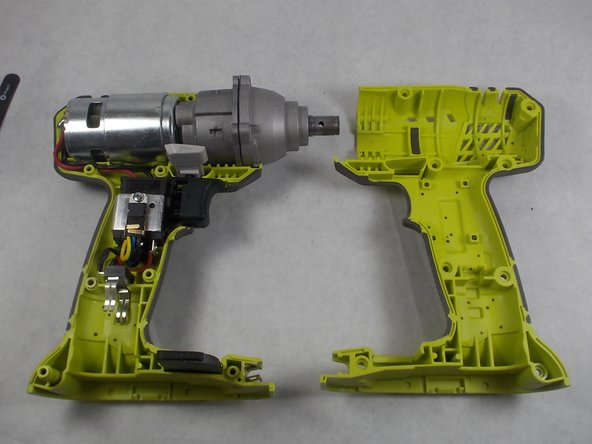
    • Use a Phillips #2 screwdriver to remove the eight 16 mm screws that secure the housing.

  4. Ryobi P235 Bit-Holder Replacement: paso 4, imagen 1 de 2 Ryobi P235 Bit-Holder Replacement: paso 4, imagen 2 de 2
    • Use a T20 Torx screwdriver to remove the four 25.4 mm screws that secure the front of the housing.

  5. Ryobi P235 Bit-Holder Replacement: paso 5, imagen 1 de 2 Ryobi P235 Bit-Holder Replacement: paso 5, imagen 2 de 2
    • Open the housing with the data label facing up.

  6. Ryobi P235 Bit-Holder Replacement: paso 6, imagen 1 de 2 Ryobi P235 Bit-Holder Replacement: paso 6, imagen 2 de 2
    • Remove the old bit holder.

Conclusión

To reassemble your device, follow these instructions in reverse order.

Paul Sousa

Miembro Desde 10/29/19

805 Reputación

5 Guías creadas

Equipo

0 comentarios

Agregar Comentario

Ver Estadísticas:

Ultimas 24 horas: 1

Ultimos 7 días: 3

Ultimos 30 días: 13

Todo El Tiempo: 768