Introducción
Replace a broken button on a Ring Doorbell Elite
Qué necesitas
-
-
Button on doorbell is broken. Replacement from Etsy Store - Doorbell Accessories
-
-
-
The button is very difficult to replace by disassembly. The seller recommends to pull out the button slightly with your fingers and slide a screwdriver around the seam. I found this didnt work for me
-
The old button is clipped around the housing with three clips. Cutting the centre of the button out allows easier access to the clips from the inside
-
Be careful with the cutters to not go too deep and damage the inner circuitry of the button, try to cut parallel to the front of the button
-
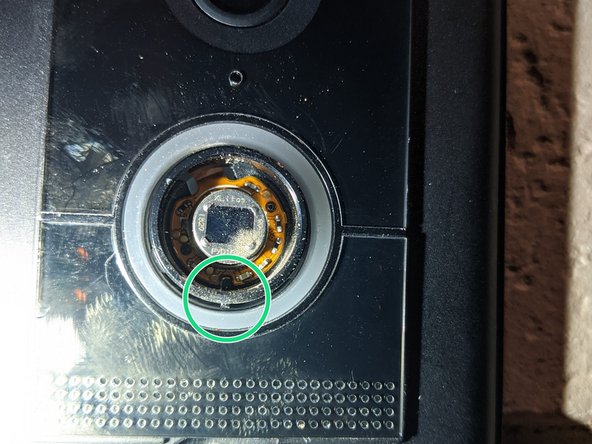
The green ring represents the remains of the old button and the red ring represents the button housing which the button is clipped to
-
-
-
-
Carefully insert the pointed end of a metal spudger into the gap between the button and the button housing and rotate to seperate the clips from the housing
-
Then pull back on the button remains as you unclip the clips
-
The clips are located at 12 oclock , 4 oclock and 8 oclock
-
-
-
Insert the new button with the notch at 6 oclock. It should line up with a tab inside the button ring
-
Push the button in firmly once lined up. It should not take too much force.
-
Done!
-


Cancelar: No complete esta guía.
4 personas más completaron esta guía.

3 comentarios
Thanks! I found numerous YouTube guides on how to disassemble the whole unit, but will definitely try this method first. If it doesn't work I can always still go the disassembly route as a backup approach.
Supergemakkelijk zelf te doen als je ietswat handig bent. Je hebt enkel een dunne punt tang en klein schroevendraaiertje nodig. Duurde welgeteld 2 min. TOP!
I thought the disassembly option was going to be the only way .
But used this method and it took me 2 mins to replace.
So it's a big yes from me