Introducción
You need to open or replace your Dell XPS 13 9380 back panel, this guide is for you!
Qué necesitas
-
-
Use a Torx T5 driver to unscrew the eight screws securing the back panel.
-
Use a spudger to pry up and loosen the back panel.
-
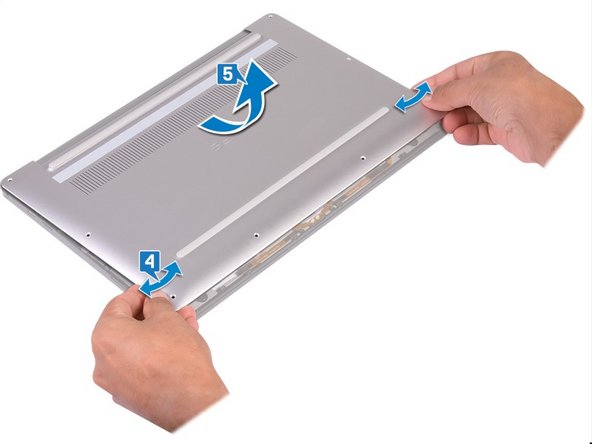
Lift the back panel up slightly from the non-hinged edge.
-
Pull the back panel away from the hinged edge, wiggling it back and forth to loosen the clips.
-
When the back panel clips are free, remove the back panel.
-
-


To reassemble your device, follow the instructions in reverse order.
To reassemble your device, follow the instructions in reverse order.
Cancelar: No complete esta guía.
Una persona más ha completado esta guía.
Un agradecimiento especial a estos traductores:
100%


Estos traductores nos están ayudando a reparar el mundo! ¿Quieres contribuir?
Empezar a traducir ›

Equipo
