Saltar al contenido principal

Replacement of the W670SZQ1 BIOS Battery

Guía Archivada
Esta guía se mantiene únicamente para fines históricos. Utiliza la última versión de la guía para llevar a cabo tu reparación.

Qué necesitas

  1. Replacement of the W670SZQ1 BIOS Battery, accumulator: paso 1, imagen 1 de 3 Replacement of the W670SZQ1 BIOS Battery, accumulator: paso 1, imagen 2 de 3 Replacement of the W670SZQ1 BIOS Battery, accumulator: paso 1, imagen 3 de 3
    • Open the latch of the accumulator on the left side.

    • Open the battery latch on the right side.

    • Remove the accumulator by simultaneously holding the right-hand latch open.

  2. Replacement of the W670SZQ1 BIOS Battery, Access to the most important components: paso 2, imagen 1 de 3 Replacement of the W670SZQ1 BIOS Battery, Access to the most important components: paso 2, imagen 2 de 3 Replacement of the W670SZQ1 BIOS Battery, Access to the most important components: paso 2, imagen 3 de 3
    • Use the Philips screwdriver to remove the two screws at the bottom of the cover.

    • Lift the cover at the bottom right with the iFixit Opening Tool

    • Lift the cover at the bottom left with the iFixit Opening Tool

    • Finally, remove the cover to gain access to the most important components.

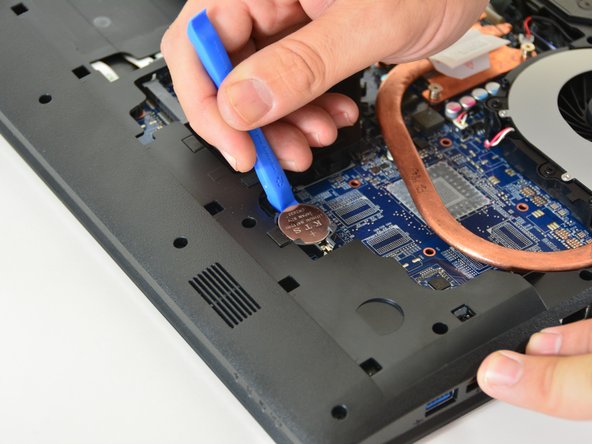
  3. Replacement of the W670SZQ1 BIOS Battery, BIOS battery: paso 3, imagen 1 de 1
    • Be careful removing the BIOS battery from its holder.

    • Please do not throw the battery in the garbage. In Switzerland, the electrical shops are obliged to accept all batteries and accumulators for disposal.

Conclusión

Replacing the W670SZQ1 BIOS Battery

Un agradecimiento especial a estos traductores:

de en

100%

¡ Corey Meyer nos está ayudando a reparar el mundo! ¿Quieres contribuir?
Empezar a traducir ›

Felice Suglia

Miembro Desde 06/15/13

30,884 Reputación

264 Guías creadas

0 comentarios

Agregar Comentario

Ver Estadísticas:

Ultimas 24 horas: 0

Ultimos 7 días: 0

Ultimos 30 días: 0

Todo El Tiempo: 68