Introducción
¿Tu odómetro no gira en absoluto? ¿Gira lentamente (es decir, tarda más en rodar otra milla de lo que debería)? ¿Gira cuando está frío, pero no cuando hace calor afuera? Todos estos son signos de que el eje que hace girar el odómetro se ha desgastado y se está deslizando.
Esta es, con mucho, la razón más común de falla del odómetro.
Deberá sacar e inspeccionar / probar el odómetro para confirmar que este es el problema antes de decidir usar el resto de esta guía para solucionarlo. Si descubre que existe otro problema, como dientes rotos en uno de los engranajes de plástico, esta guía no será útil hasta que reemplace el engranaje y luego pruebe el odómetro nuevamente para ver si también necesita realizar esta reparación.
Qué necesitas
-
-
Deberá comenzar quitando el grupo de instrumentos del automóvil. Puede leer la guía de eliminación para este proceso si necesita ayuda con esto.
-
-
-
-
Si todos los engranajes de su odómetro están bien, puede probar el funcionamiento del odómetro para ver dónde radica el problema.
-
Para hacer esto, debe colocar un taladro eléctrico, con una broca cuadrada del tamaño adecuado, en la abertura del cable del velocímetro y ejecutar el taladro. Observe la función del velocímetro y el odómetro mientras hace esto.
-
-
-
Vea este video para ver la prueba en acción. Tenga en cuenta que este video se grabó después de que se corrigiera este odómetro a través de los pasos de esta guía.
-
Si todas las marchas de su odómetro giran y el velocímetro también se mueve, pero los números de su odómetro no giran, ¡esta es la guía para usted! Sigue leyendo.
Josh, we used a drill bit that fit snugly in the opening for the speedometer cable. A square bit works best as it matches the shape of the end of the cable.
Hello all. I have a similar problem but with the daily miles counter. He stops everytime @ 29.9 miles and doesn't go further. Is this guide useful then ?
Kr,
Bart
This would be what I would try first, yes. This is also known as the trip odometer. It is driven off the primary odometer. If the primary is slipping it will also cause the trip odometer to not work properly.
Hello Nicolas,
It's only the trip odometer that causes the problem (sorry for the bad translation - i'm living in Belgium and bought a W123 USA). So what should i do then ? The odometer works fine. So I don't like to open it up when it works fine like it does now...
-
-
-
Este engranaje de latón es el artículo que nos interesa. Está unido a un eje que se encarga de girar el engranaje principal del odómetro.
-
Este engranaje gris es el engranaje principal del odómetro que hace girar los pequeños engranajes de plástico a lo largo de la parte superior de los números del odómetro.
-
Este es el otro extremo del eje al que está unido el engranaje de latón. Se mantiene en su lugar mediante un anillo de latón ajustado.
bei mir liegt irgendwo zwischen welle und hauptanteieb, das problem, beide lassen soch einzeln antreiben aber nicht zusammen
-
-
-
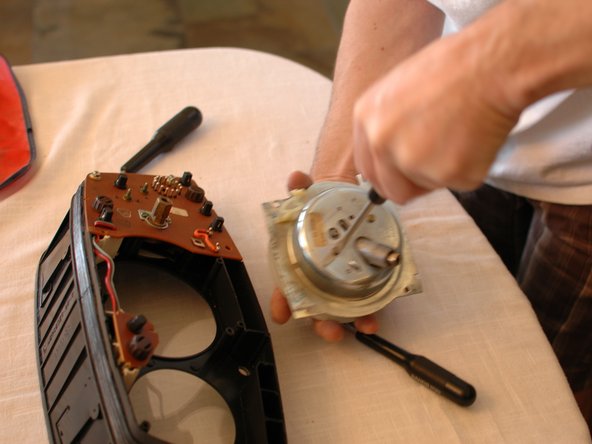
Ahora apoye la cara del indicador del velocímetro y el resto del ensamblaje sobre algo suave que lo protegerá. En este caso se utilizó algo de espuma.
-
Luego, con un martillo y un punzón pequeño, golpee suavemente el eje que se muestra en el último paso desde el lado con el anillo de latón pequeño.
-
-
-
Ahora querrá marcar el eje con un cuchillo u otro objeto afilado. La punta de un destornillador afilado puede funcionar. O puede desbastarlo con papel de lija grueso. En cualquier caso, la idea es crear una superficie lo suficientemente rugosa como para restaurar la fricción entre el eje y el engranaje gris.
-
No es fácil tomar una fotografía, pero el eje se ha marcado con un patrón de trama cruzada.
-
Ahora puede volver a insertar el eje, sacando la broca y asegurándose de que los números permanezcan sincronizados. Una vez que el eje está completamente de regreso, puede usar un pequeño punzón y un martillo para golpear el anillo de retención de latón en el extremo del eje. Si es necesario, apoye el engranaje con un pequeño trozo de madera dura.
When I did this repair, I put a little superglue on the shaft at the place of the grey gear. Just a little, so that the shaft was about 0,2 mm thicker on one side. It never slipped again.
Hello,
I can’t thank you enough for this site. It saved me a lot of money and time.
Followed your procedure and it works great
Thanks Paul V
-


Para volver a montar su dispositivo, siga estas instrucciones en orden inverso.
Para volver a montar su dispositivo, siga estas instrucciones en orden inverso.
Cancelar: No complete esta guía.
37 personas más completaron esta guía.
Un agradecimiento especial a estos traductores:
100%

¡ Josue Smith nos está ayudando a reparar el mundo! ¿Quieres contribuir?
Empezar a traducir ›

Equipo

16 comentarios
Hi,
My speedometer needle and odometer don't work when I turn them with a drill bit. What can be the issue? Any guides for fixing?
Thanks
Hello Vito, as the guide says, what you are looking for is to see if the gears spin on the back of the odometer when using the drill. If the gears spin, but the odometer does not turn, the reason is the shaft being worn as noted. Use this guide to fix it.
If however the gears are not all turning on the back of the odometer it is likely that one of the gears is stripped or broken. You will need to find which gear is broken and replace it. There are sites online that sell replacement plastic gears. You'll need to do some research to find the right one(s). I haven't had to do that before.
…it’s only my TRIP odometer that stopped working…. I’d bet it’s in the mechanism for resetting it—that is, pushing the button IN to reset the TRIP odometer to 00000….. now jammed at 190.1 or so …. and pushing doesn’t do anything. …
MAIN odometer & speedometer DOEs work as usual. ‘haven’t opened ‘er up and eyeballed it yet. THANKS for the insight here.
…by the way…just in case you’re reading this and had experience with the FUEL gauge also….I specifically can tell you…that stopped working once when I had instrument panel out (for other purposes—as if I brushed against something??)
…it doesn’t work by: being “over” to the right…such that “full” down to about 1/3rd acts normally….but it stops at 1/3rd …
in other words, it could read 1/3rd and be empty. ….
setting trip odometer, thus, becomes quite handy, as I always do…until a few days ago when that stopped working. Peace. Out. 240D 1983 380K 4 speed manual…a beauty mechanically.
What about the aluminium gear beside the odo numbers? Shouldn’t that be fixed to the shaft as well? I have secured the brass gear to the shaft, and the odo is still not turning while the speedo works.
No, the grey aluminium gear is not affixed to the shaft. It rides on the shaft by friction. The problem that tends to happen is that the shaft that has the brass gear on the end develops a very smooth spot there due to minor slippage over 30+ years and eventually it just slips. That is why this guide describes how to rough up that part of the shaft so it can turn the gear again by friction.
So, if I add a key to the grey gear the way I did to the brass gear, it should work as a permanent repair? (If I can figure out how to reinstall everything…)
Hi- great instructions. Thanks. But I am at the last stage and cannot get the speedo cable reattached. Is there some trick.? There’s just so little clearance!
Ok answered my own question. There’s a zip tie in the engine bay which secures the Speedo cable to a bracket. Cut the zip tie and you have plenty of room.
Where can I get correct Odometer gears for 1984 380SL?
More specifically the small 12 pt gear that fits on the motor shaft and fits over the brass bushing.
Great repair instruction. Thank you!
Buenas tardes. Gracias por compartir sus conocimientos, han ayudado en muchas ocasiones. Tengo una consulta en específico: se consiguen planos para hacer impresiones en 3d de los engranajes? Porque donde vivo es virtualmente imposible conseguir repuestos. Agradezco el tiempo que se toman, gracias por ayudar siempre