Saltar al contenido principal

Repairing VTech Touch and Swipe Baby Phone Battery Pack

Qué necesitas

  1. Repairing VTech Touch and Swipe Baby Phone Battery Pack, Battery: paso 1, imagen 1 de 2 Repairing VTech Touch and Swipe Baby Phone Battery Pack, Battery: paso 1, imagen 2 de 2
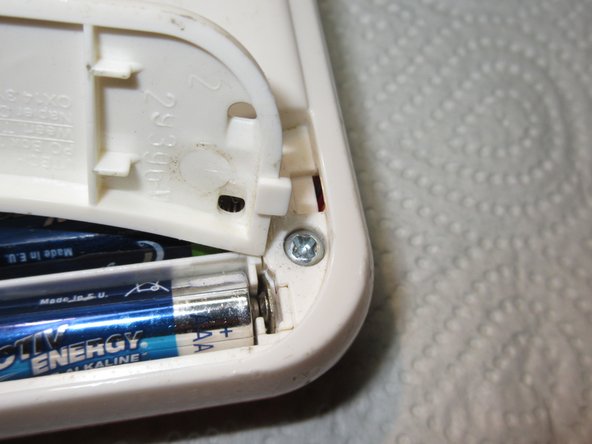
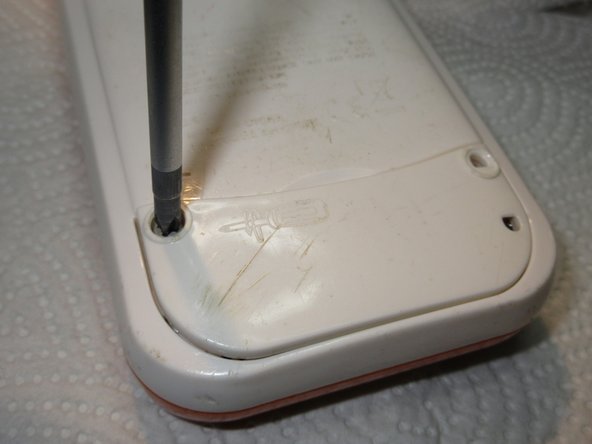
    • Using a Phillips #1 screwdriver, remove the 4.8mm screw on the battery cover by twisting the screwdriver counter-clockwise.

  2. Repairing VTech Touch and Swipe Baby Phone Battery Pack: paso 2, imagen 1 de 3 Repairing VTech Touch and Swipe Baby Phone Battery Pack: paso 2, imagen 2 de 3 Repairing VTech Touch and Swipe Baby Phone Battery Pack: paso 2, imagen 3 de 3
    • Remove the two AAA batteries by pulling on one end of the battery and lifting it straight out.

  3. Repairing VTech Touch and Swipe Baby Phone Battery Pack: paso 3, imagen 1 de 3 Repairing VTech Touch and Swipe Baby Phone Battery Pack: paso 3, imagen 2 de 3 Repairing VTech Touch and Swipe Baby Phone Battery Pack: paso 3, imagen 3 de 3
    • When reassembling, align the notch on the battery panel with the slot on the phone.

  4. Repairing VTech Touch and Swipe Baby Phone Battery Pack, Repairing VTech Touch and Swipe Baby Phone Battery Pack: paso 4, imagen 1 de 2 Repairing VTech Touch and Swipe Baby Phone Battery Pack, Repairing VTech Touch and Swipe Baby Phone Battery Pack: paso 4, imagen 2 de 2
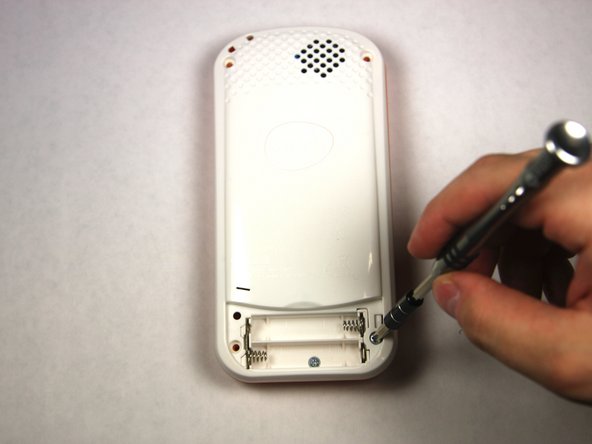
    • Remove 4 13.8mm screws holding the device back using a Phillips #1 screw driver.

  5. Repairing VTech Touch and Swipe Baby Phone Battery Pack: paso 5, imagen 1 de 3 Repairing VTech Touch and Swipe Baby Phone Battery Pack: paso 5, imagen 2 de 3 Repairing VTech Touch and Swipe Baby Phone Battery Pack: paso 5, imagen 3 de 3
    • Remove the 1 4.8mm phillips head screw with a #0 Phillips head screw driver and lift away the battery pack being careful not to tug on the wiring.

  6. Repairing VTech Touch and Swipe Baby Phone Battery Pack: paso 6, imagen 1 de 2 Repairing VTech Touch and Swipe Baby Phone Battery Pack: paso 6, imagen 2 de 2
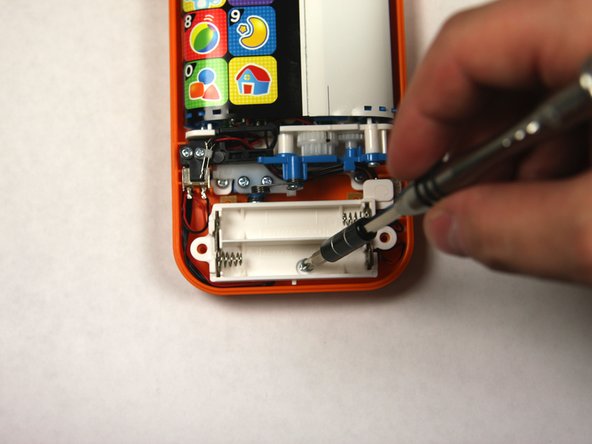
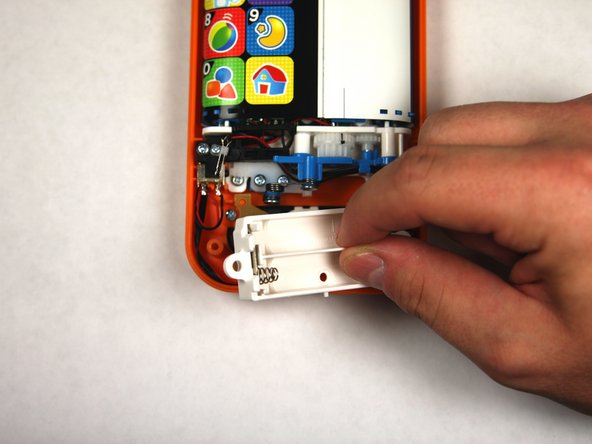
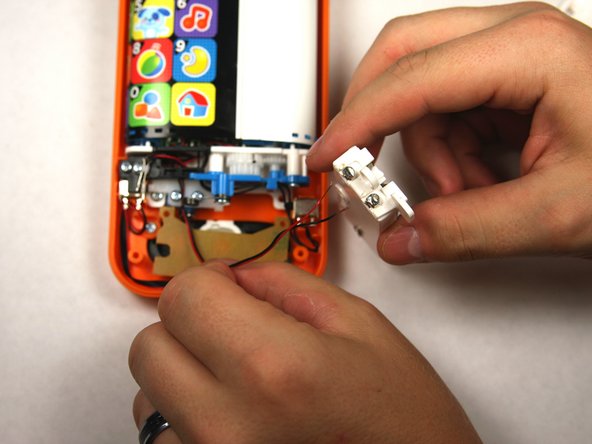
    • If the batty casing solder has been disconnected you will see that the pair of red and black wires near the battery pack are no longer connected.

    • You will need to solder back on these wires to the two silver soldering plates on the battery case. The black wire should be soldered on to the plate closer next to the square plastic piece attached.

    • Make sure to correctly solder each wire as shown, because if you solder the red wire where the black wire should be your device will not function.

Conclusión

To reassemble your device, follow these instructions in reverse order.

Una persona más ha completado esta guía.

Zack Drawdy

Miembro Desde 09/04/15

231 Reputación

2 Guías creadas

Equipo

USF Tampa, Team 2-4, Sullivan Fall 2015 Miembro de USF Tampa, Team 2-4, Sullivan Fall 2015

USFT-SULLIVAN-F15S2G4

3 Miembros

12 Guías creadas

0 comentarios

Agregar Comentario

Ver Estadísticas:

Ultimas 24 horas: 0

Ultimos 7 días: 1

Ultimos 30 días: 1

Todo El Tiempo: 329